


A Docker tool that allows us to containerize an entire application with just one file saving us from the tedious task of running every Docker container by hand. In this step-by-step Docker Compose tutorial, you’re going to learn how to create simple containers, map ports with Docker Compose and deploy them.
Are you ready? Let’s dig in!
Prerequisites
If you’d like to follow along step-by-step, in this tutorial, ensure you have the following:
You'll need a very tiny bit of Docker knowledge but if you don't, that's ok. We'll go through a quick overview of Docker and how it works.
A Linux Machine. (Any Linux Distro, WSL2, Google Cloud Shell)
Brief overview of Docker
Docker makes developing applications much easier to manage and the way it does that is through what's known as containers. The container is like a box that holds your application and all its dependencies together in an isolated environment.
Let's take a step back and start from Dockerfile. You invite me over for a dinner and plan to make a meal, preferably Butter Chicken and Naan. In that case:
Dockerfile is your recipe book.
It has an ingredient list and portion size. Following the recipe book, you can make "one item(the sauce)" of the total meal in a vessel. Once you add everything up, to make "that one item", you have it inside "a container". That's truly what a "docker container" is. Once you are done cooking/making that item, you can take that vessel (container) and take it anywhere. Containers are supposed to be "stateless" just like your vessel.
What is Docker Compose?
While our Docker application includes more than one container, at that time building, running, as well as connecting the containers from separate Dockerfiles is definitely time-consuming. So, as a solution to this problem, Docker Compose permits us to use a YAML file to define multi-container apps.
Let's roll back to the docker example:
Until now we only made "one item" i.e chicken sauce for the full meal, the meal consists of some naans as well. To make "A meal" you need several of those "items", you prepared using a few recipe books. Or need a few items from the same recipe book. To make naan, you gotta make the dough. They always go together. That is "sorta" like docker-compose, where several of those "containers" come together and make a complete application. Some of them have dependencies(Rice, Salad, etc).
Why do we need Docker Compose?
Technically speaking, Single commands can get long, really long in Docker. Take the below as an example. This example creates a container for a software application called bookstack.
$ docker create \
       --name=bookstack \
       -e PUID # UID of user to take ownership of application/files \
       -e PGID # GID of user to take ownership of application/files \
       -e DB_USER # The database user \
       -e DB_PASS # The database password \
       -e DB_HOST # The database host \
       -e DB_DATABASE # The database to be used \
       -e APP_URL # The url your application will be accessed on (required for correct operation of reverse proxy) \
       -v /host/path/to/config:/config # Location of any uploaded data \
       -p 80:80/tcp # Web UI port \
       --restart unless-stopped \
       linuxserver/bookstack:version-v0.31.4
As the complexity of a docker environment increases, so does the amount of flags and conditions required for a working container setup. The Docker command line starts to become cumbersome and difficult to troubleshoot; especially once multi-container setups start entering the mix.
Docker Compose is a way to create reproducible Docker containers using a config file instead of extremely long Docker commands. By using a structured config file, mistakes are easier to pick up and container interactions are easier to define.
Installation
Let's install Docker Compose, open your terminal and type the following commands: (Assuming you already have Docker installed, refer to the docs for more information on how to install Docker.)
$ sudo apt update
$ sudo apt install docker-compose -y
Run the following command to verify the installation of Docker Compose.
$ docker-compose -v
Let's Get Practical
Using Docker Compose, we can group containers together defined within a single file. By defining multiple containers in a single file, containers can communicate between dependent services and simplify the organization of complex container layouts.
To demonstrate such a scenario, let’s set up a simple URL Shortener built with Go by cloning this Github Repo.
This application requires a separate database and a separate web service to speak over an API, I have already configured a separate Dockerfile for the database and API service.
Creating a Docker Compose Configuration File
To bind separate Dockerfiles together, we need to create a docker-compose.yaml file in the project's root directory.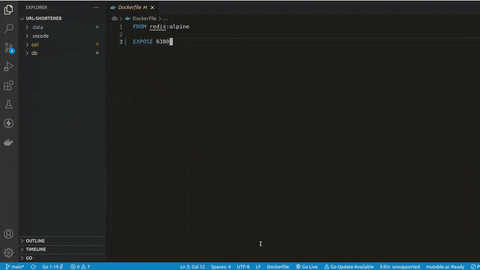
At its most basic form, a docker-compose.yaml file for the following application looks like this. Open your favourite IDE, copy and paste the code below into the Docker Compose configuration file that we just created.
version: "3"

services:
  api:
    build: api
    ports:
      - "5500:5500"
    depends_on:
      - db

  db:
    build: db
    ports:
      - "6380:6380"
    volumes:
      - .data:/data
Let’s step through each of the options shown:
versionspecifies the version of docker compose file.servicescontain the specifications for the actual containers. You can define multiple containers in this section.apiis the name of the first container anddbof the other. You could have more containers.depends_onsets the order in which services must start and stop.volumeskeyword is used to persist data generated by and used by Docker containers. It creates a.datafolder in the root directory to store the generated data.
Port Mapping
ports in particular require a special mention.
ports:
  - "5500:5500"
In Docker Compose, the ports keyword allows you to set one or more mappings from the host to the container. For example, above you have mapped port 5500 on the host to port 5500 on the container. However, you do not need to match the port number.
You could also define multiple ports like below.
ports:
  - "5500:5500"
  - "3000:3000"
Running the Container
By now you should have the docker-compose.yaml file inside of your root directory. Now’s the time to create and start the service.
On your terminal and run the following command:
$ sudo docker-compose up -d
Success! You have now successfully used Docker Compose to start a container from a config file. With that first important step taken, let’s look at how you manage the state of your container.
Managing an application with Docker Compose
In the previous section, you started the container using the -d flag. Doing so ran a container in a detached state. When a container is in a detached state, the container will continue to run in the background. But, this poses a problem: how do you manage that container if you no longer have direct control?
To solve this problem, Docker Compose has a series of commands that will manage containers starting with a docker-compose.yaml file:
docker-compose restartis used to restart a container that is currently running.docker-compose stopwill stop a running container without destroying the container.docker-compose startwill start the stopped container up again.docker-compose downwill stop the running containers and also destroy them.
A full list of docker-compose commands can be seen by running docker-compose with no additional arguments or referenced here in the documentation.
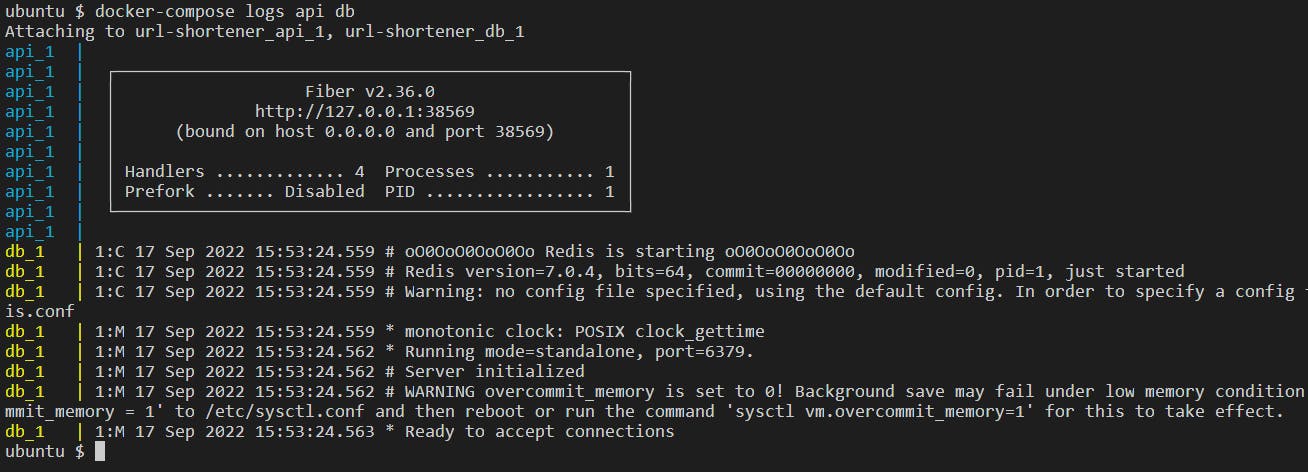
Monitoring Docker Compose logs
Docker Engine works with Docker Compose and executes many different tasks in the background. Being able to monitor what's going on in the background, especially when working with multiple containers at once is quite useful.
To monitor both the containers in URL Shortener, use the logs command and the name of the container you'd like to monitor.
$ docker-compose logs api db
Networking in Docker Compose
Up to this point, you haven’t learned too much about the communication and networking aspects of how containers work together. Let’s change that.
When you create multiple containers within a single docker-compose.yaml file as you’ve done earlier, they are all assigned to the same network (usually called name-of-parent-folder_default).
You can see the network created for the containers when you run docker-compose up -d as shown below.

You can manually also define internal or external networks. Manually defining networks is great when you have a container that needs to speak to another container in a separate docker-compose.yaml file. You could expose the ports, or you can create a network they can both join!
To define an external network, modify the URL Shortener docker-compose.yaml to include an externally created network.
Create the external network with
$ docker network create my_external_networkDefine the external network in
docker-compose.yaml:version: "3" services: api: build: api ports: - "5500:5500" depends_on: - db networks: - "my_external_network" - "url-shortener_default" db: build: db ports: - "6380: 6380" volumes: - .data:/data networks: - "url-shortener_default" networks: "my_external_network": "url-shortener_default": external: true
Note: When you explicitly define networks, you also have to explicitly define the default network.
- Run
docker-compose up -dto recreate the containers. Your two containers are now joined to two networks as shown below.

Conclusion
At this stage, you should have enough information to follow along with the majority of docker-compose tutorials out on the web. Having this knowledge can vastly expand your ability to move into the world of Docker, and the building of web apps in Infrastructure as Code.
Follow Kubesimplify on Hashnode, Twitter and Linkedin. Join our Discord server to learn with us.