


What is kyverno?
- Kyverno in Greek means to govern and kyverno is a policy management tool for kubernetes.
- Other alternatives of kyverno is OPA which is a general purpose policy management tool and it's not Kubernetes native as it was built prior to kubernetes.
- OPA uses rego to enforce policies and kyverno uses declarative syntax that k8s uses.
Why bother about policies at all?
- If you're running your k8s cluster locally, say minikube, rancher-desktop or kind then we don't need to manage any policies. However things change when it comes to production. You want to give your cluster access to other developers and have some organizational standards in place. Now to enforce that we need policies. Another reason for using policies can also be industry specific compliance.
What is a policy?
- Policy in many ways is like a digital contract between two different entities. It can be a contract between two different individuals, teams or between developers and operations people.
- kyverno is like the centralized thing that takes care of the complete cluster of who can have access to what resources and who can do what within a cluster?
How Kyverno Works?
- This is how resource creation takes place in Kubernetes.
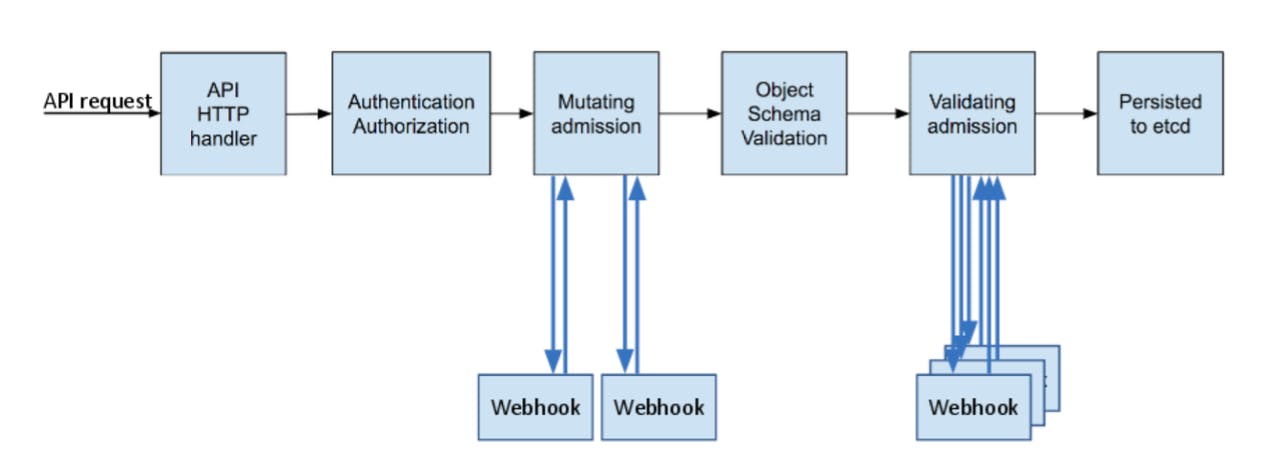
- Kyverno works like an admission controller for Kubernetes. Kubernetes admission controllers are plugins that govern and enforce how the cluster is used.
- The admission control process has two phases
- Mutating Phase
- Validating Phase
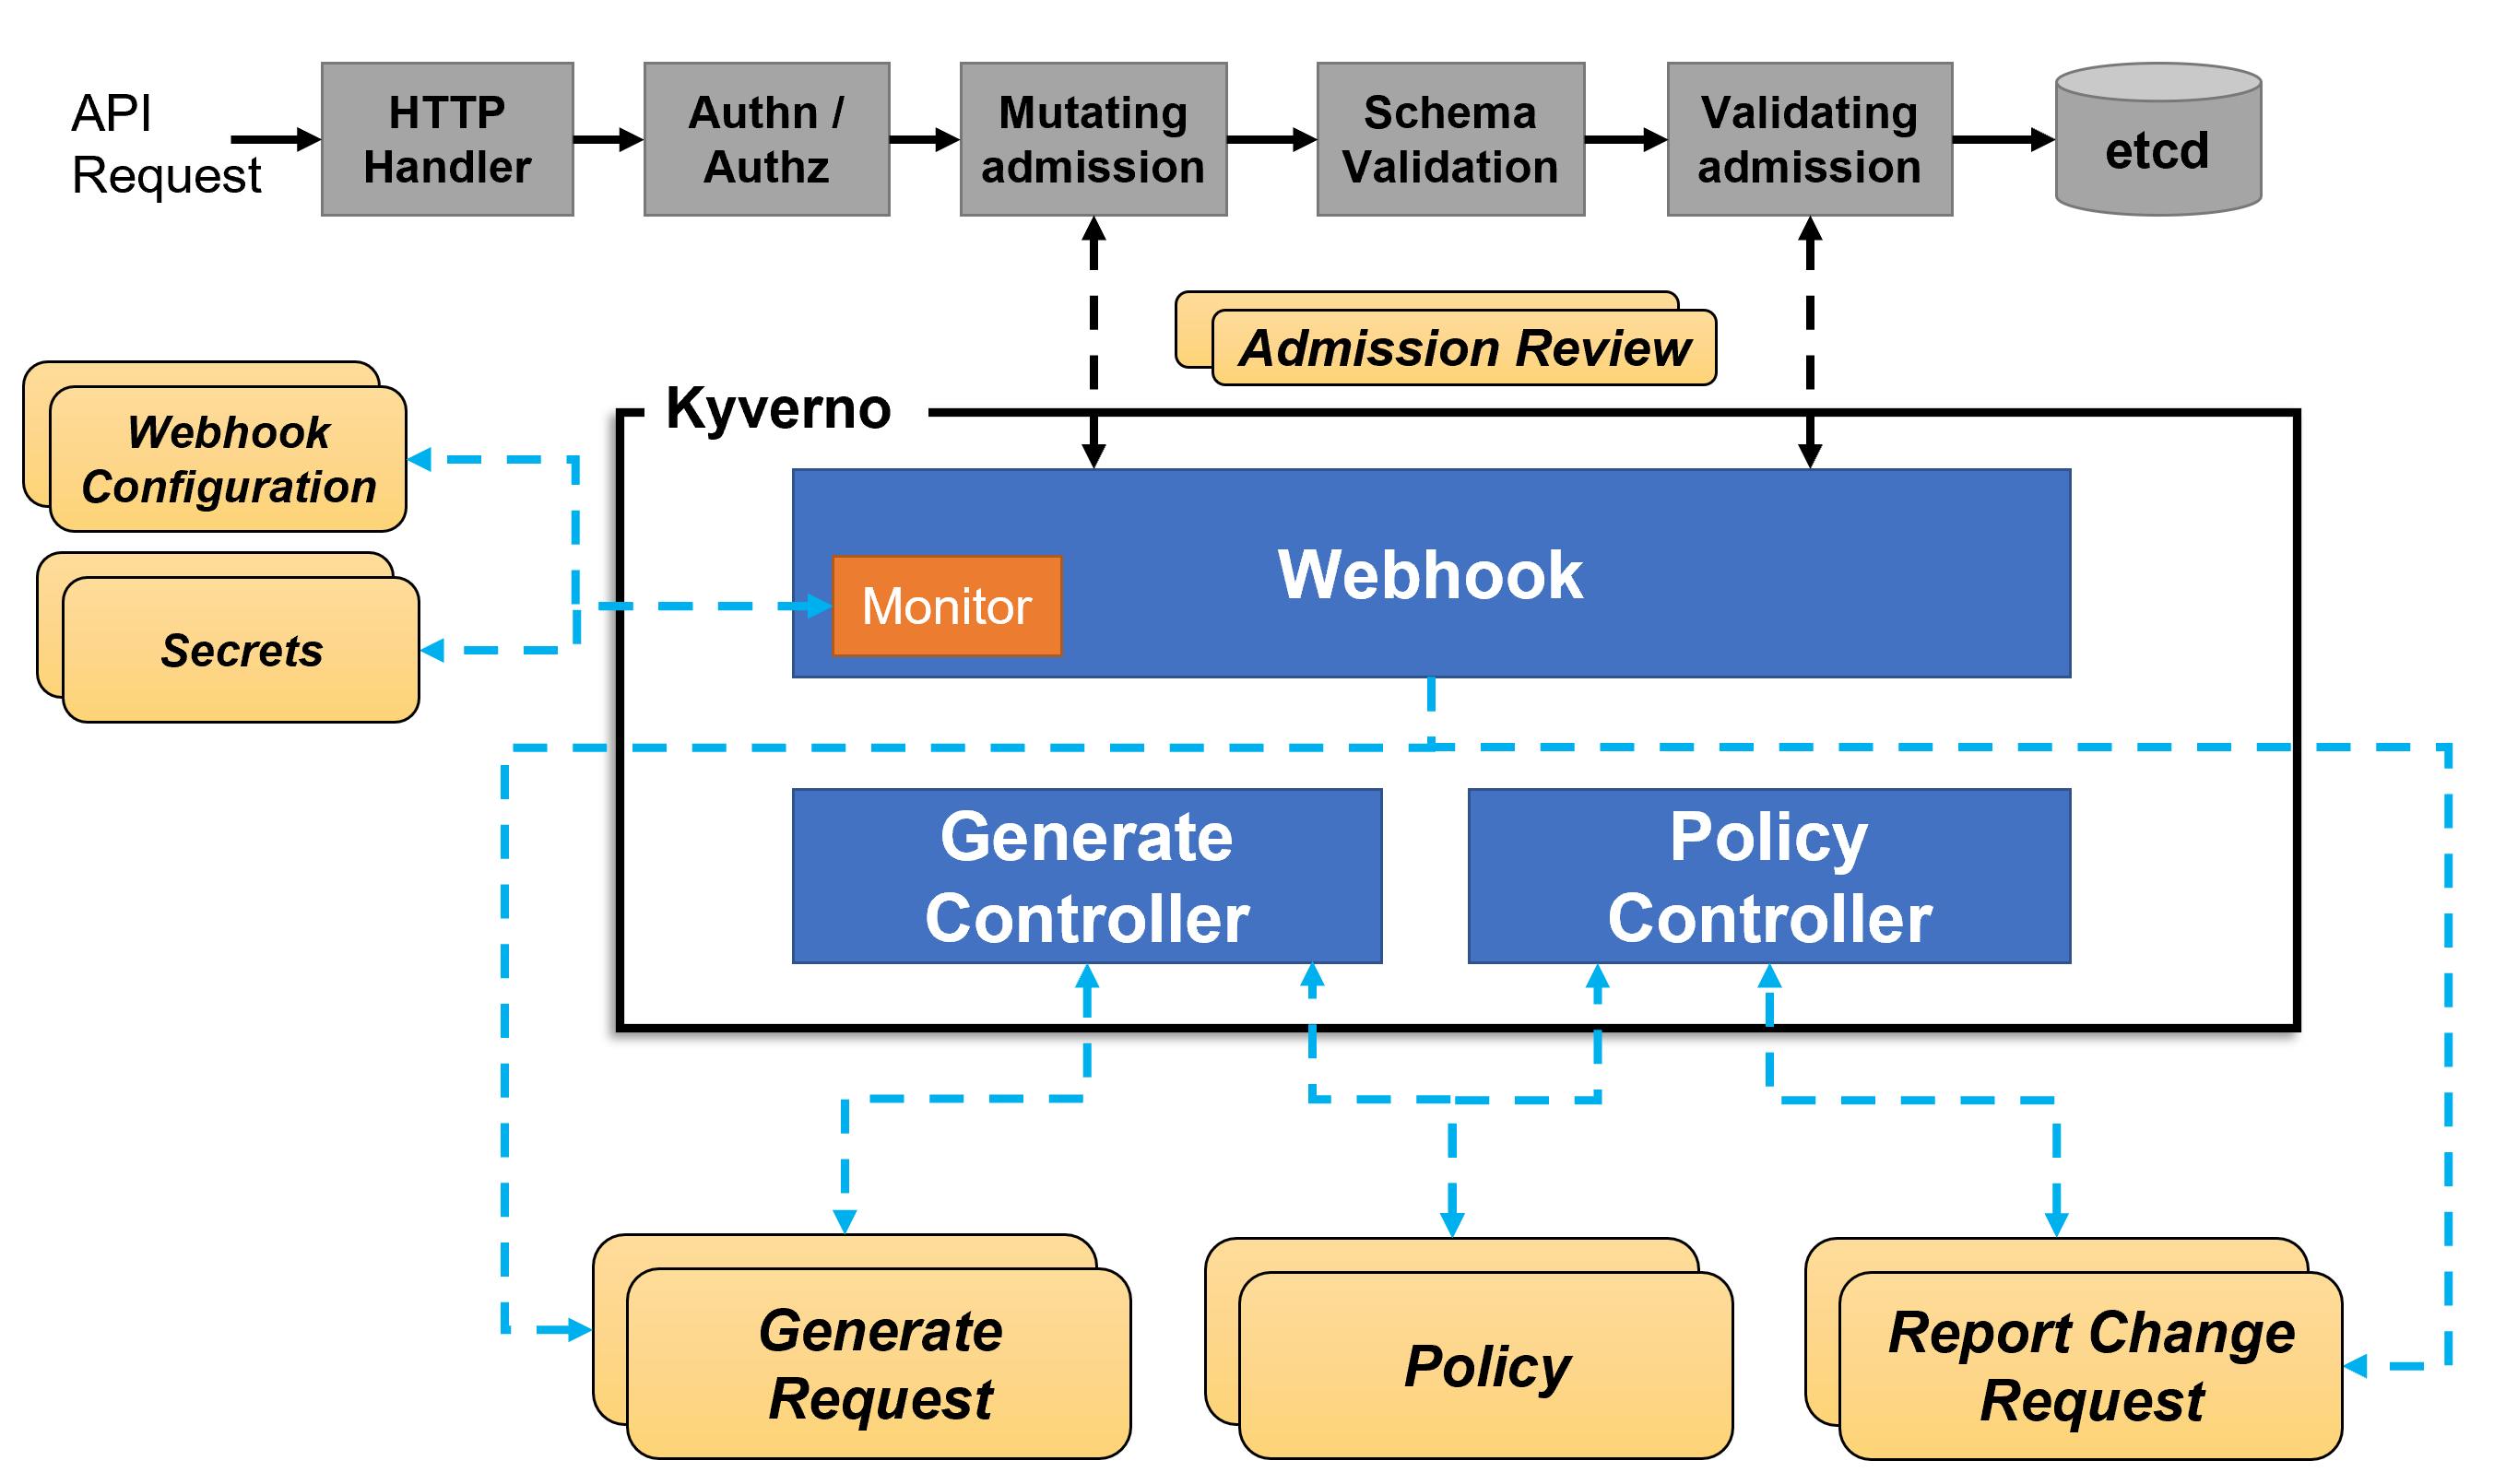
- When you install kyverno in your cluster you can see that webhook are installed on your cluster.
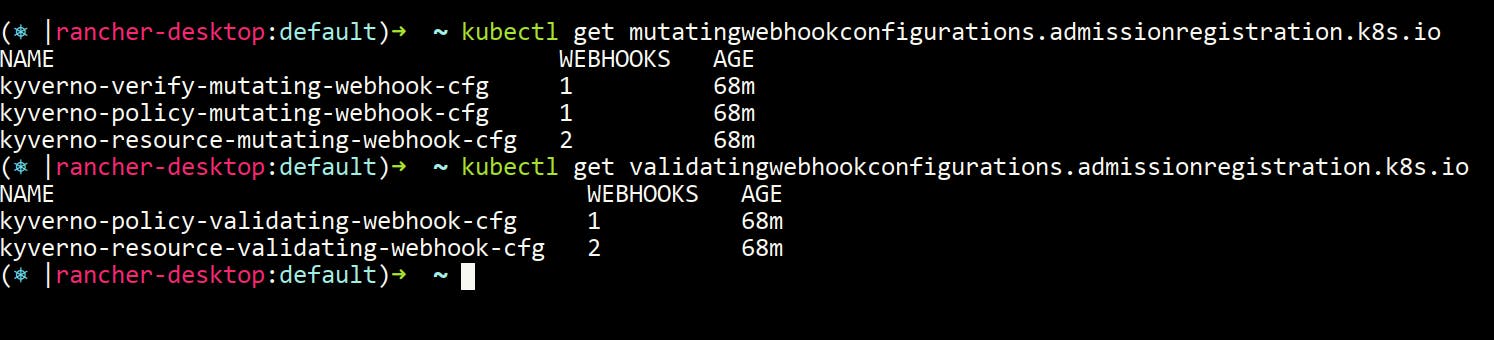
- Mutating webhooks modify the request and pass it further to the k8s api server.
- Validating webhooks either allow or reject the request.
Types of policies
As of writing this blog kyverno has 4 types of policies.
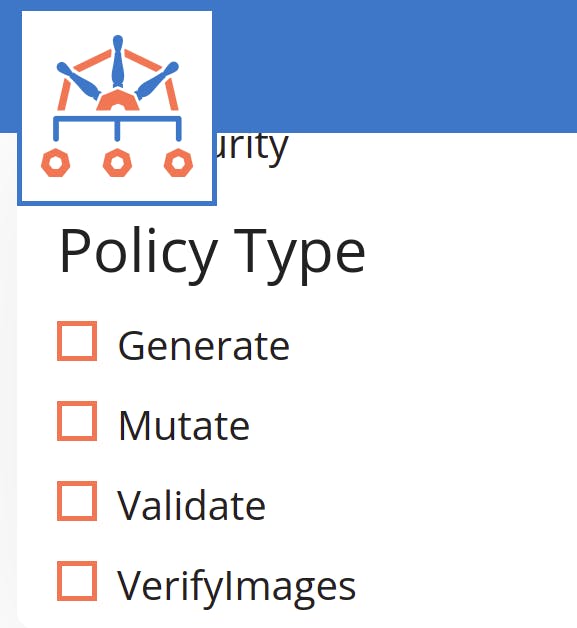
- Generate - This will generate the policy
- Mutate - This will mutate the resource manifest corresponding to a policy
- Validate - This will validate the resource against a policy and returns a simple Yes or No to the apiServer.
- VerifyImages - This is a new addition to the kyverno project and with the help of this we validate/block the api request on the basis of image. e.g. We can sign our images using the cosign project to ensure that supply chain security is maintained.
More about kyverno
- Learning curve of kyverno is much easier as compared to OPA.
- Kyverno as of now has 138 policies written by community members which you can use.
- Kyverno makes it super easy to write even complex policies.
- Kyverno supports wildcards(globbing) and set operators.
Kyverno Policy Structure
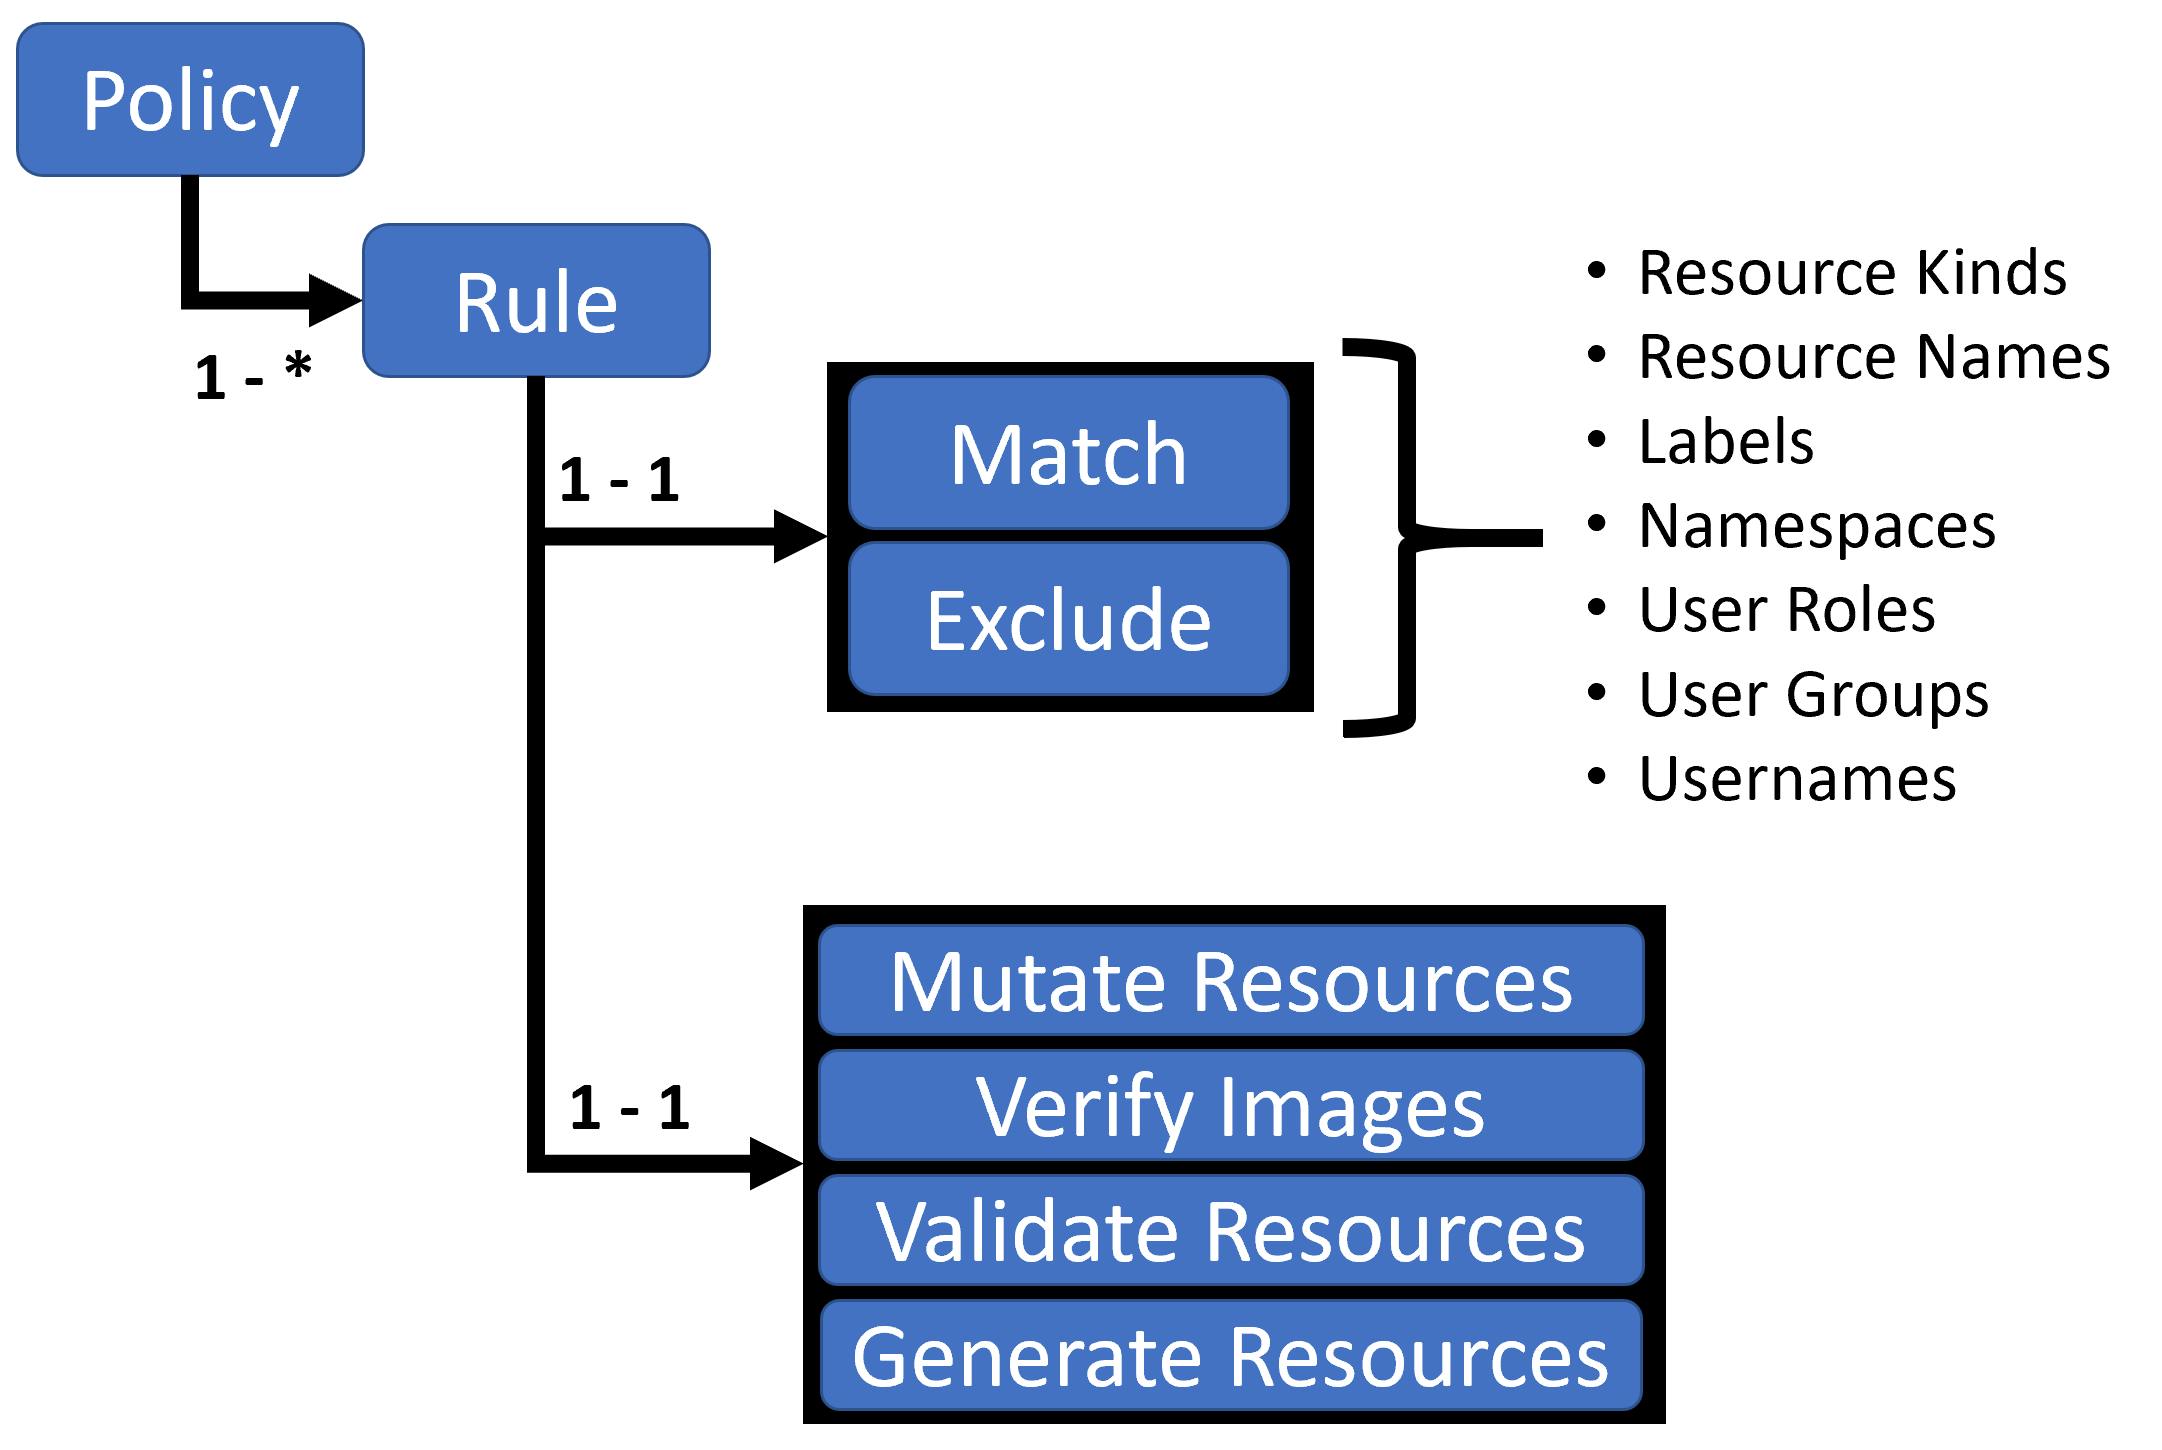
- The overview of a Kyverno policy looks like this. If you are familiar with github actions then you can relate things. One policy is composed of multiple rules. Under each rule we can filter out the resources we want to target with the help of match and exclude.
- Match targets to a specific resource whereas exclude targets all the resources excluding something depending on the conditions provided.
- We then write about actions that a policy needs to perform. It can be validating, generating and mutating the incoming request or it can verify the images whether they are signed or not? There are multiple permutations and combinations you can do here.
Install Kyverno
- We have covered some theories and now let's get our hands dirty with the following example.
- Download kyverno in your kubernetes cluster.
helm repo add kyverno https://kyverno.github.io/kyverno/
helm repo update
helm install kyverno kyverno/kyverno --namespace kyverno --create-namespace
Policy Example
- Now let's take an example and see how a kyverno policy looks like.
- The following policy will block the creation of pods who don't have request and limits set.
apiVersion: kyverno.io/v1
kind: ClusterPolicy
metadata:
  name: require-limits-and-requests
spec:
  validationFailureAction: enforce
  rules:
    - name: validate-resources
      match:
        resources:
          kinds:
            - Pod
      validate:
        message: "You need to set request and limits in the manifest"
        pattern:
          spec:
            containers:
            - resources:
                requests:
                  memory: "?*"
                  cpu: "*?"
                limits:
                  memory: "?*"
                  cpu: "?*"
- Let's try to understand the policy step by step. Let's first understand about the apiVersion, kind and metadata.
- apiVersion is the endpoint where the request is being sent.
- kind is the type of resource we are willing to create. It can be a
ClusterPolicywhich is applicable to the complete cluster or it can be aPolicywhich is namespace scoped. - metadata - In this section we provide the name of our policy and if we want then we also provide the labels and annotations w.r.t our policy.
- Now comes the most important and interesting part which is the spec section.
- Let's try to understand our spec section is looking something like this
spec:
  background: false
  validationFailureAction: enforce
  rules:
    - name: validate-resources
      match:
        resources:
          kinds:
            - Pod
      validate:
        message: "You need to set request and limits in the manifest"
        pattern:
          spec:
            containers:
            - resources:
                requests:
                  memory: "?*" # this means you need to pass some values here
                  cpu: "*?"
                limits:
                  memory: "?*"
                  cpu: "?*" # It means that this field is mandatory
The
background: falsesimply saying not to scan your existing kubernetes resources. According to kyverno documentation one of the use cases of this is that you can first check this before setting thevalidationActionFailureto enforce. This will act like a litmus test on how your cluster is behaving when you're enforcing a particular policy to the cluster with enforce enabled.validationActionFailuredefines what to do when the resource fails against the policy you've applied in the cluster. There are two modes- Enforce - Blocks the request if any violation is there.
- Audit - Allow resource creation but audit that to the policy reporter.
- Now comes
spec.rules. In the example policy above we have only defined a single rule and let's go through that. - In the match section we have defined that our policy is valid only for pods. Kyverno considers every other resource as well which works on top of pods.
- Validate means that this policy will not make any edits into the incoming request if something is violated. It simply returns Yes or No based on the policy.
- The message under the validate you will see in the terminal if the resource is against the given policy in the enforce mode.
- Then we define the pattern which checks what should be present and what not? Like in this case we have mentioned that the incoming requests must have requests and limits set.
- We have used wildcards in the policy manifest which means
*- matches zero or more alphanumeric characters?- matches a single alphanumeric character?*- It means that the field is mandatory and you need to pass some values here.
- Now what kyverno will do is that whenever any pod request comes then it will check if
pod.spec.containers.resources.requests.memoryis present or not and if it's empty/non-compatible then it will not allow the resource creation.
Hands On Kyverno
- Now that we have understood the policy, let's try to implement this. We will first create a
wrong_podwhich does not have requests and limits set. Create a YAML manifestwrongpod.yamland run the commandkubectl apply -f wrongpod.yaml - I will encourage you to go ahead and try this in a cluster.
- Here is the manifest of the wrong pod. We will use a simple busybox container in our example.
apiVersion: v1
kind: Pod
metadata:
  name: nginx
spec:
  containers:
  - name: nginx
    image: nginx:alpine
    ports:
    - containerPort: 80
- You will notice that the pod is not getting created and it's throwing the error. You will also notice the message that it is showing on the terminal. This is the same message that we had written in the policy manifest.

- Now we will create a manifest with requests and limits set and we will try to create the pod now.
- Here is the manifest of the
correct_pod. This pod has requests and limits set. - Create a YAML manifest
correctpod.yamland run the commandkubectl apply -f correctpod.yaml
apiVersion: v1
kind: Pod
metadata:
  name: nginx
spec:
  containers:
  - name: nginx
    image: nginx:alpine
    ports:
    - containerPort: 80
    resources:
      requests:
        memory: "64Mi" # 64Mi (binary notation)
        cpu: "250m" # 250 millicores
      limits:
        memory: "128Mi"
        cpu: "500m"
- Run
kubectl get podsin your terminal and You will notice that the pod is running.
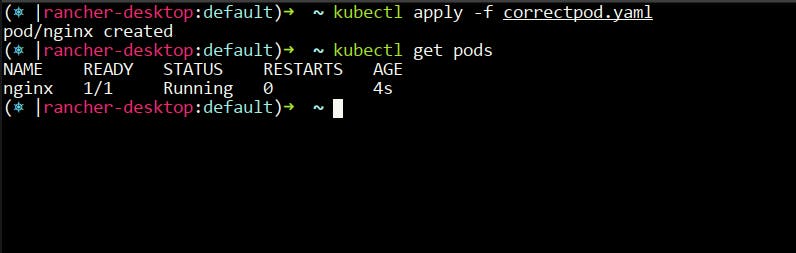
- This time it's running because this pod is not violating the
require-limits-and-requestspolicy. - I hope that now you have understood the basics of kyverno and how a policy works and why do we need it?
- I will encourage you to do the same operation that I have done above but for deployments.
- You will see that this policy is applicable for deployments as well. Kyverno applies the existing
require-limits-and-requestspolicy to not only pods but to all the resources that work on top of pods like deployments, daemonsets, stateful sets and Jobs. - Run the command
kubectl describe cpol require-limits-and-requestsin terminal and you will notice that kyverno have auto generated the policy for other resources that works on top of pods like deployments, daemonsets etc. - That's all for now. In the future I will be writing about Kyverno policy-reporter, Kyverno CLI and I will be writing some mutating policies as well so stay tuned for that.
- Follow kubesimplify for more.