✨ Introduction to Jenkins ✨
Jenkins is an automation tool written in Java with built-in plugins for continuous integration tasks. It is used to continuously build and test project

On this page (10)
👉 Before we jump to Jenkins, let's understand the situation before Jenkins(or before Continuous Integration).
Manual Build Process #
-
Developers have to wait until the complete software is developed for the test results.
-
If the test results show bugs then it was tough for developers to find those bugs because they have to check the entire source code of the application, which in turn slows the software delivery process.
-
The whole process was manual which increases the risk of frequent failure.
To overcome this manual build processing, Continuous Integration came into picture.
Let's first understand how Continuous Integration is done ? #
First you have to split the entire code into segments then you have to keep small segment of this manageable code after that make the required changes, then you have to integrate the segmented code like multiple times for days so that everyone has that code and they can coordinate with your team.
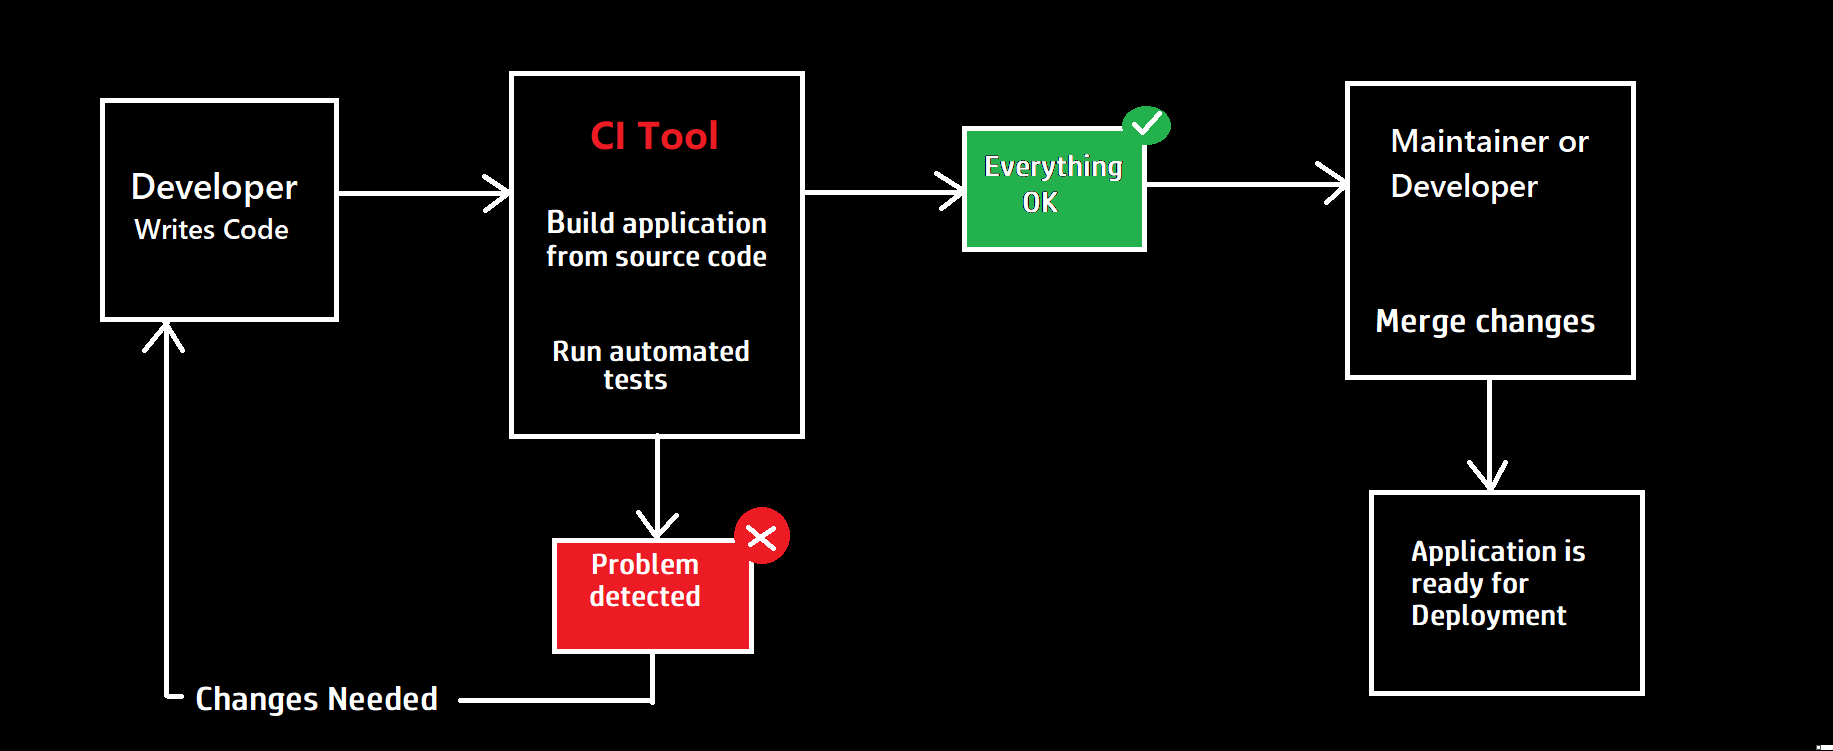
What is Continuous Integration? #
Continuous integration, often abbreviated as CI. It is a software development practice where members of a team integrate their work frequently, usually each person integrates at least daily. Each integration is verified by an automated build and tests to detect integration errors as quickly as possible. This approach reduced integration problems and allows a team to develop software more rapidly.
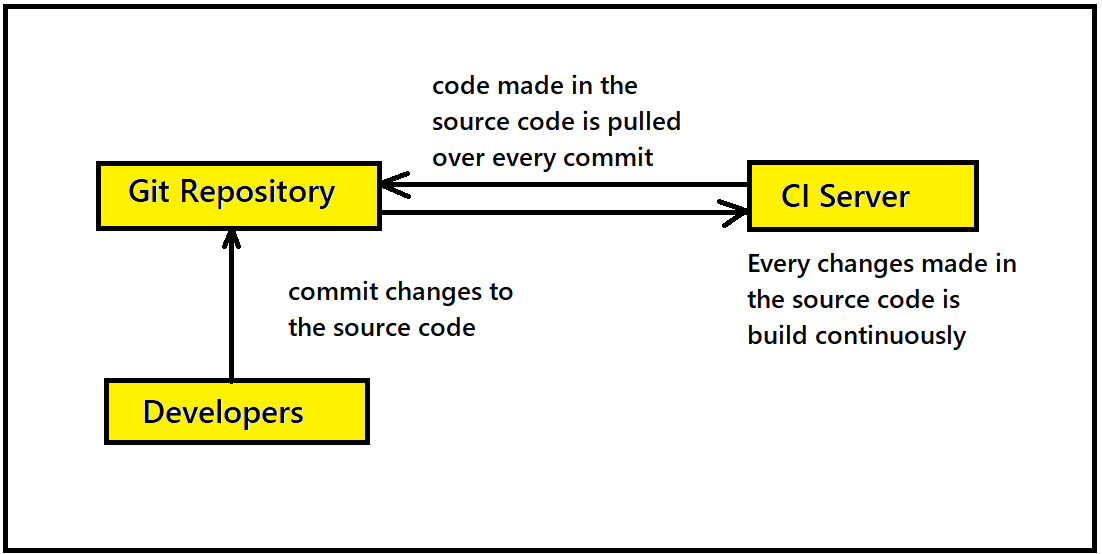
Continuous Integration Workflow
Benefits of Continuous integration
- Immediate bug detection
- Committing code frequently
- Less context switching as developers are alerted as soon as they break the build
- Spend less time debugging and more time adding features
- Reduce integration problems allowing you to deliver software more rapidly
**Continuous Integration Tools **
Some famous CI Tools are :
- Jenkins
- TeamCity
- Bamboo
- GitLab CI
- CircleCI
what is Jenkins 🚀 #

Jenkins is an automation tool written in Java with built-in plugins for continuous integration tasks. It is used to continuously build and test projects making it easier to integrate the changing codes to it.
It is a server-based system that runs in servlet containers such as Apache Tomcat. Jenkins is quite easy to configure, modify and extend. It deploys code instantly, generates test reports.
Jenkins is the most famous Continuous Integration tool, achieves Continuous Integration with the help of plugins. Plugins allow the integration of Various DevOps stages. If we want to integrate a particular tool, you need to install the plugins for that tool. For example Git, Amazon EC2, HTML publisher etc.
Features of Jenkins 🤩
Easy Installation - Jenkins is a self contained java based program ready to run with packages for Windows, macOS and Linux operating systems.
Easy Configuration - Easy setup and configured via a web interface which includes error checks and built in help.
Plugins - Lots of plugins available in the Update Center and integrates with many tools.
Extensible - Jenkins can be extended by that plugin architecture which provides nearly infinite options for what it can be used for.
Distributed - Jenkins easily distributes work across multiple machines, helping to speed up builds, tests and deployments across multiple platforms.
Installing Jenkins 💥 #
Jenkins can be installed through native system packages, Docker, or even run standalone by any machine with a Java Runtime Environment (JRE) installed.
👉 Checkout this link for Jenkins installation according to your requirements.
💥 In this blog, I will show step-by-step guide on how to install Jenkins on AWS EC2 instance.
Steps
- Create a key pair using Amazon EC2.
- Launch an Amazon EC2 instance
- Install and configure Jenkins
Prerequisites
-
An AWS account, if you don’t have one, you can register here
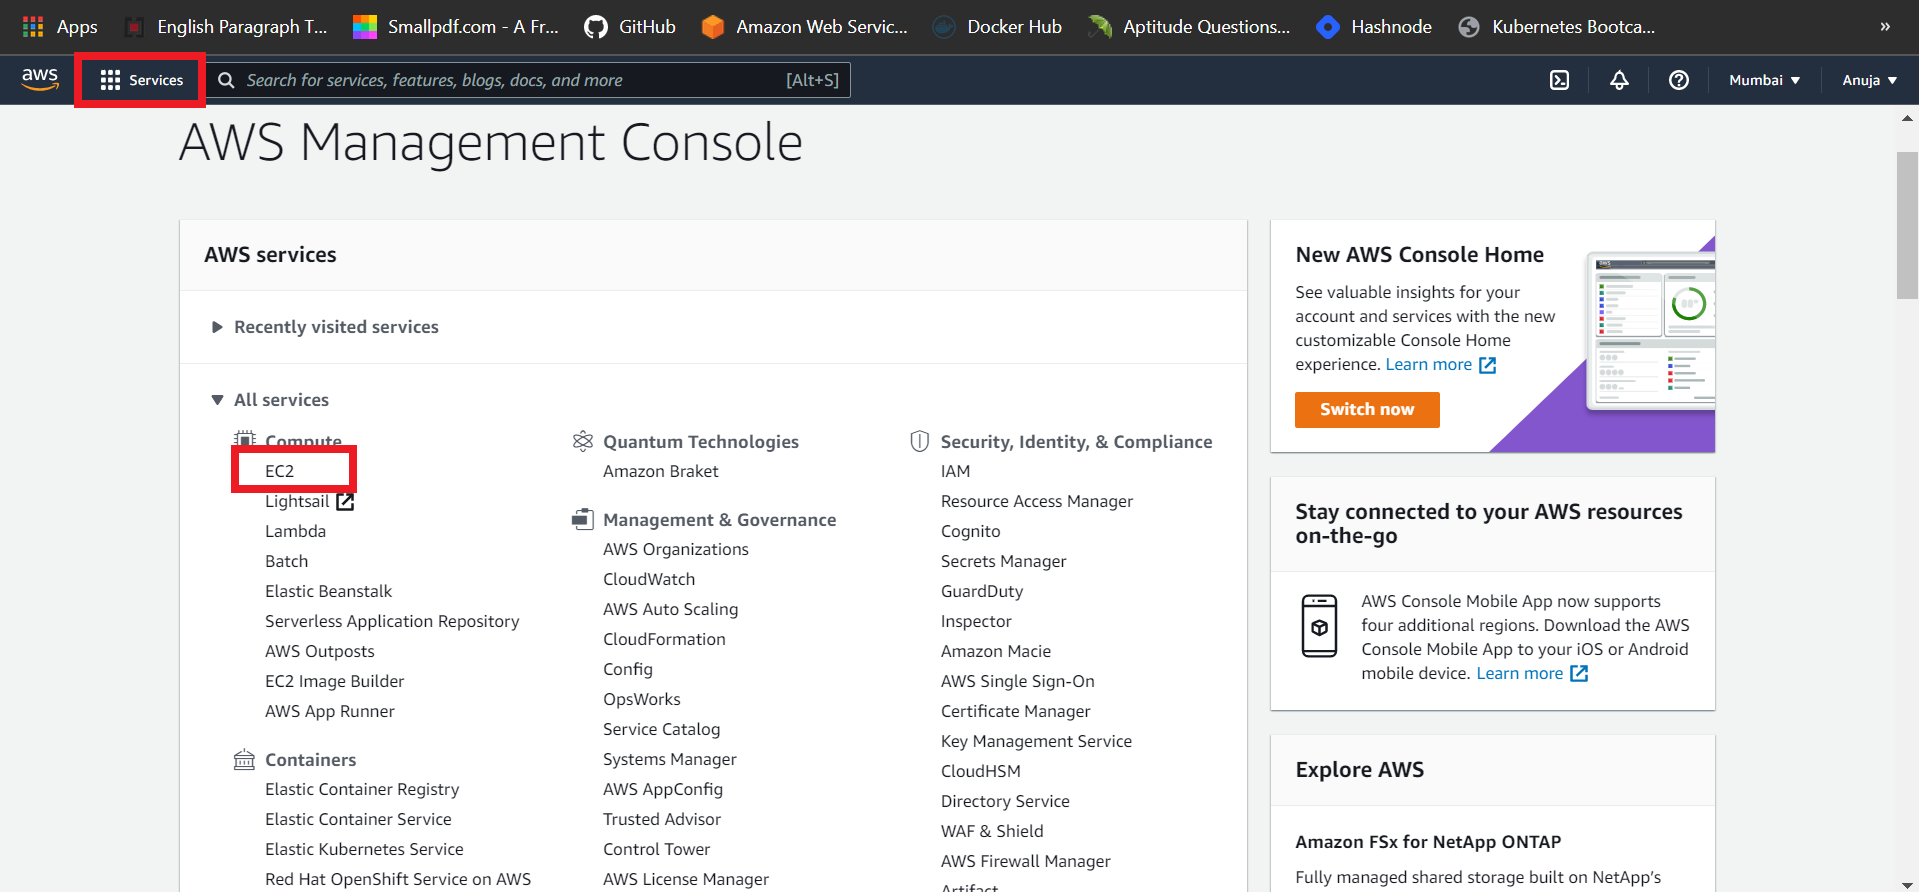
Launch an Amazon EC2 instance #
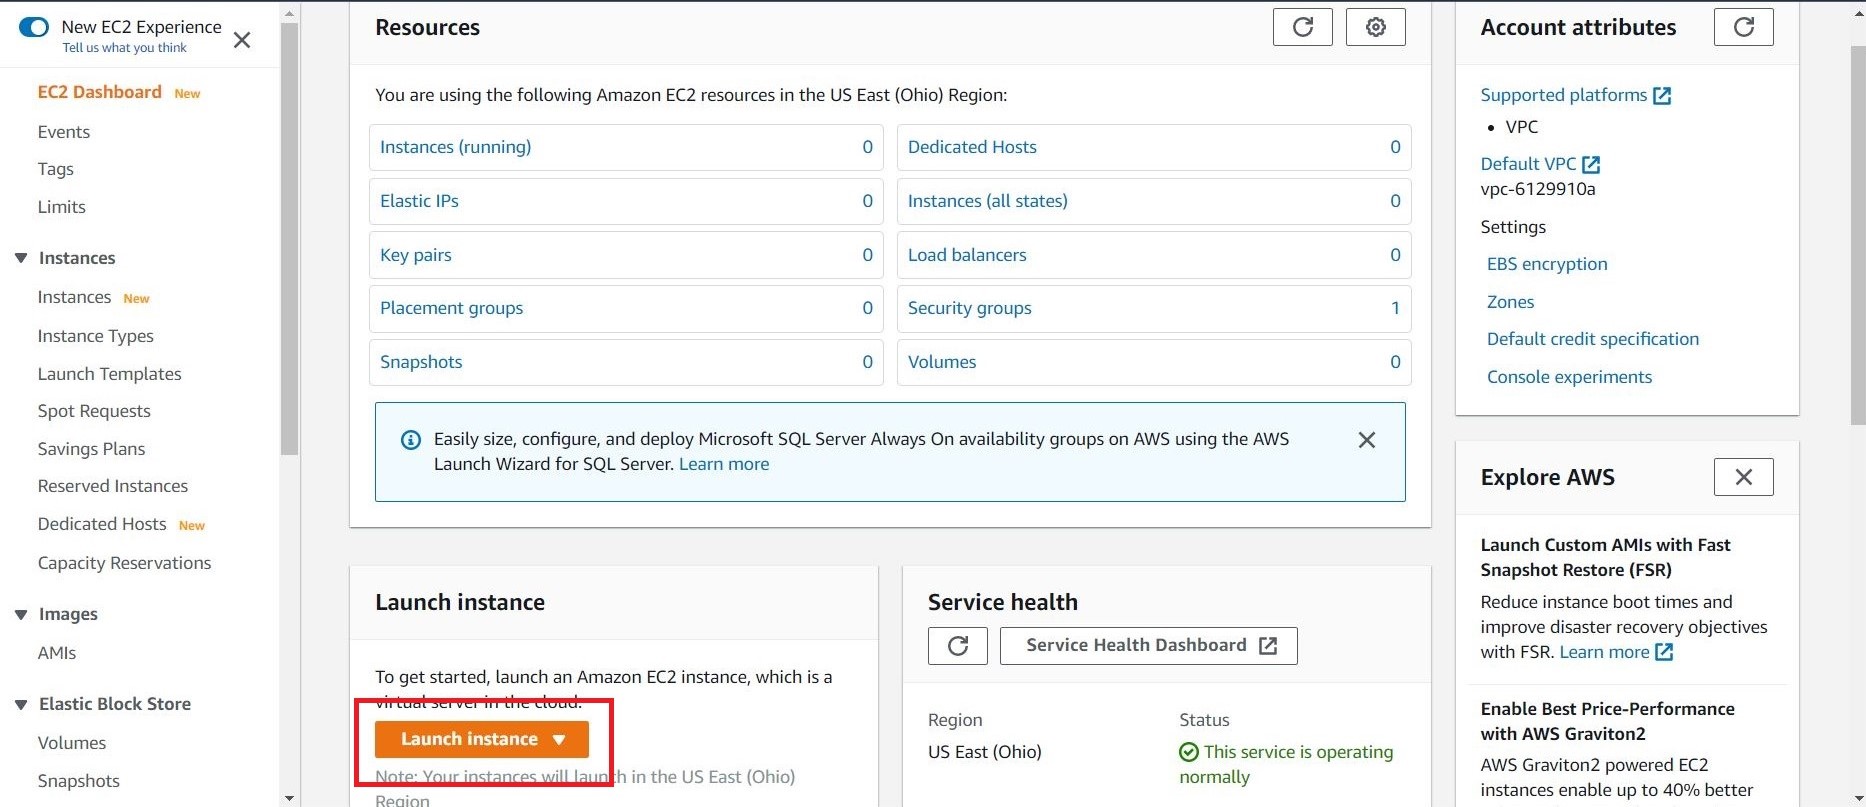
👉 Open the Amazon EC2 console by choosing EC2 under Compute.
👉 From the Amazon EC2 dashboard, choose Launch Instance.
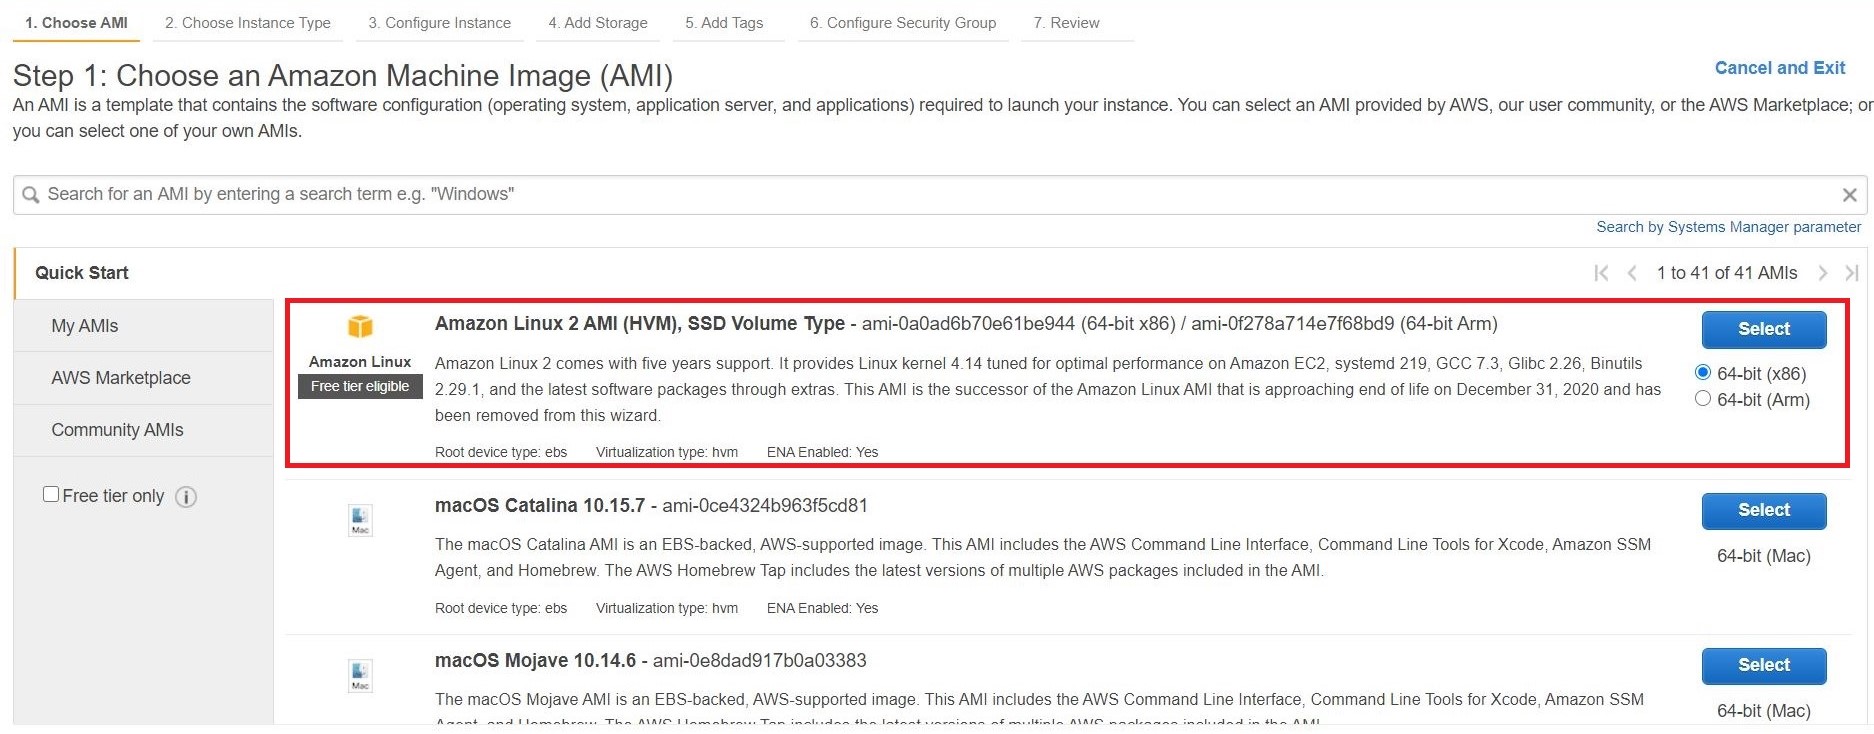
👉 Then Choose an Amazon Machine Image (AMI). Select the HVM edition of the Amazon Linux AMI. Notice that this configuration is marked Free tier eligible.
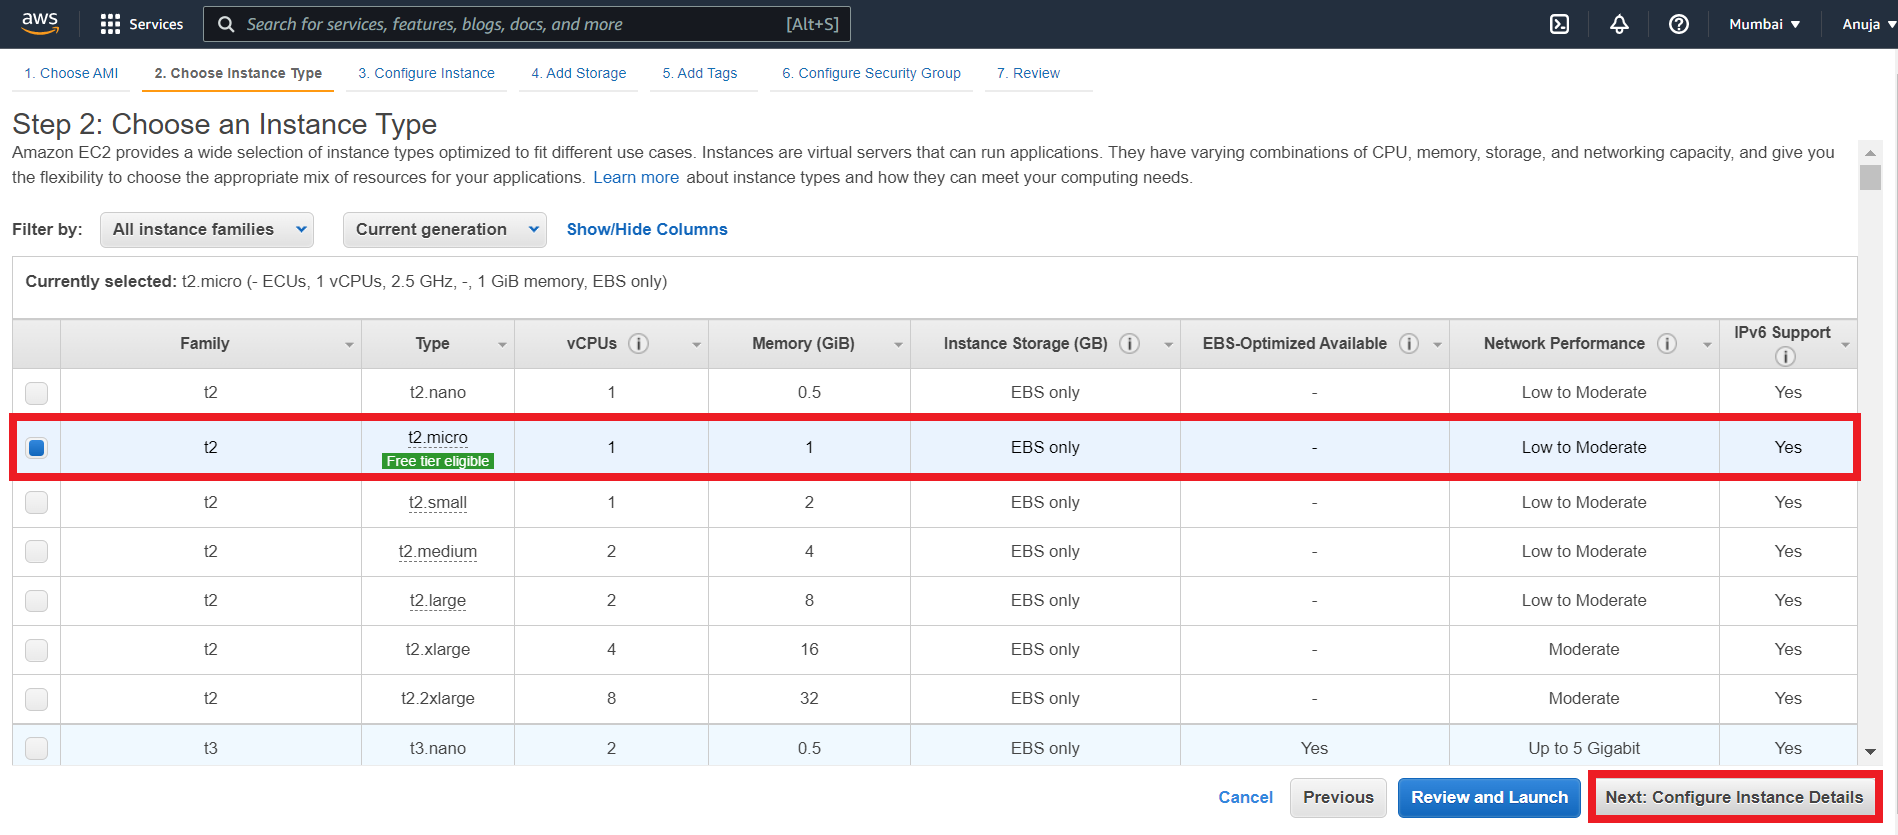
👉 Now, Choose an Instance Type page, the t2.micro instance is selected by default.
👉 Leave Configure Instance Details, Add Storage and Add Tags steps as default.
👉 Configure Security Group
-
Click Add Rule, and then choose SSH from the Type list. Under Source, select Custom and in the text box enter public IP address range enter 0.0.0.0/0.
-
Click Add Rule, and then choose HTTP from the Type list.
-
Click Add Rule, and then choose Custom TCP Rule from the Type list. Under Port Range enter 8080.

👉 Click Review and Launch.
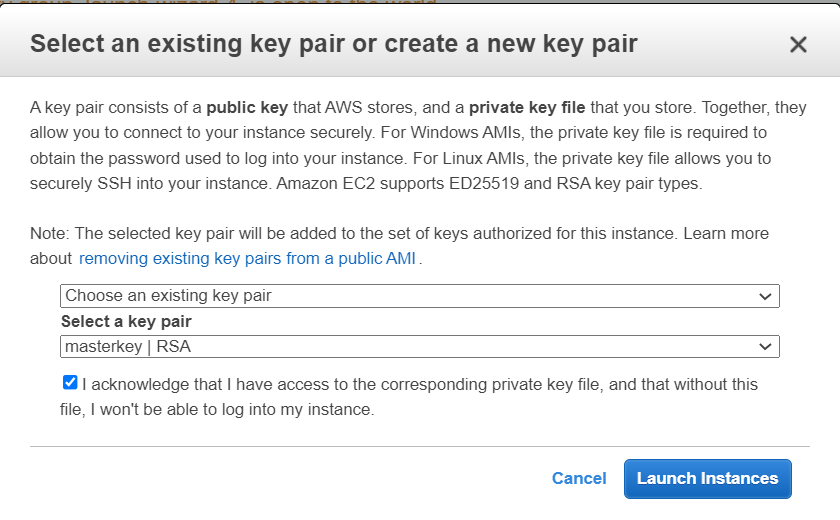
👉 In the Select an existing key pair or create a new key pair dialog box, select Choose an existing key pair, and then select the key pair you created or any existing key pair you intend to use.
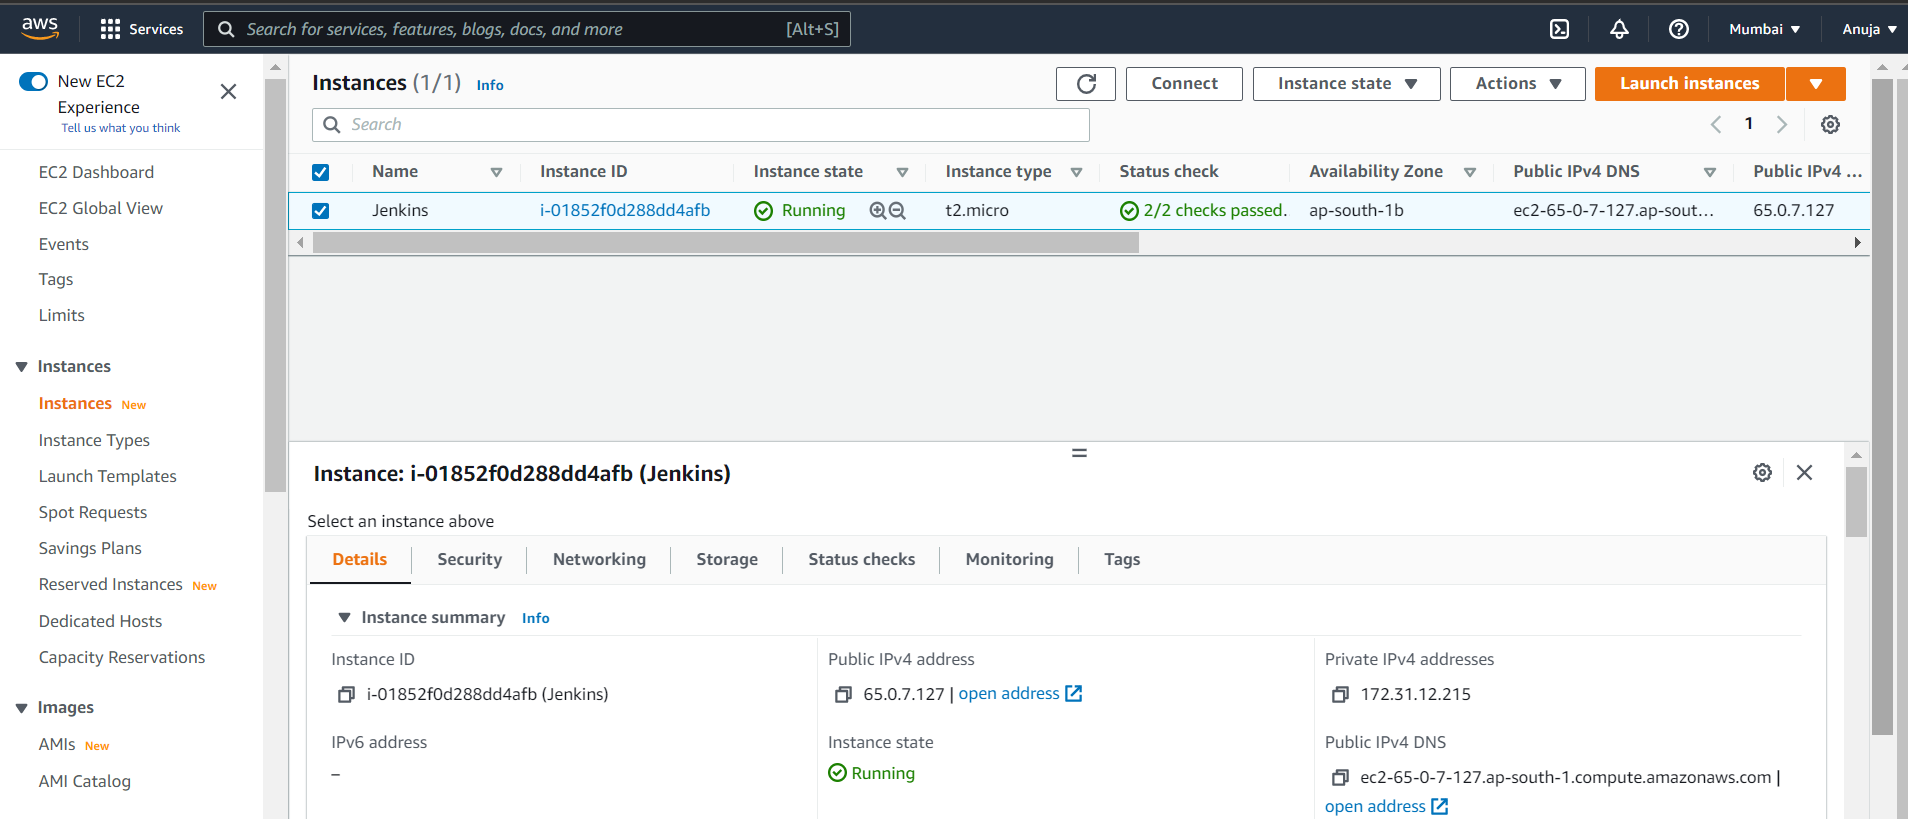
⏩ In the left-hand navigation bar, choose Instances to see the status of your instance. Initially, the status of our instance is pending. After the status changes to running, instance is ready for use 🥳
Connect to your Linux instance #
⚜ Here, I am using PuTTY to connect to instance.
You can download it from here
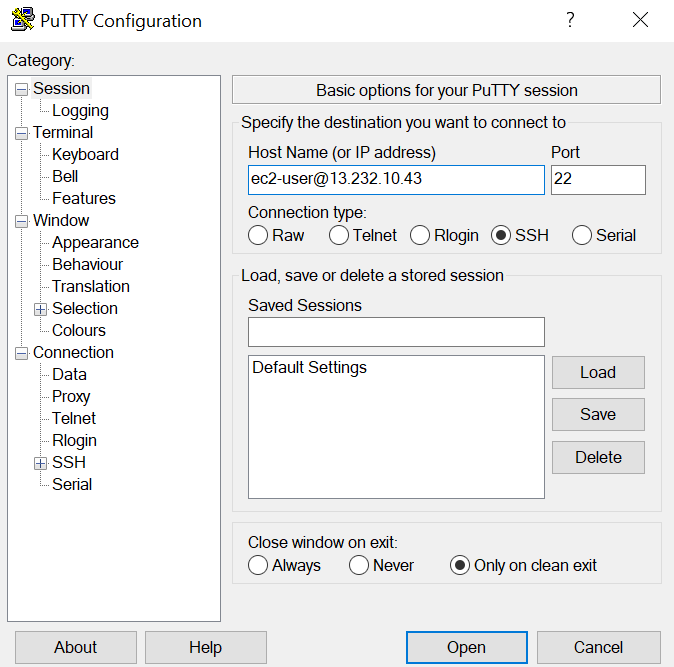
✅ From the Start menu, Open PuTTY.
✅ In the Category pane, select Session, and complete the following fields:
✅ In Host Name, enter ec2-user@public_IPv4 address.
✅ In the Category pane, expand Connection, expand SSH, and then select Auth.
✅ Click on Browse.
✅ Select the .ppk file that you generated for your key pair and then click Open.
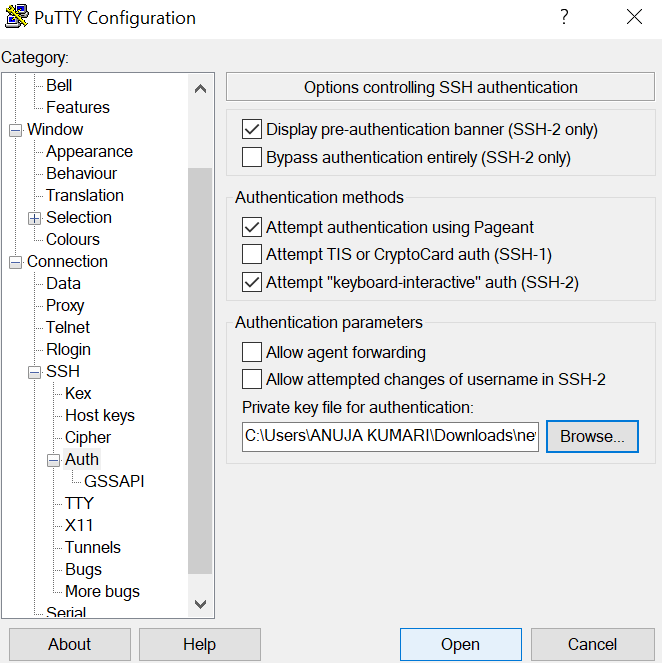
✅ Click Open to start the PuTTY session.
✍ Give root power
sudo su - root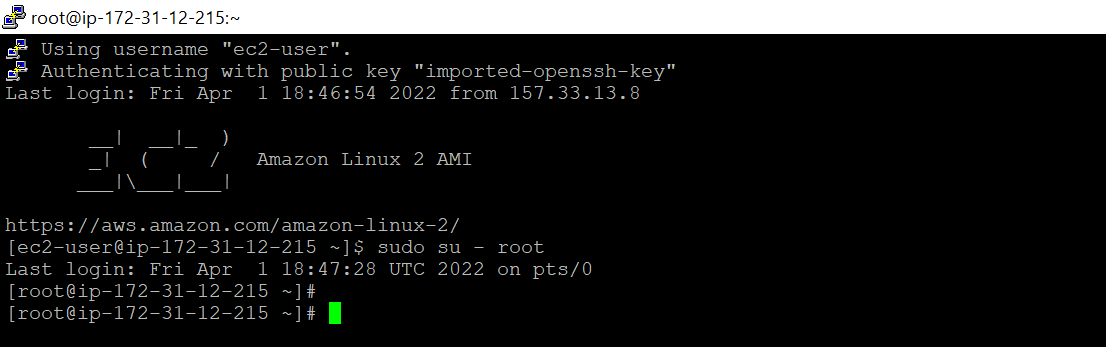
Download and install Jenkins #
✍ Add the Jenkins repo using the following command:
wget -O /etc/yum.repos.d/jenkins.repo \
    https://pkg.jenkins.io/redhat-stable/jenkins.repo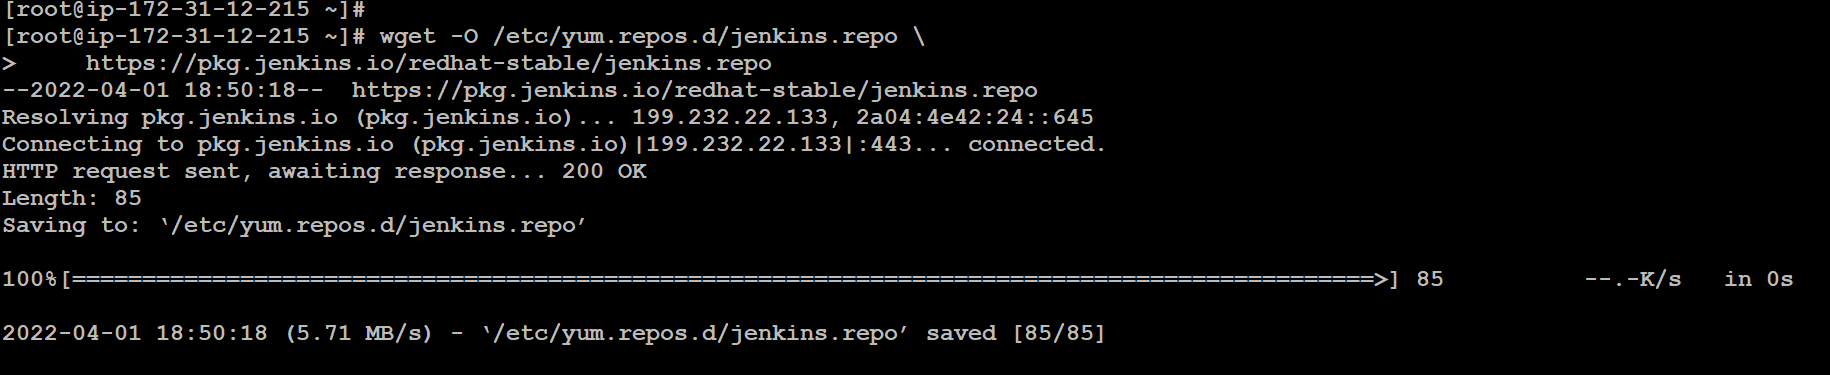
✍ Import a key file from Jenkins-CI to enable installation from the package:
rpm --import https://pkg.jenkins.io/redhat-stable/jenkins.io.keyyum upgrade
✍ Install Java:
amazon-linux-extras install java-openjdk11 -y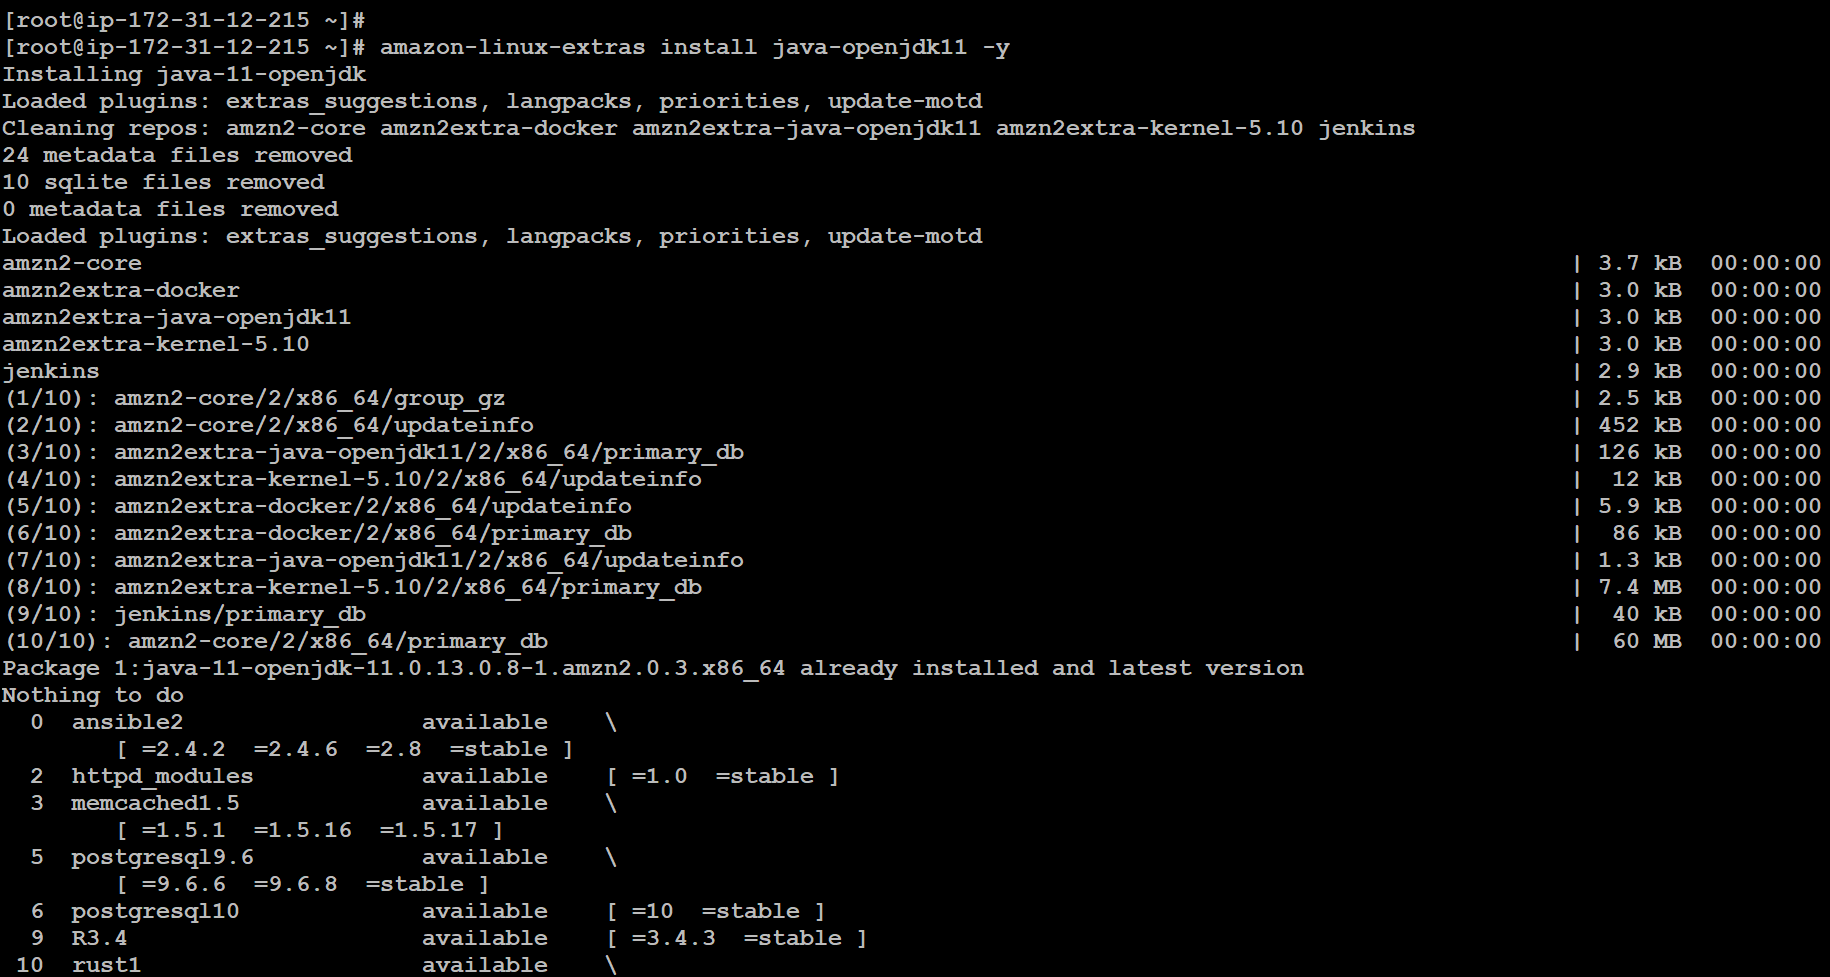
✍ Install Jenkins:
yum install jenkins -y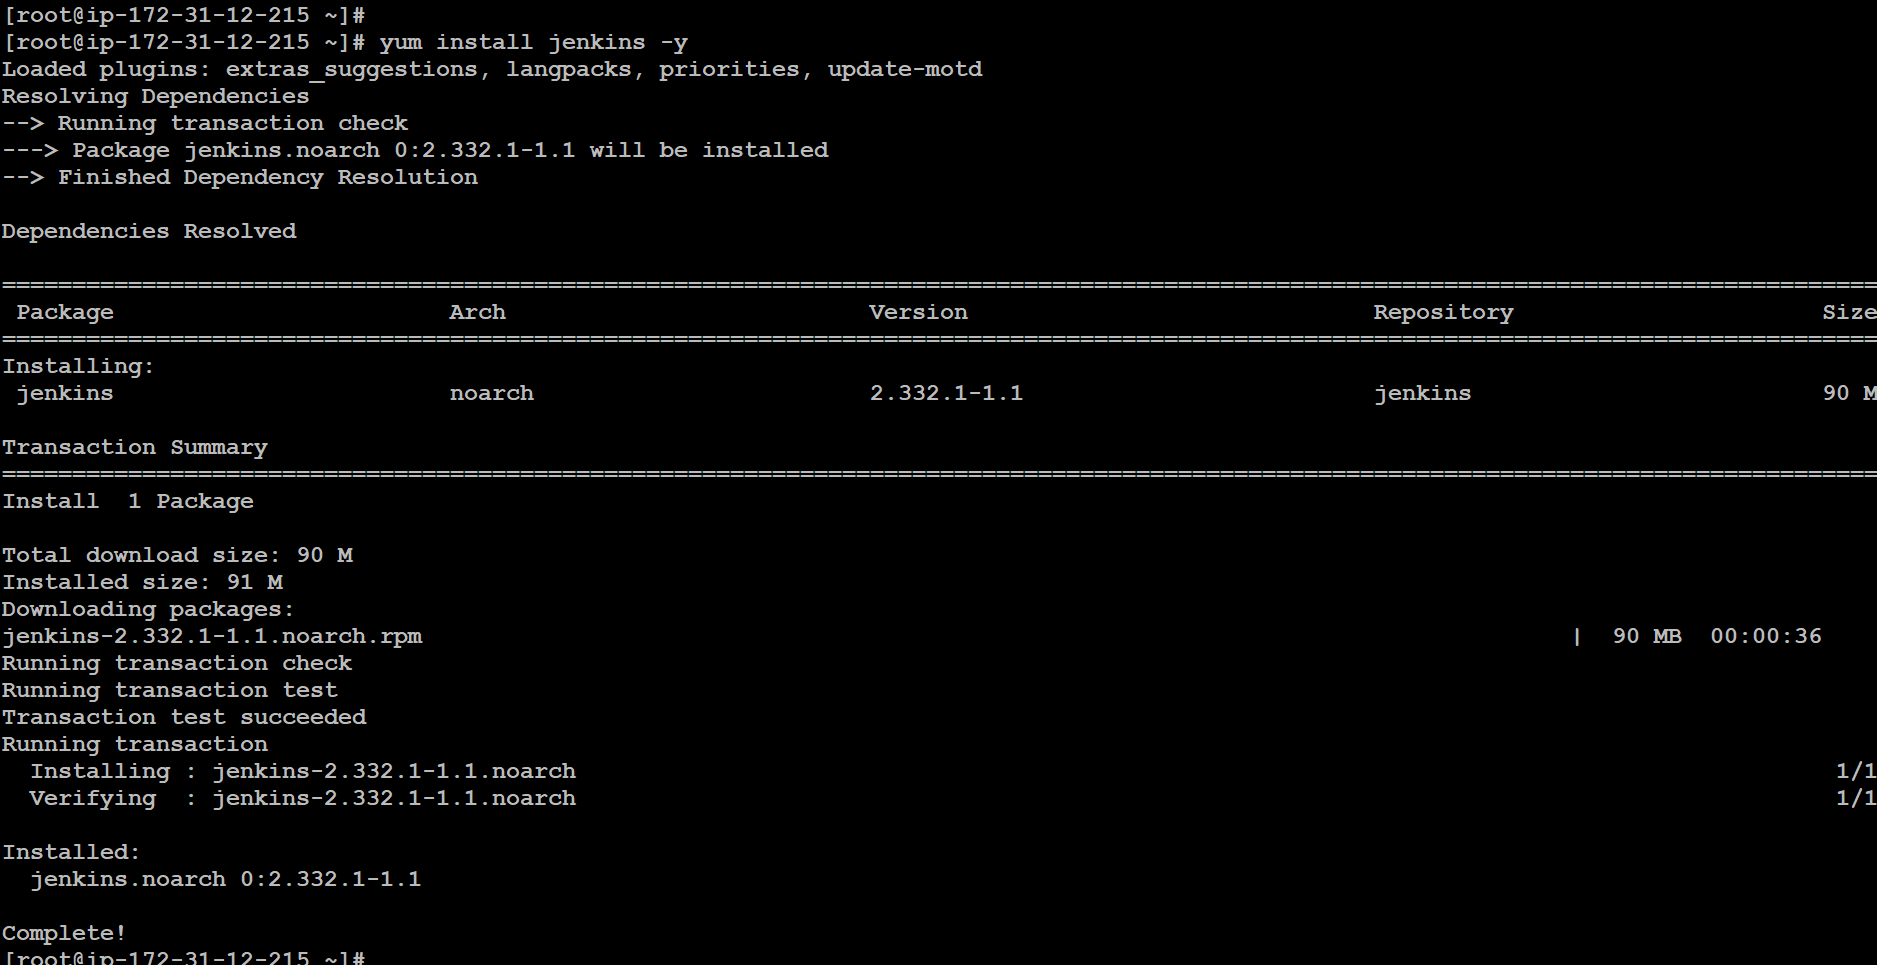
✍ Enable the Jenkins service to start at boot:
systemctl enable jenkins✍ Start Jenkins as a service:
systemctl start jenkins✍ check the status of the Jenkins service:
systemctl status jenkins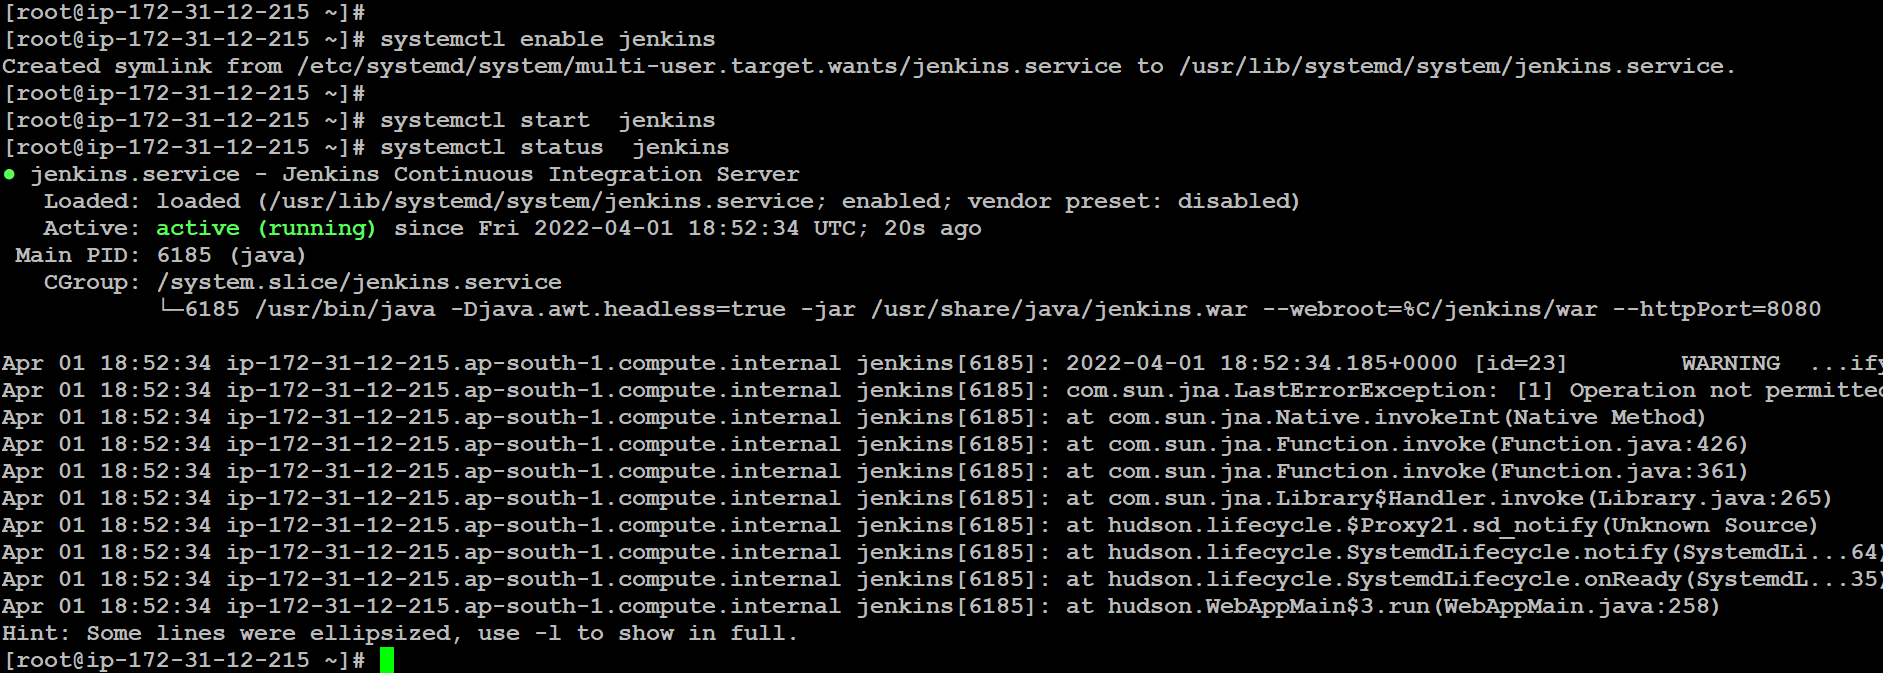
Configure Jenkins #
Jenkins is now installed and running on your EC2 instance. To configure Jenkins:
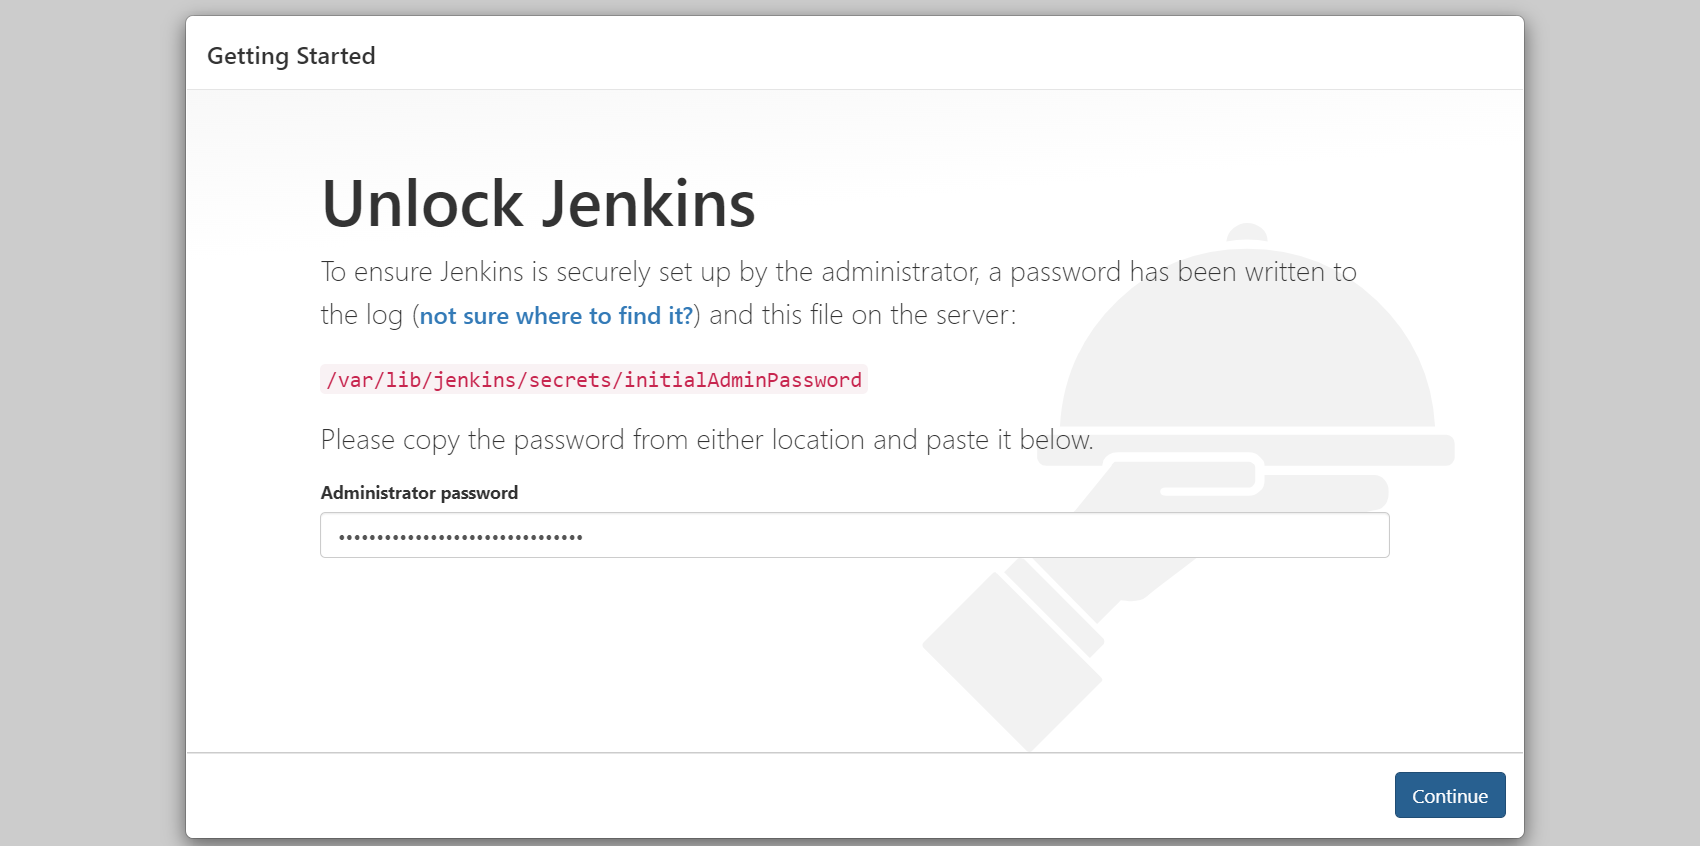
📌 Connect to http://your_server_Public_IPv4_DNS:8080 from your favorite browser. You will be able to access Jenkins through its management interface:
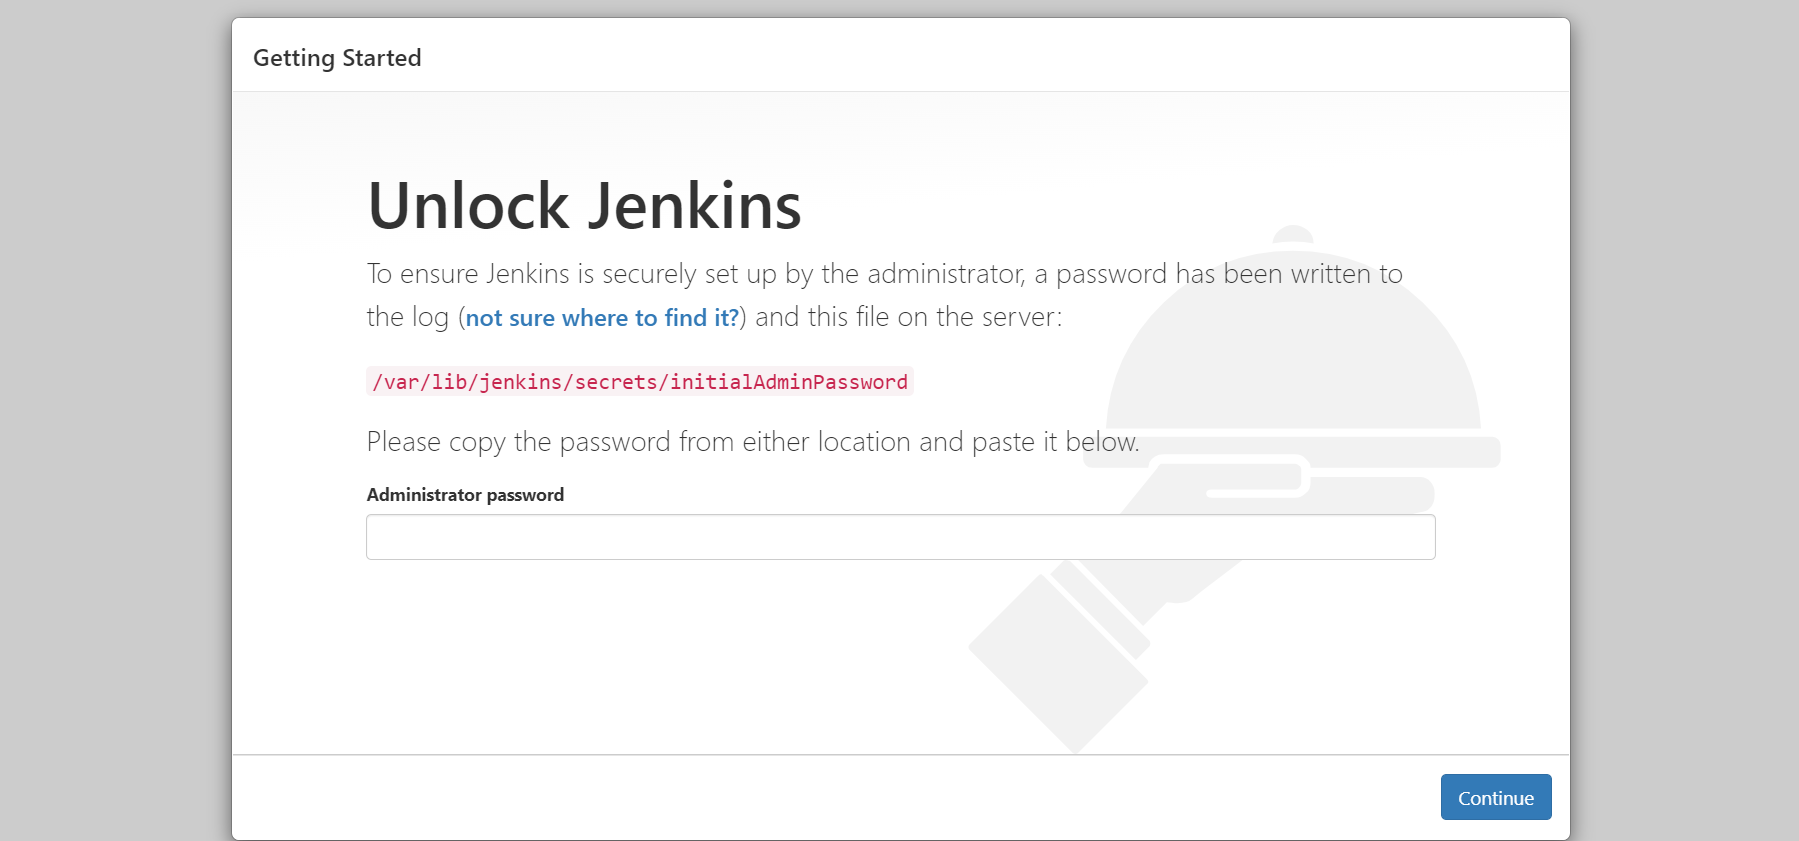
📌 Use the following command for password:
cat /var/lib/jenkins/secrets/initialAdminPassword
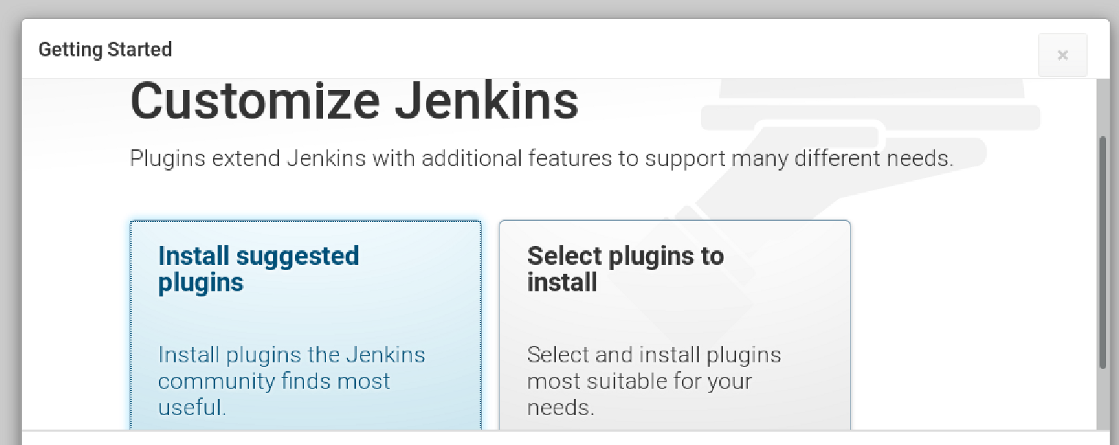
📌 Now click on the Install suggested plugins. This will automatically install the important plugins..
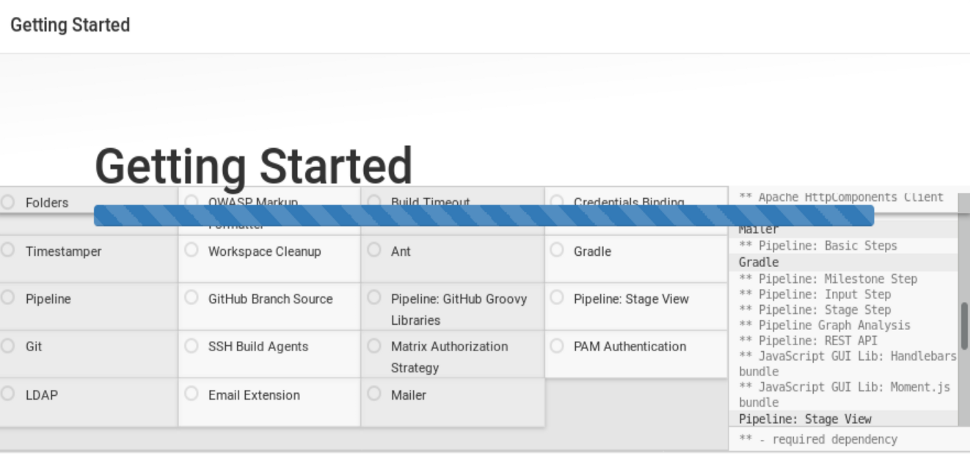
📌 We can see below👇 that plugins start downloading…..
📌 Once the installation is complete, Create First Admin User, click Save and Continue.
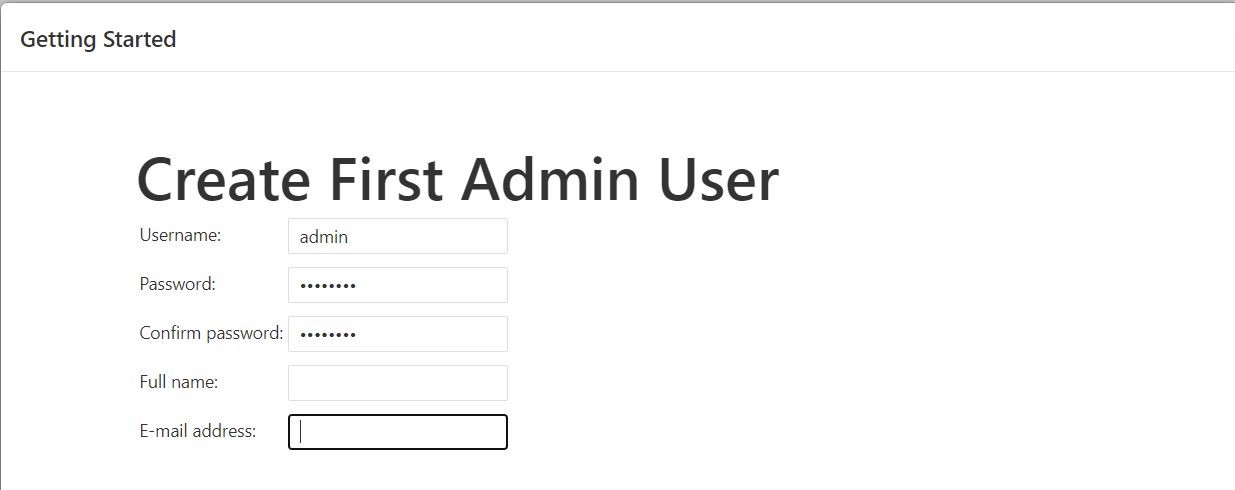
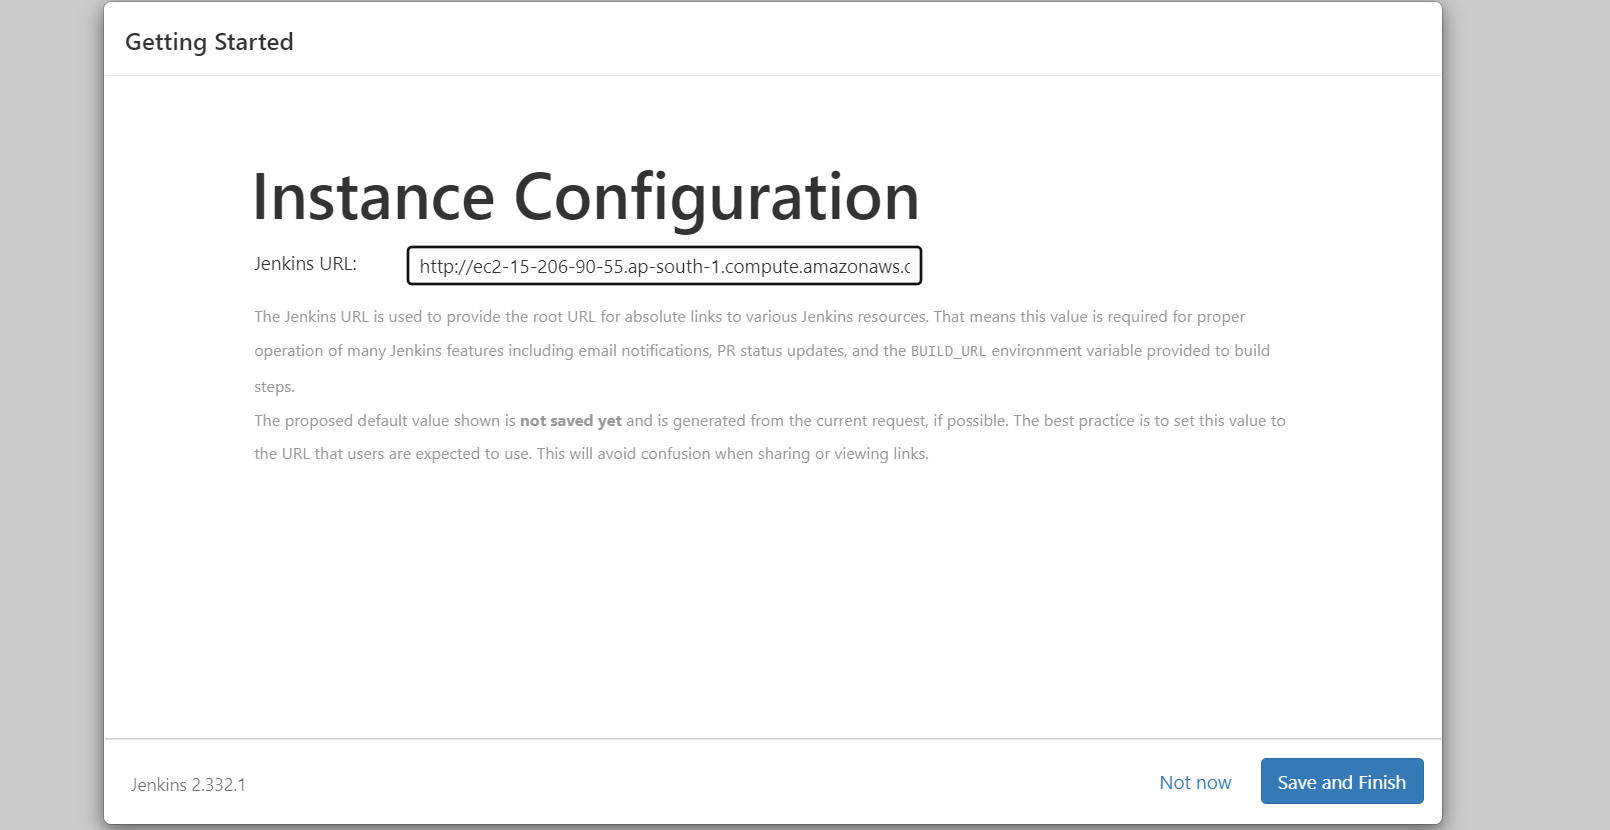
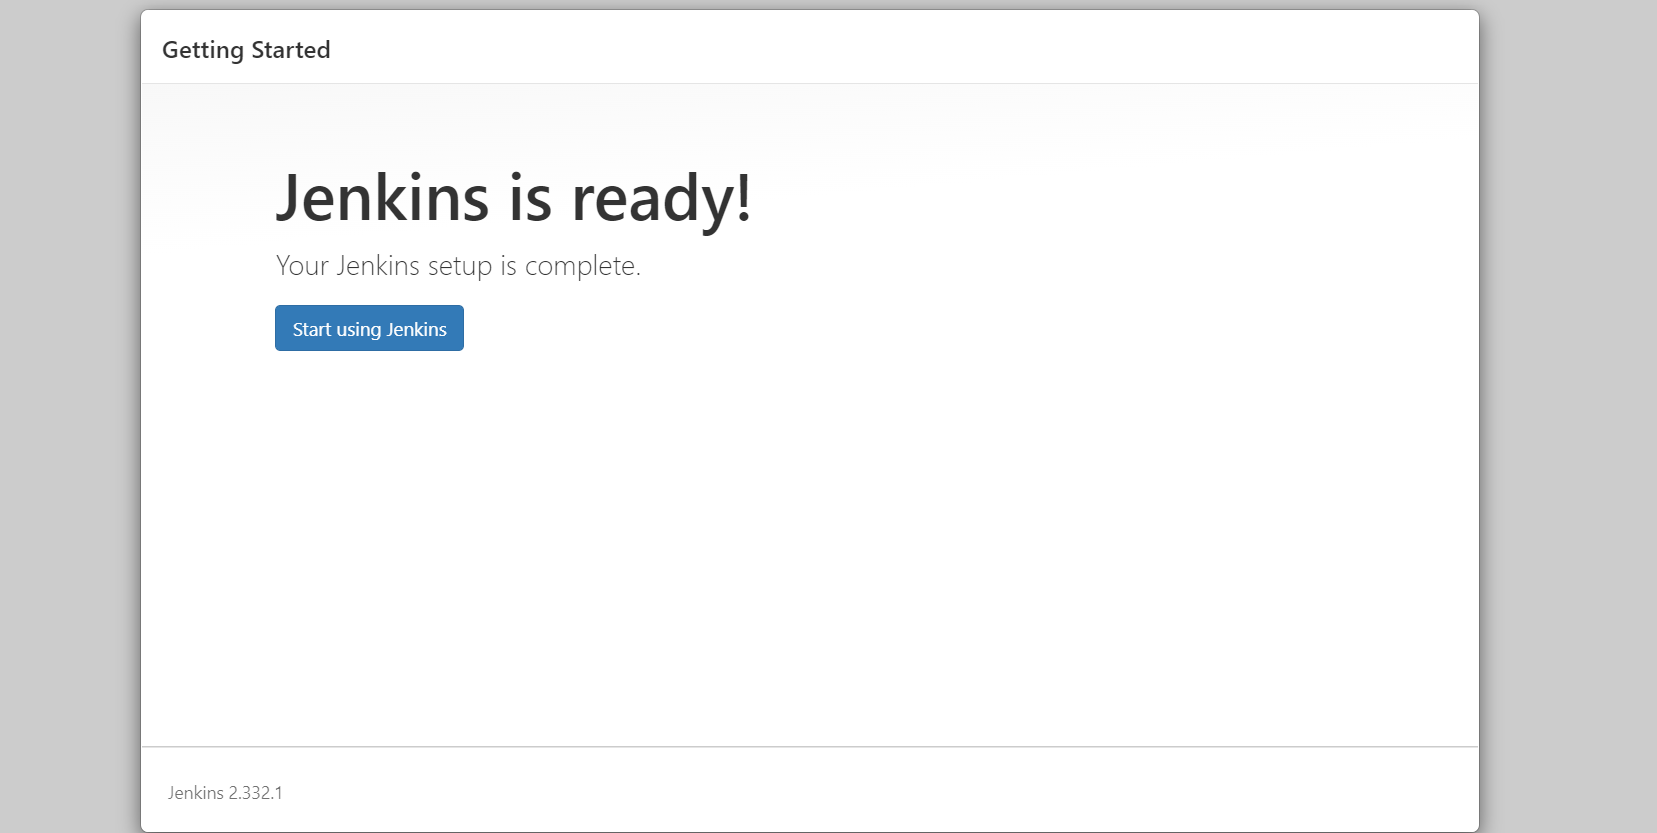
So now , jenkins is ready to use 😀✌
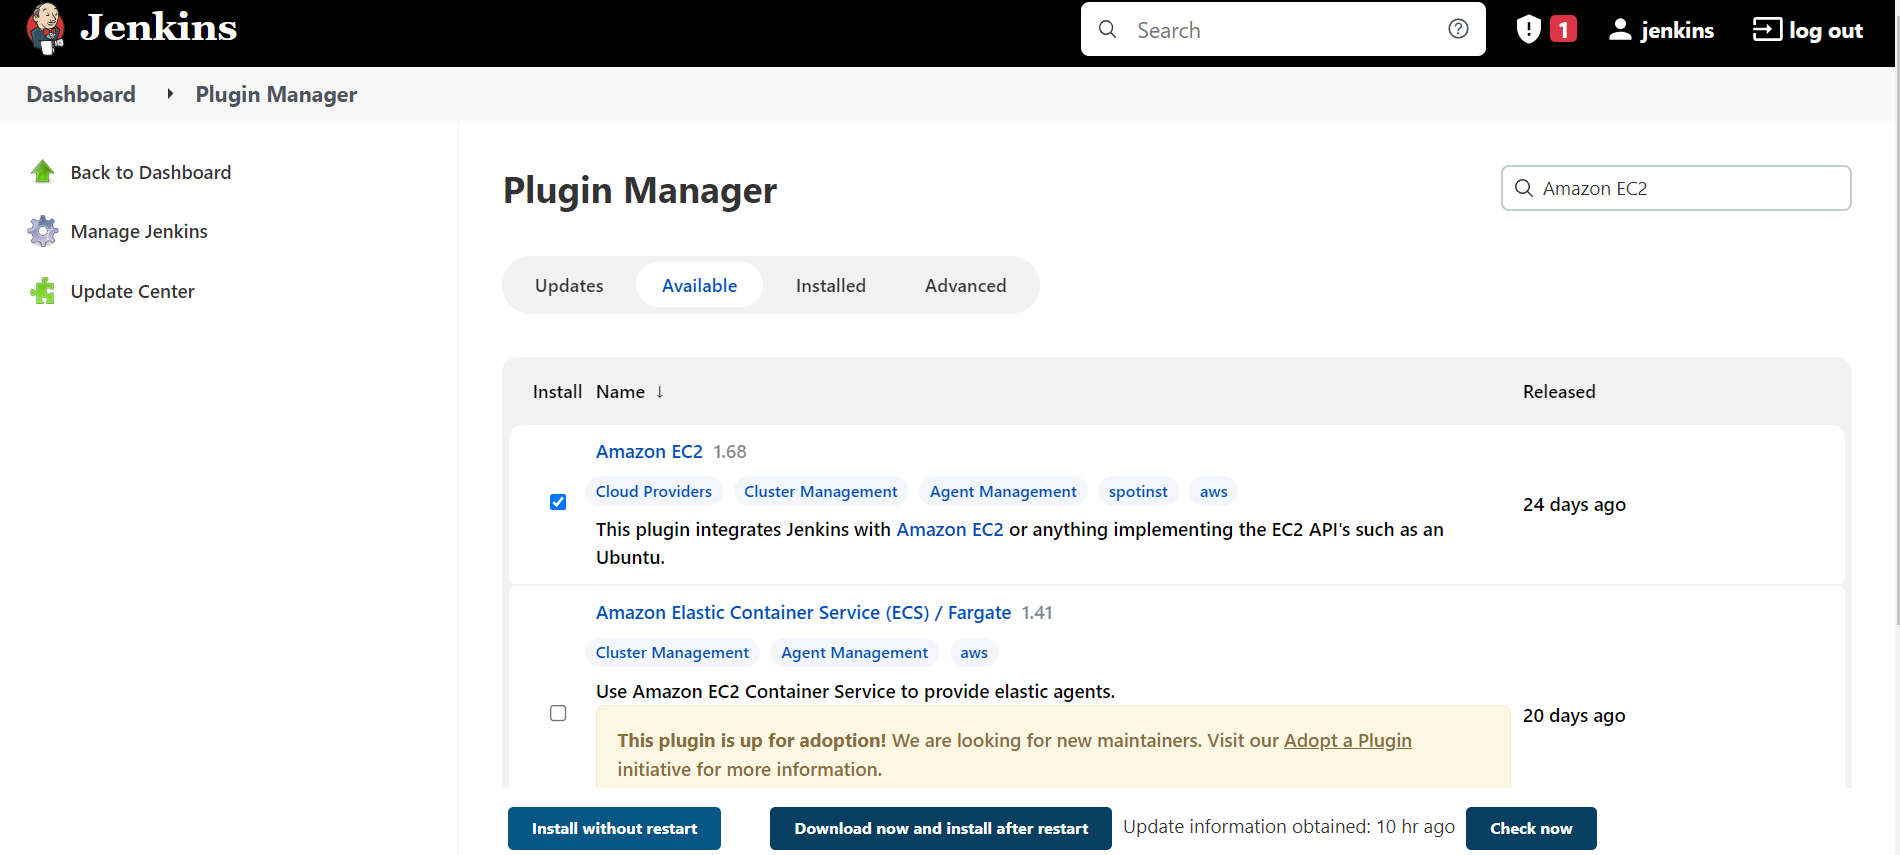
📌 On the left-hand side, click Manage Jenkins, and then click Manage Plugins. Click on the Available tab, and then enter Amazon EC2 plugin at the top right. Select the checkbox next to Amazon EC2 plugin, and then click Install without restart.
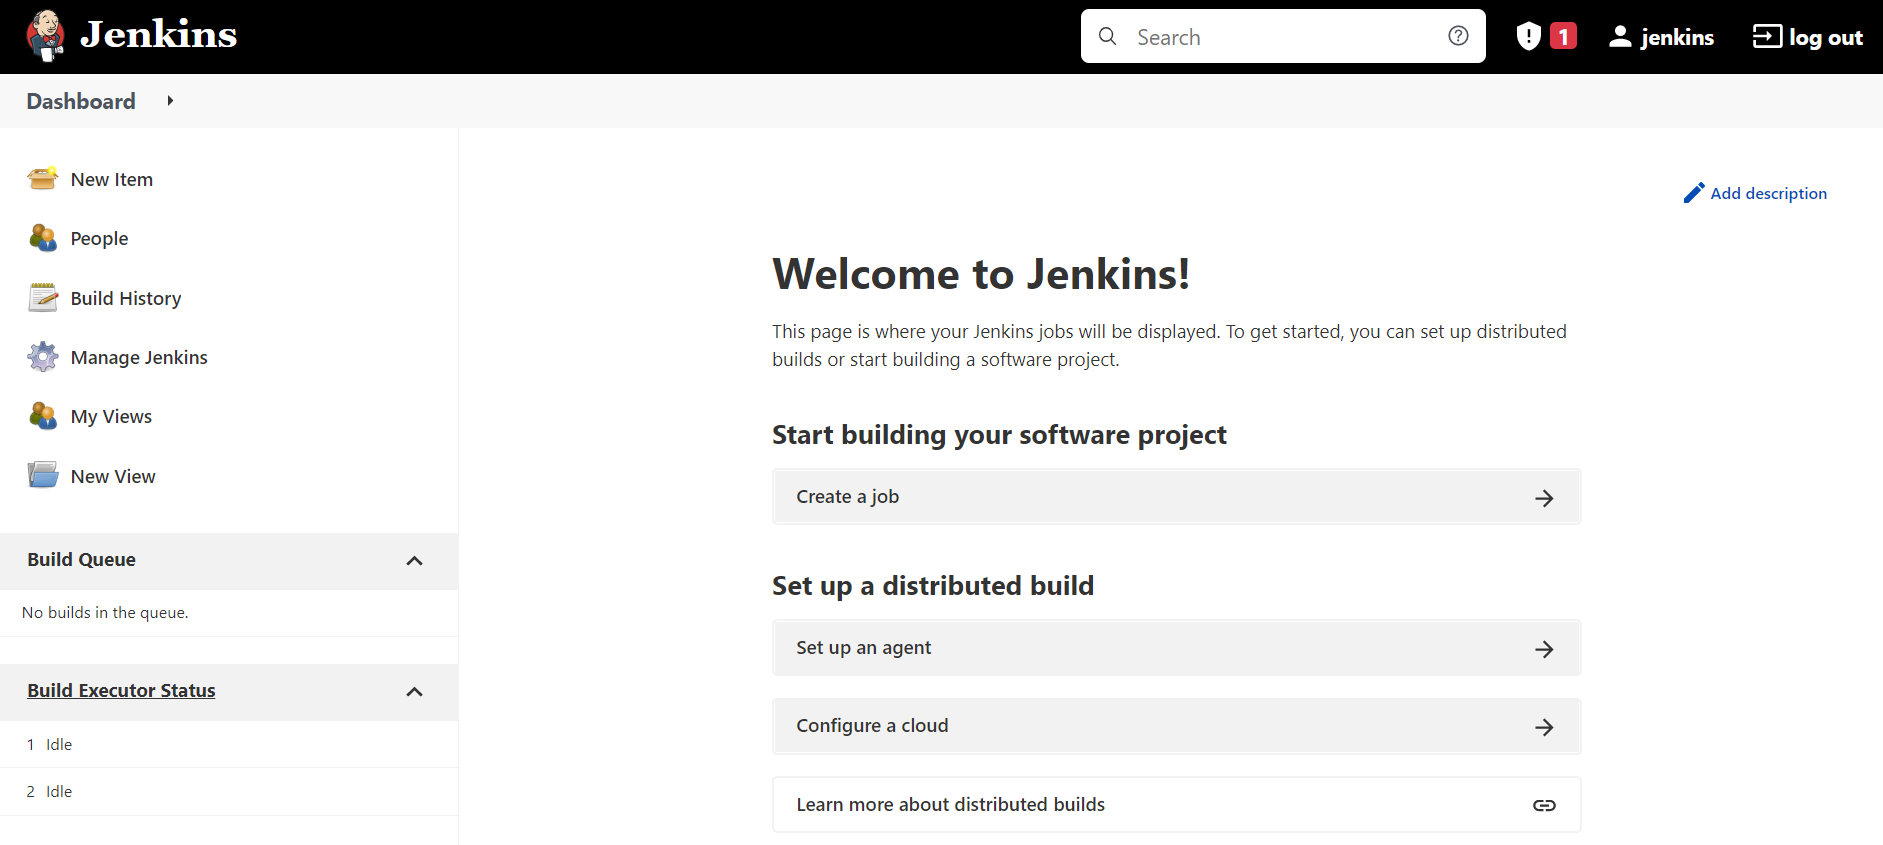
Now , Let's run a simple job 🤩 #
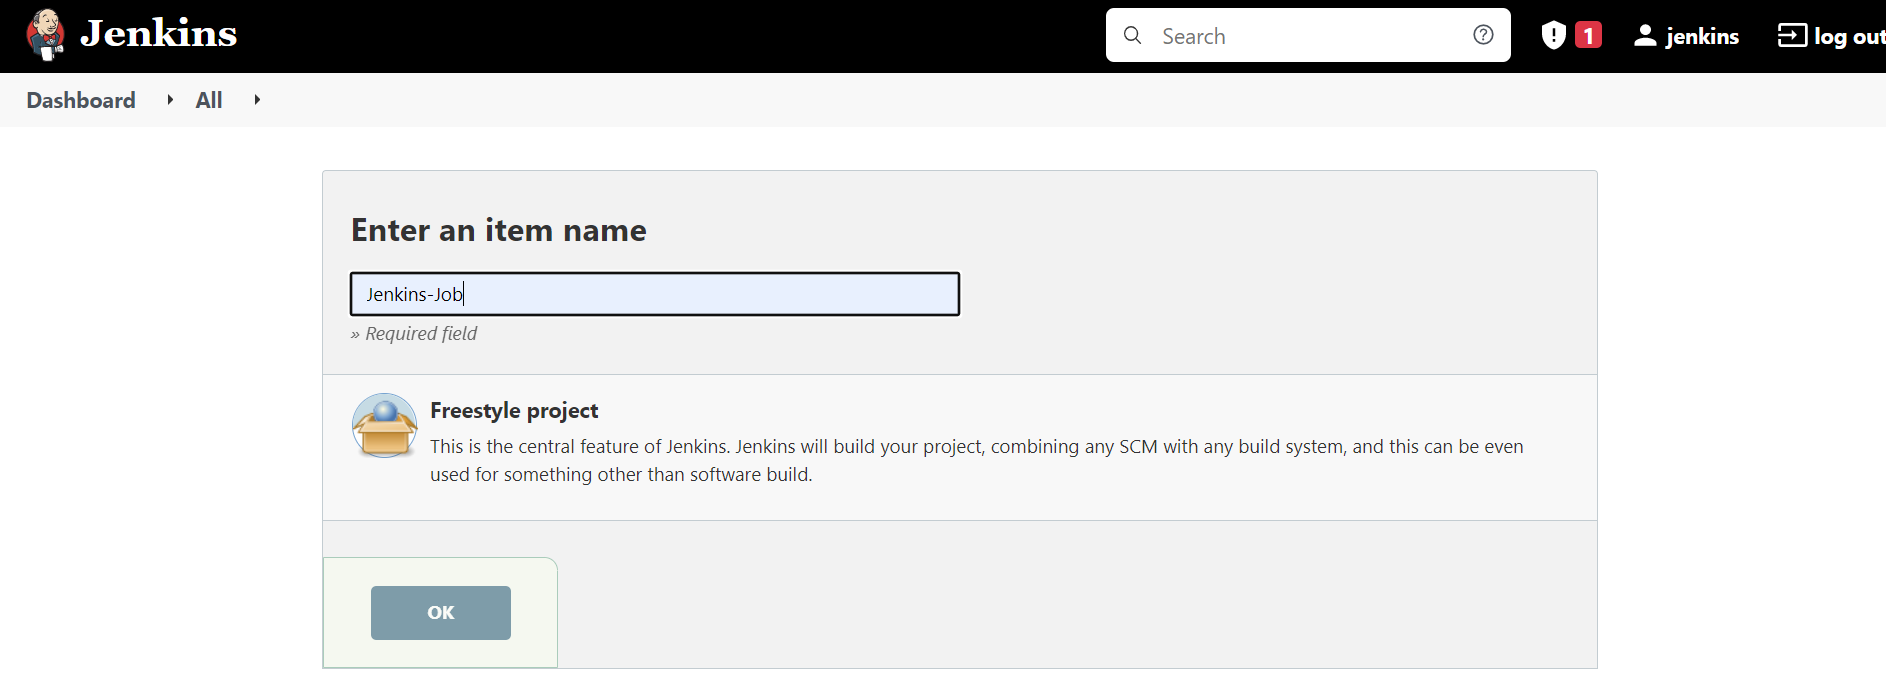
👉 Click on New Item at the top left-hand side of your dashboard.
👉 Enter Item details
- Enter the name of the item you want to create.
- Select Freestyle project
- Click Okay
👉 In Build Environment section, select Execute shell and write a simple command.
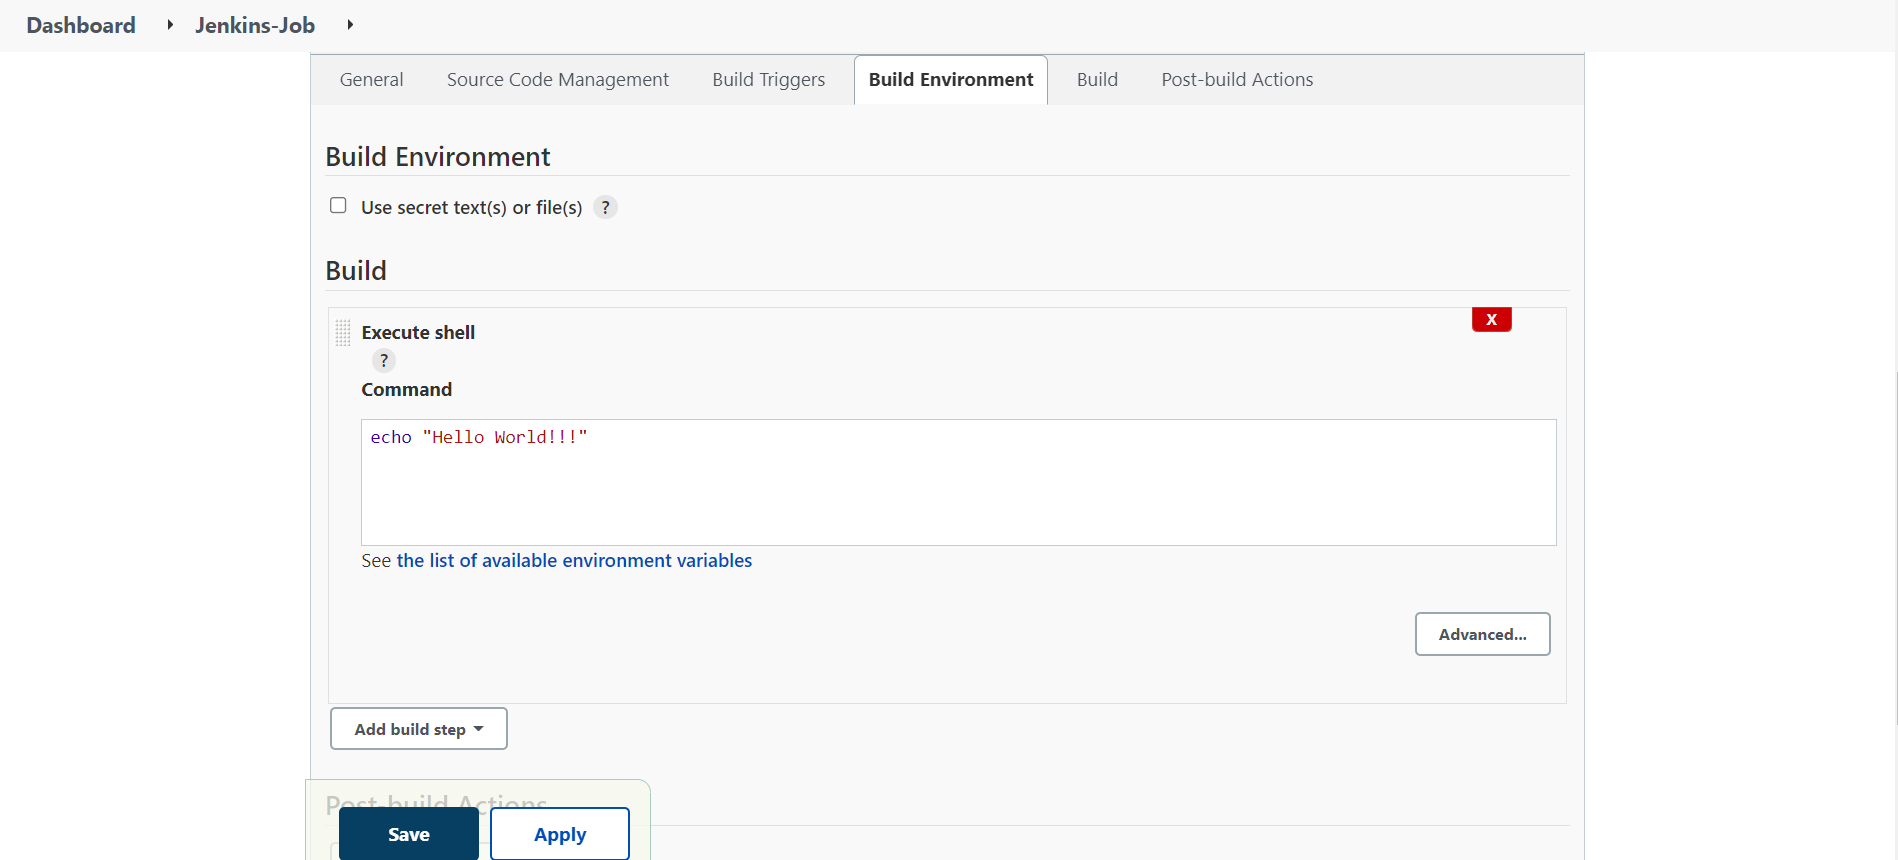
👉 Save the project
- Click Apply
- Save the project.
👉 Build Source code
Now, in the main screen, Click the Build Now button on the left-hand side to build the source code.
👉 See the console output
Click on the build number and then Click on console output to see the status of the build you run. It should show you a success message.

So , our job is successfully done 😀
I hope this blog will help you all in understanding Jenkins.
THANKS FOR READING !!
🔰KEEP LEARNING !! KEEP SHARING 🧾🔰
I am a junior pursuing my bachelor's in Computer Science and Engineering. I'm a Cloud and Devops enthusiast.
Get new posts in your inbox.
Spotted a typo or want to improve this post? Edit on GitHub →