Speeding up using MicroK8s
MicroK8s is a lightweight Kubernetes distribution that is designed to run on local systems. It is the smallest and fastest multi-node Kubernetes . It is…

What is MicroK8s? #
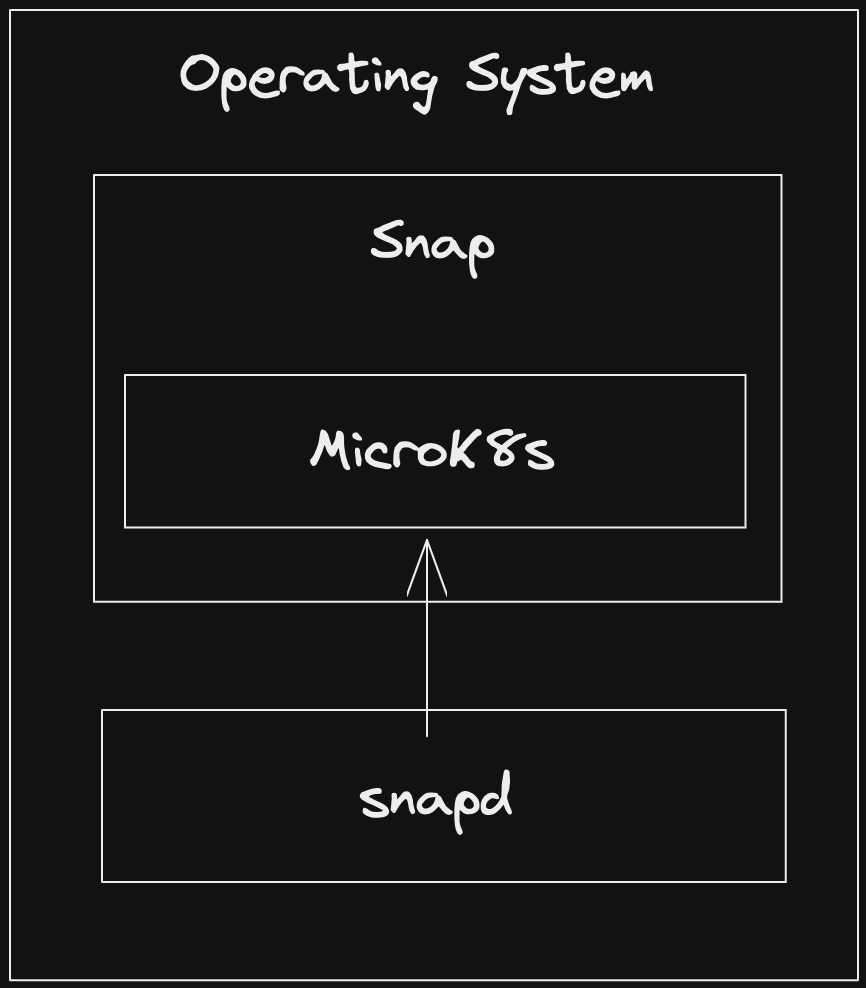
MicroK8s is a lightweight Kubernetes distribution that is designed to run on local systems. It is the smallest and fastest multi-node Kubernetes. It is lightweight and easy to set up, which helps in decreasing the complexity of management, deployment, and scaling of containerized applications, which further helps in the smooth transition to Kubernetes. It is available as a snap and runs on Linux, macOS, and Windows using multipass.
MicroK8s is an upstream Kubernetes deployment that is CNCF-certified and operates fully on our workstation. It can quickly build up a single-node cluster and works well with local development, IoT appliances, CI/CD, and at the edge because it employs snap packing, it is also capable of automatic updates, which means that once a new Kubernetes version is available on the main deployment, it will immediately update itself to the most recent version.
Benefits of MicroK8s #
Apart from being fast, it has various other functionalities to look at before choosing any other distribution.
-
Do not require VM - MicroK8s was originally intended for Linux and does not require a virtual machine to execute. Instead, it is installed as a snap package.
-
Diverse integrations and resources - MicroK8s is ideal for edge deployments since it doesn't need a virtual machine (VM) and has more resources at its disposal to run applications.
-
Isolated Environment - As MicroK8s is a Zero-ops, pure-upstream Kubernetes,
from developer workstations to production it provides an isolated and secure development environment fundamental to the Operating System. -
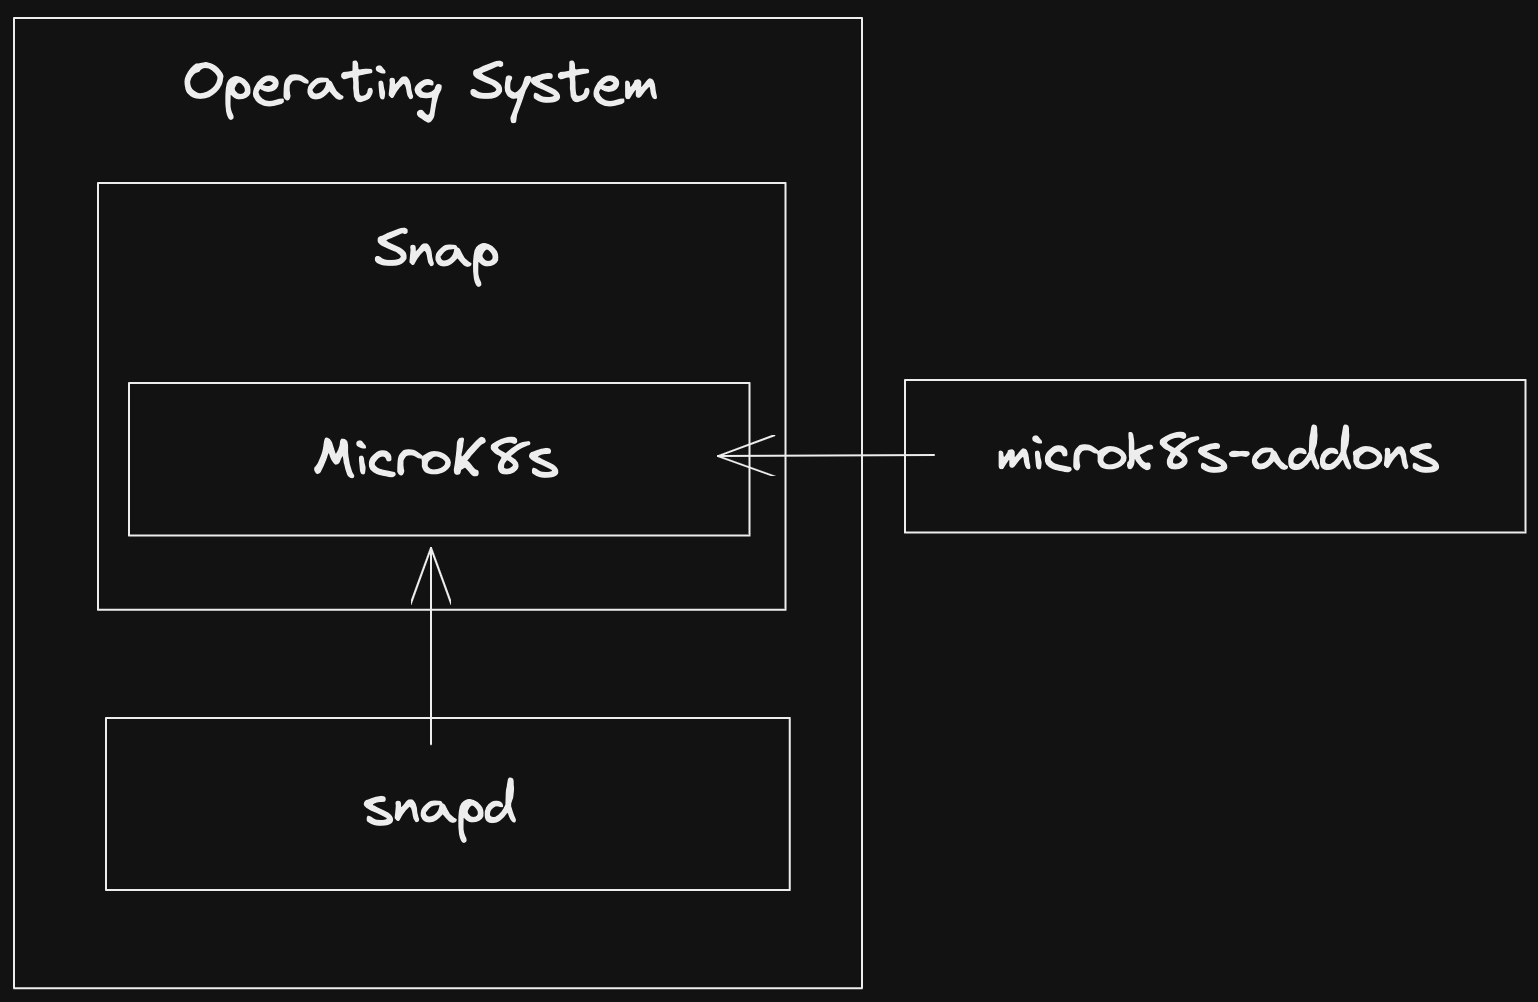
High-Level addons - Initially there are various services provided by MicroK8s such as - kube-proxy, kubelet, api-server, and so on. Users can add more services as per their needs, to view the list of all the add-ons click here.
-
High Availability(HA) Support - In MicroK8s when three or more nodes are clustered, high availability is immediately activated, and the data store automatically switches between nodes to preserve a secret in the case of a failure. When a node is lost, HA MicroK8s can continue to offer reliable services, and lower production needs with a minimum of overhead and important work.
-
Lightweight - As said earlier it does not need to spin a VM containing all the services which might not even be used making the process faster and lighter. MicroK8s initially provides only the required services to run a single-node cluster in your local system using snap and multipass which make it lighter.
-
A vast variety of fields - MicroK8s may be utilized in a variety of technologies, including DevOps, AI/ML, CI/CD, and others. When compared to other options, all of the aforementioned fields require a significant amount of effort to configure, however MicroK8s simplifies the process and provides significant resource savings.
Some valuable Addons #
AFTER INSTALLING AND RUNNING MICROK8S, RUN THE FOLLOWING CODE IN YOUR TERMINAL TO ENABLE ANY ADDON:
microk8s enable <addon name>The following are the most crucial or often used MicroK8s additions for setting up a production-level environment:
-
cert-manager - Certificate controller for Kubernetes clusters.
microk8s enable cert-manager -
CoreDNS - To provide address resolution services to Kubernetes, CoreDNS is deployed. It is advised that you activate this service because other add-ons frequently use it.
microk8s enable dns -
dashboard - The default Kubernetes Dashboard.
microk8s enable dashboard -
ingress - This addon adds an NGINX Ingress Controller for MicroK8s.
microk8s enable ingress -
community - This enables the addition of several add-ons created by third parties and the community such as - portainer, istio, argued and so on.
microk8s enable community
Installation #
- STEP-1 - Installing MicroK8s:
-
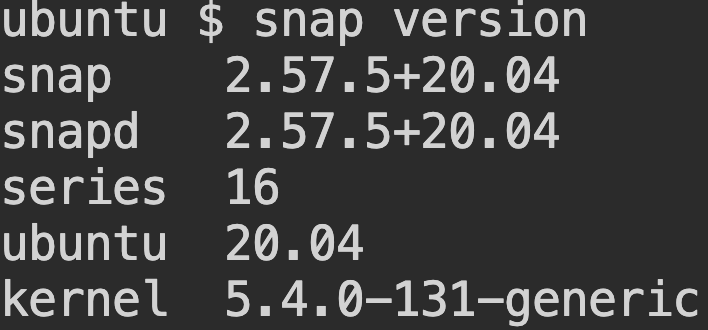
Linux - In Linux, MicroK8s is installed with the help of snap. Check if your system contains snap or not by running the below-given command:
snap versionIt should display these details if present in your system and if you get an error install snap in your local system to install MicroK8s:
If you have snap installed run the below command in your terminal to install MicroK8s in your local system:
sudo snap install microk8s --classicIt should take a while and you should get this output in your terminal:

MicroK8s is successfully installed in your system!!
-
macOS - In macOS, MicorK8s is installed with the help of Homebrew. If you don't have Homebrew installed do install it in your local system and after that run the below command in your terminal to install MicroK8s:
brew install ubuntu/microk8s/microk8sThis can take a few minutes and at the end of the process it should display:

After this execute the below command in your terminal and again this might also take a while:
microk8s installWait until you get this displayed on your terminal screen:

-
Windows - In windows simply run the MicroK8s Installer.
-
STEP-2 - Check the MicroK8s status:
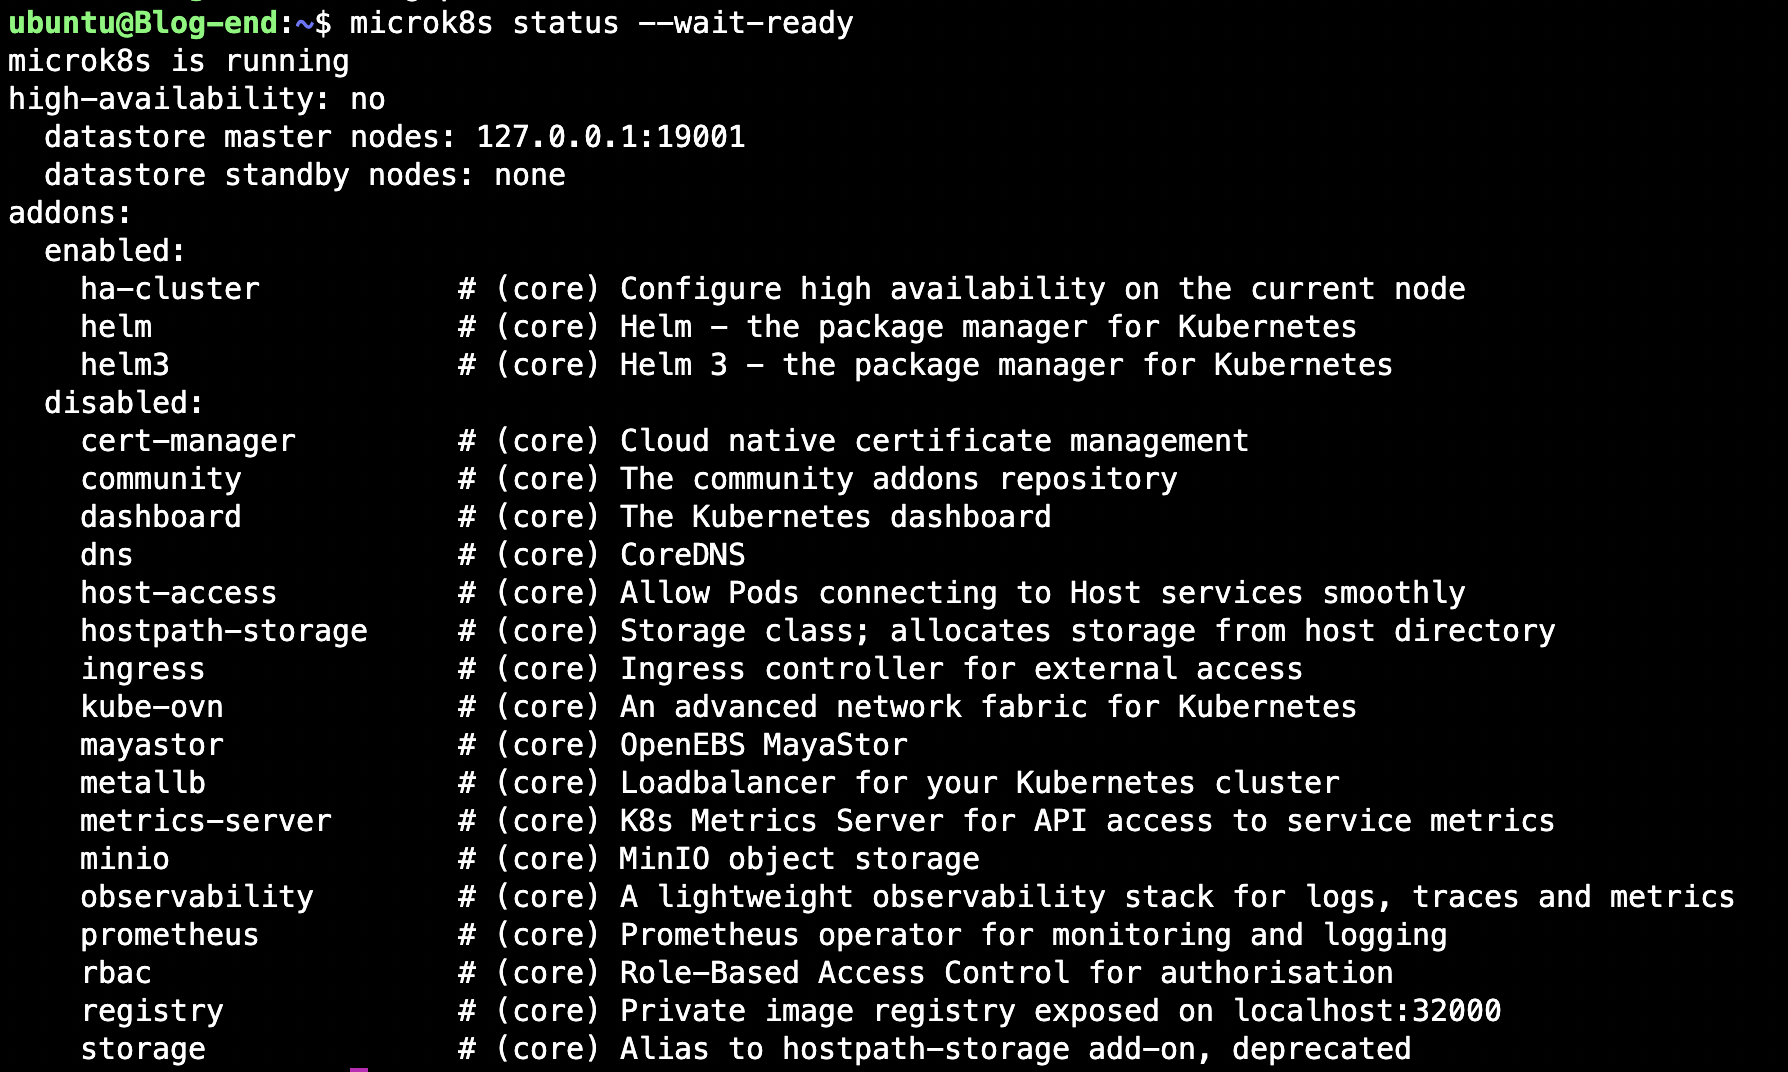
Run the below command in your terminal to check if MicroK8s is running:
microk8s status --wait-readyThe result on the terminal should be:
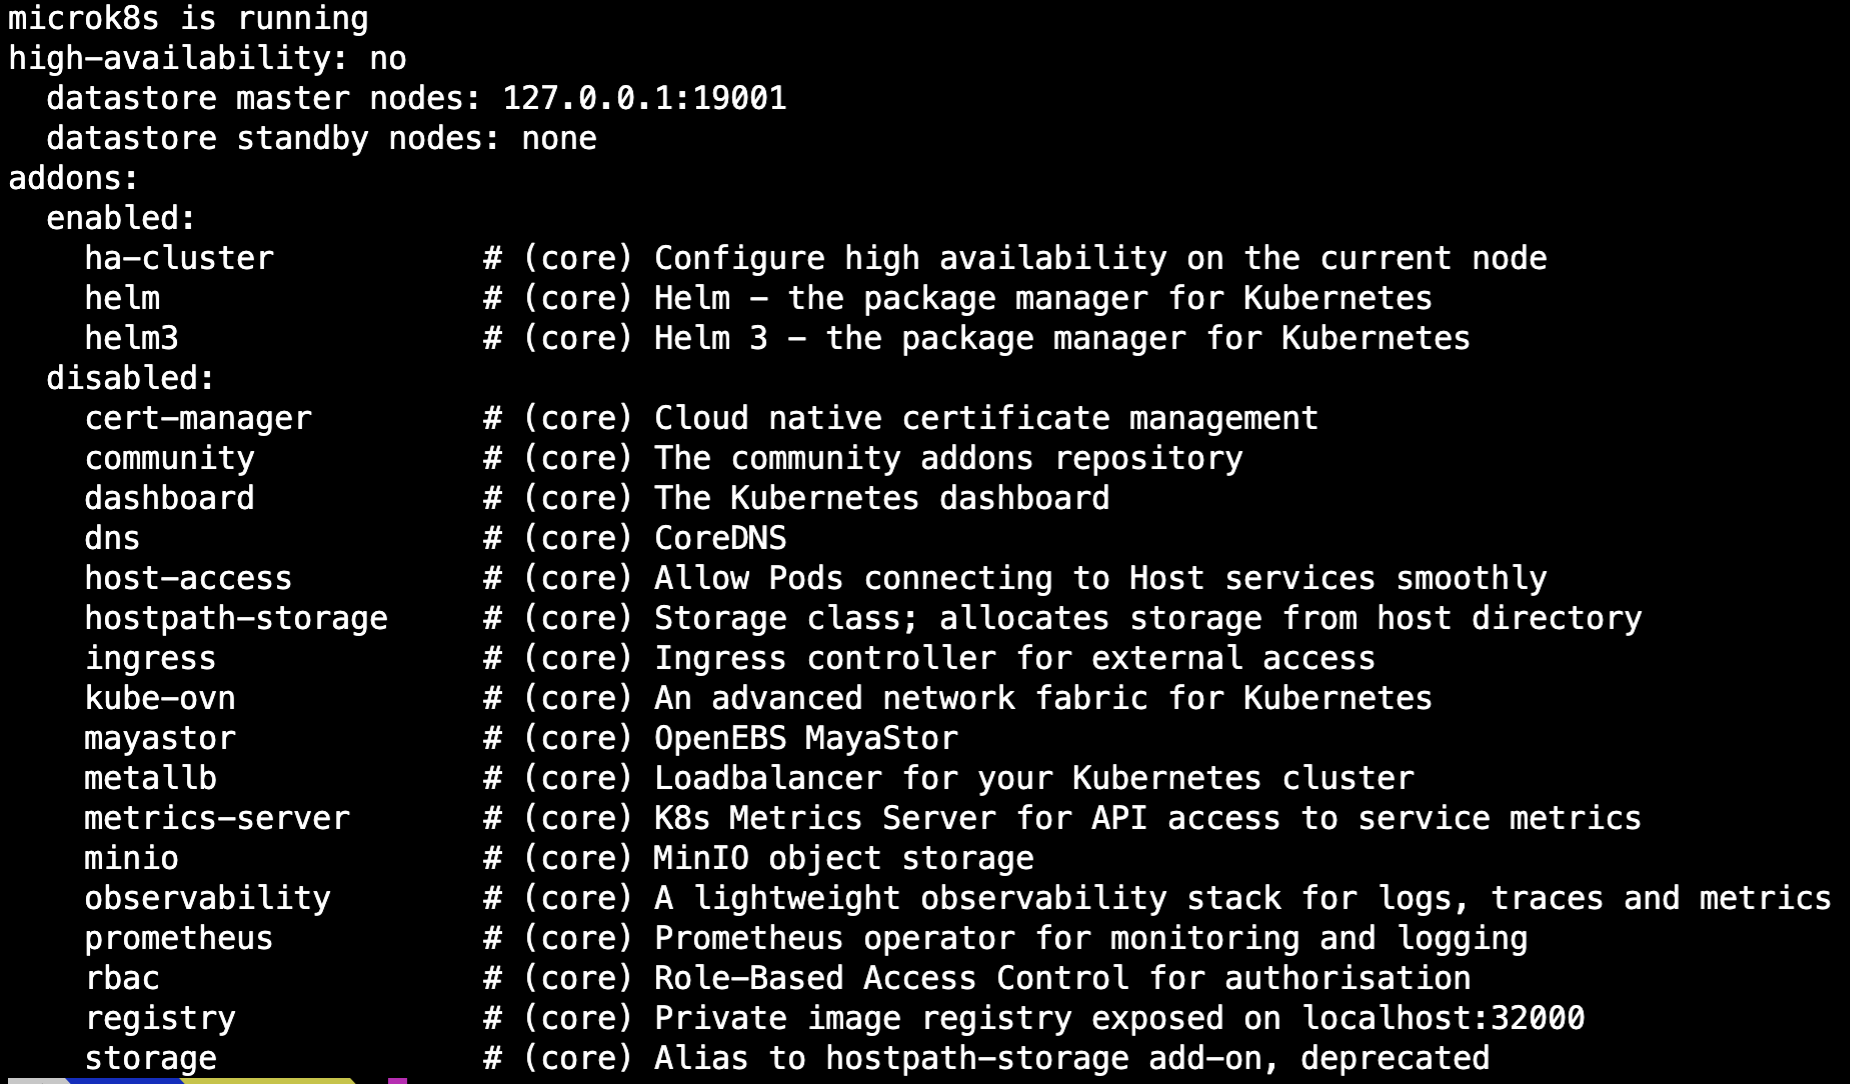
That's it MicroK8s is up and running in your local system!!
Kubernetes Dashboard #
After completing the installation steps, let's check the node's status by running the below command:
microk8s kubectl get nodes
I have one default "microk8s-vm" node running. Let's enable some of the important services before creating the dashboard:
microk8s enable dashboard dns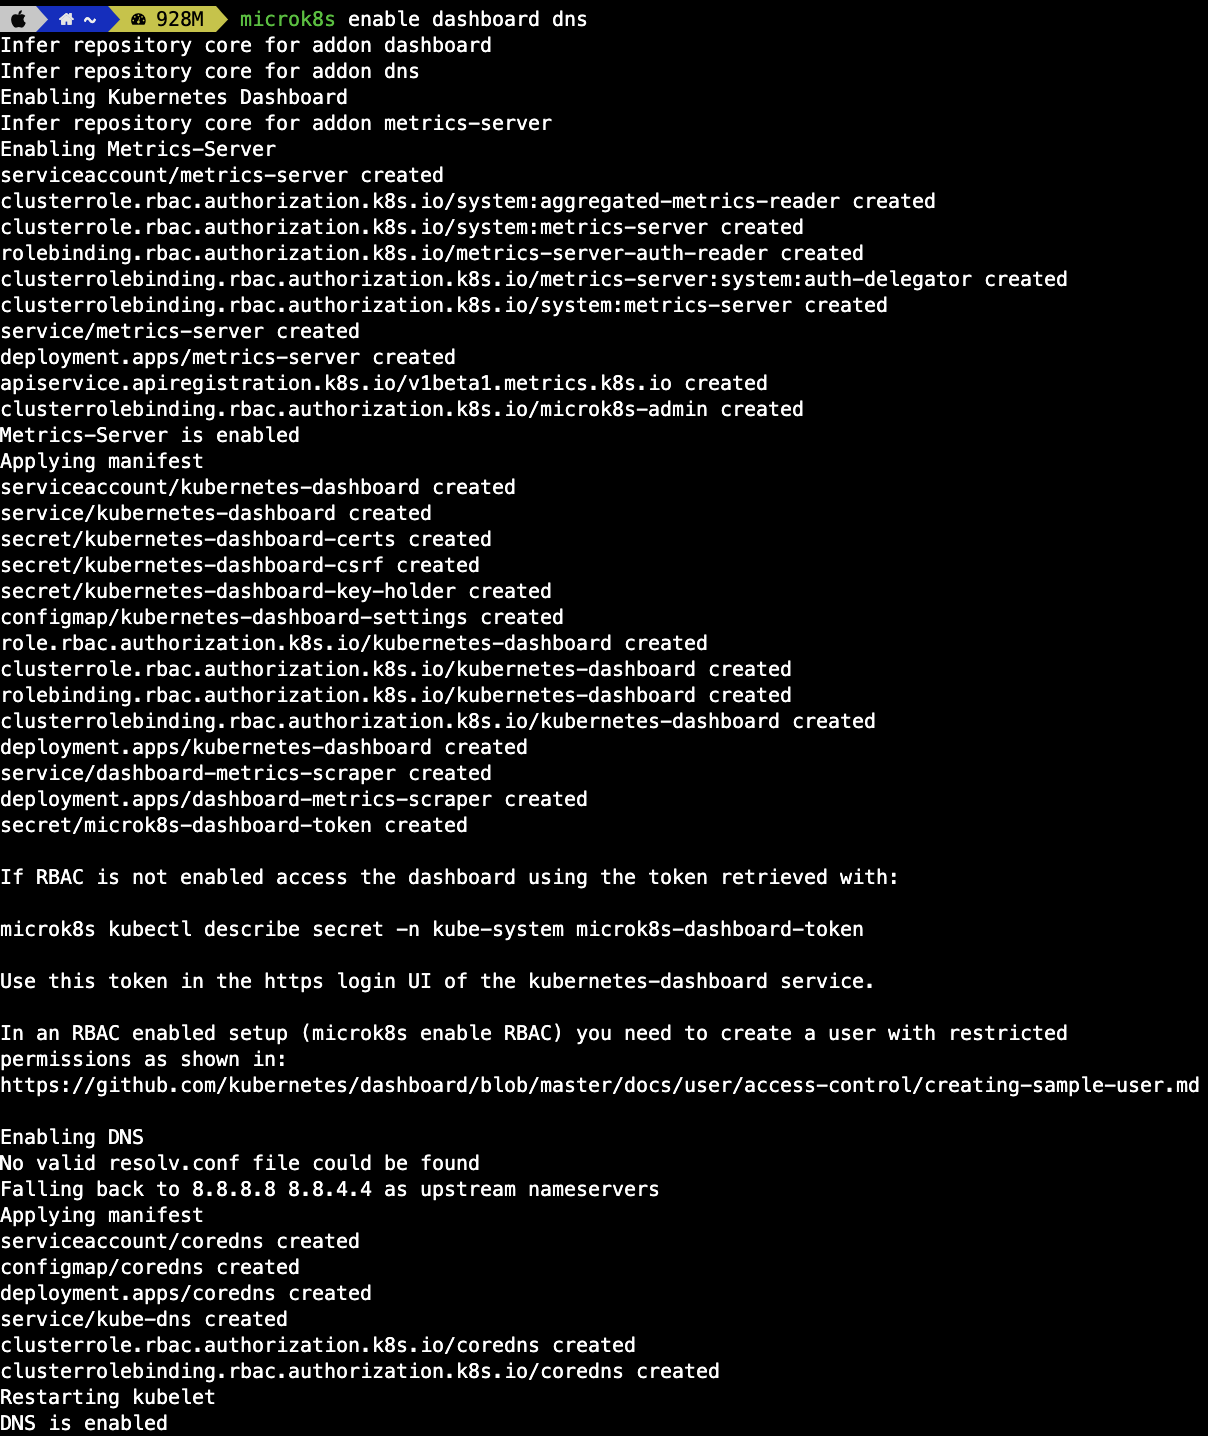
To double-check all the services that are running, enter the below command in your terminal:
microk8s kubectl get all --all-namespaces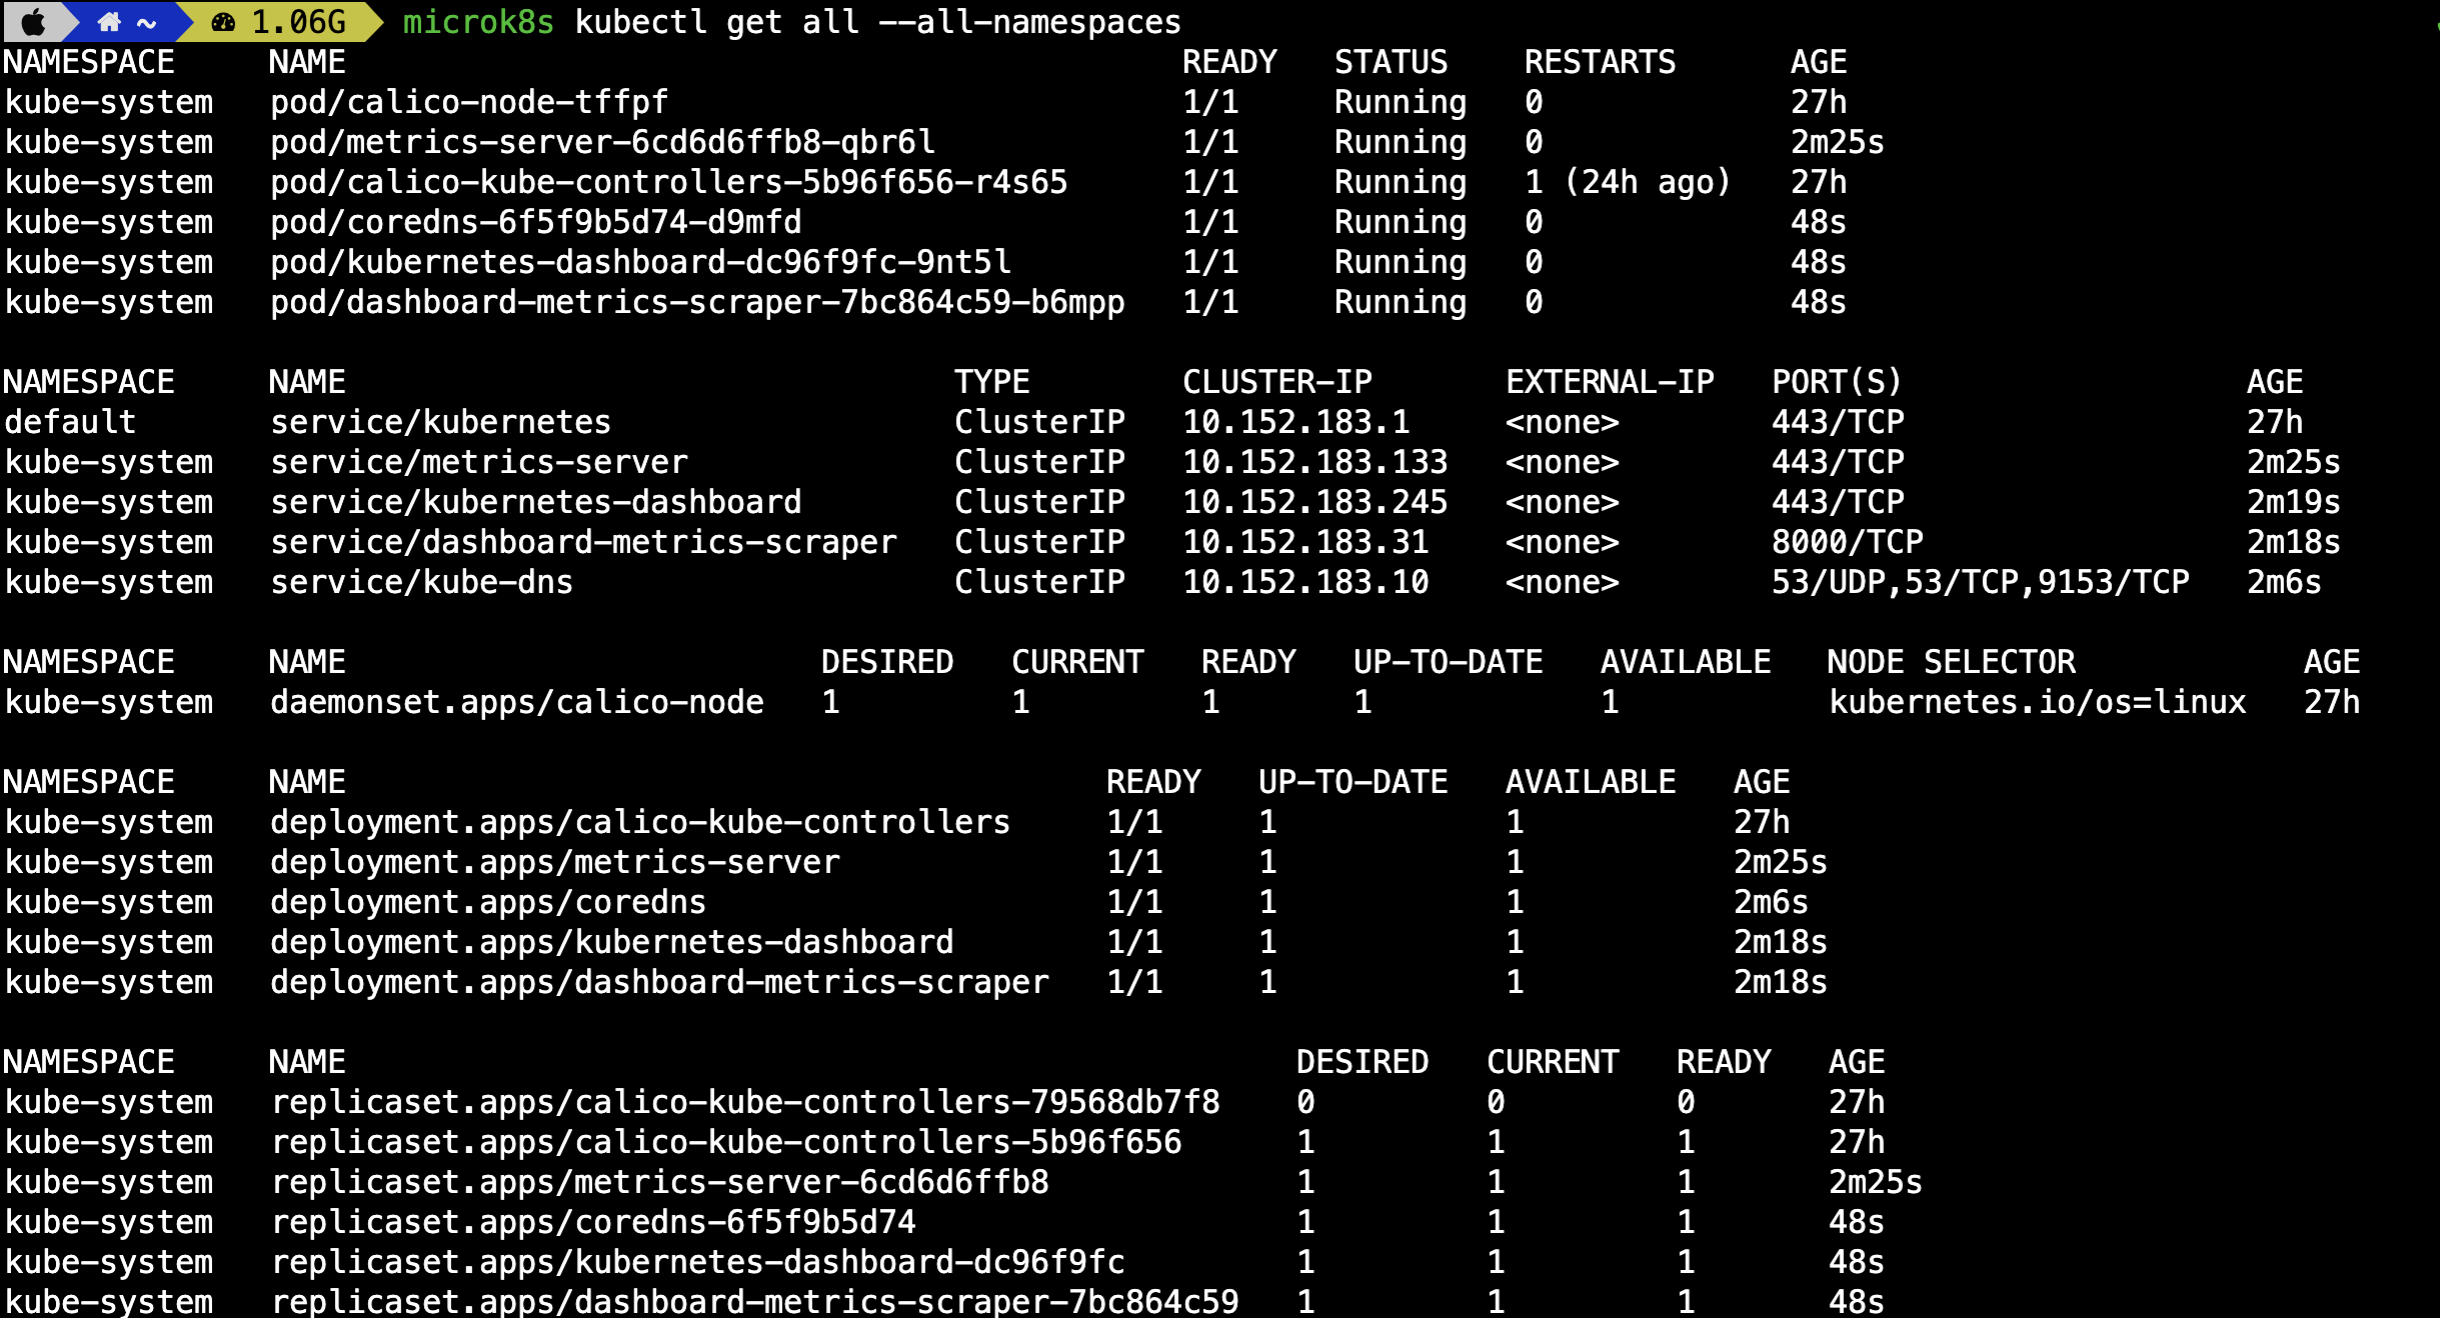
Finally, create the dashboard using:
microk8s dashboard-proxyVisit the link where the dashboard is available and enter the token displayed in your terminal to access the Kubernetes Dashboard.

Multi-node Setup #
After completing the installation steps to run a multi-node cluster, let us first create two VMs using the multipass command:
multipass launch --name <vm-name> --mem 4G --disk 40GIn the above command, the "--name" is used to name the VM, the "-mem" flag is used to specify memory, and the "-disk" is used to allocate the disk storage for the VM.


In the above two images, I have launched two VMs named "Blog" and "Blog-end".
To check the list of nodes running, enter the below command in your terminal:
multipass list
After this, shell into both the VMs using the command:
multipass shell <vm name>

Tip: Split your terminal window, which will help you avoid confusion while setting up the multi-node cluster.
Following that, install MicroK8s on both VMs separately using:
sudo snap install microk8s --classic

On completing the installation, run the below command to check the status of MicroK8s:
microk8s status --wait-readyIf you get the below error:

Check if you have the ".kube" directory in your VM by running:

As we see in the above directory list ".kube" directory is absent so create one with the help of the below command:
mkdir .kube
Now the ".kube" directory is created after this just copy and paste the suggested command into the terminal
sudo usermod -a -G microk8s ubuntu
sudo chown -R ubuntu ~/.kube

Following the process make a new group of microk8s using the below command:
newgrp microk8sAfter completing these steps check again if MicroK8s is running or not by using:
microk8s status --wait-ready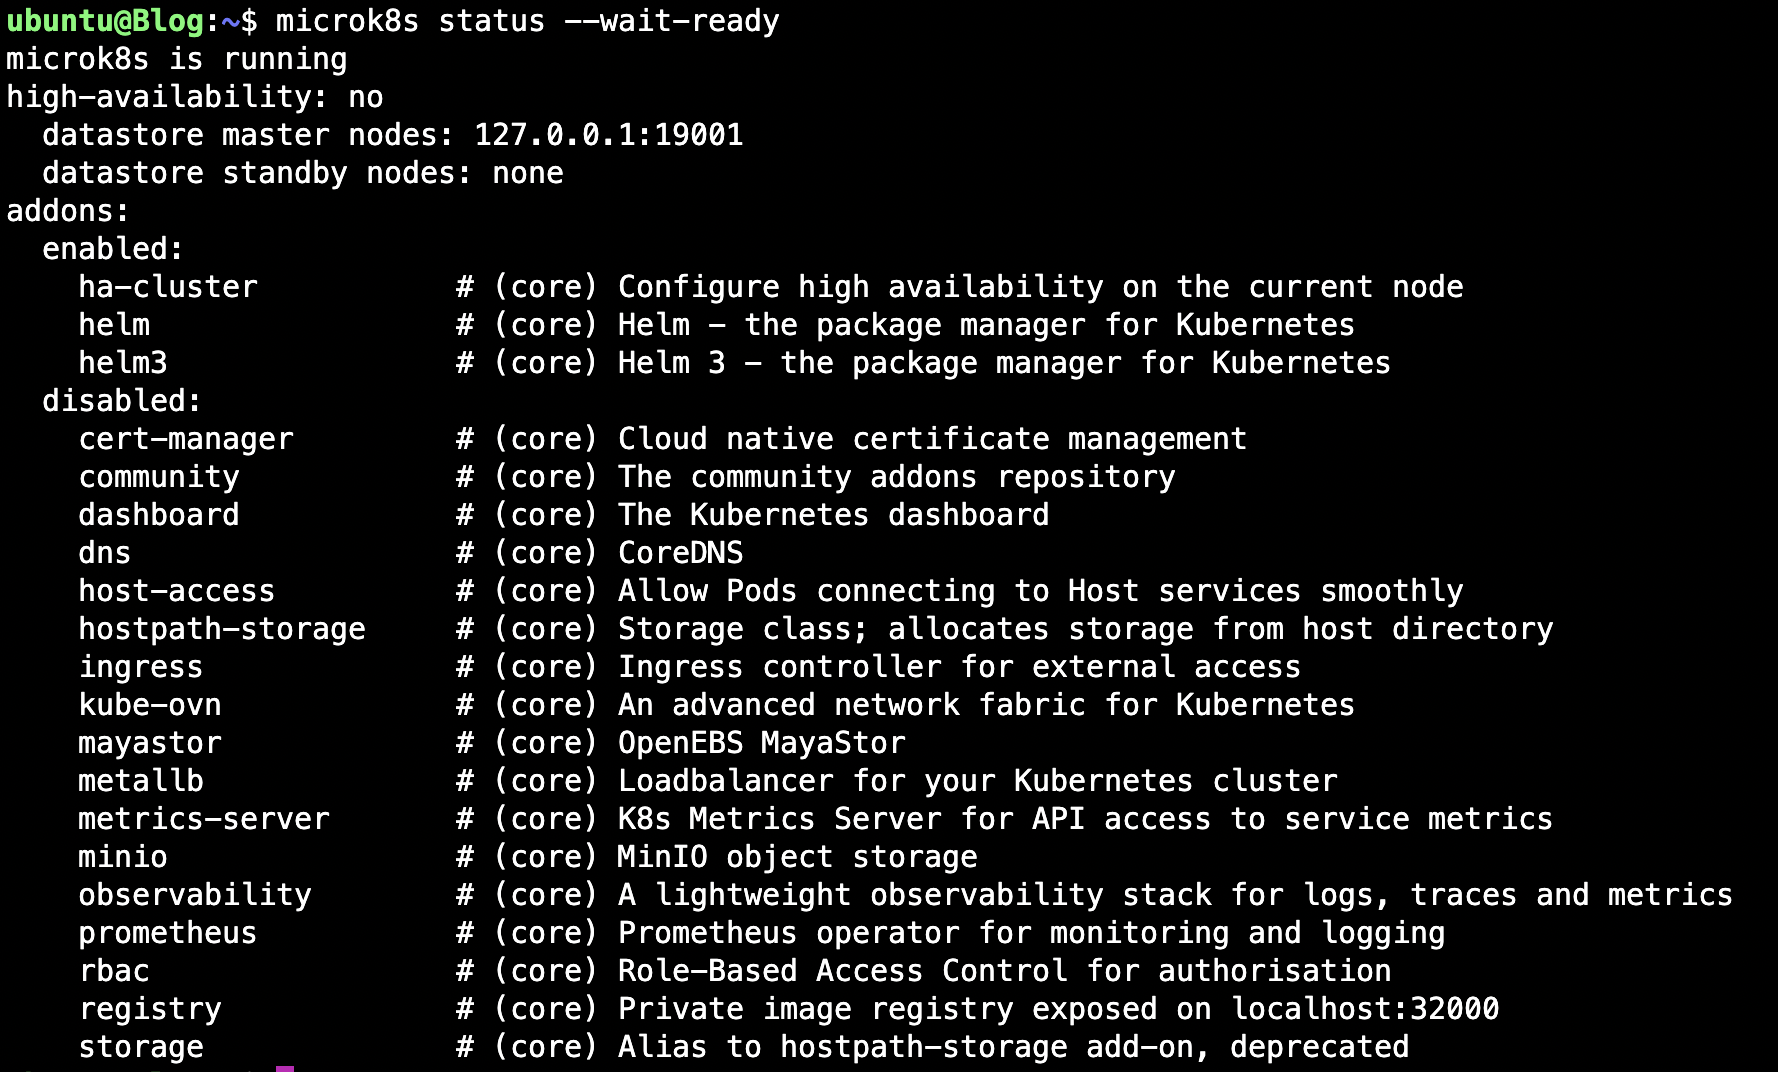
As we see, Microk8s is running in both VMs.
To add the node to this cluster, we have to run the following command in the VM we want to end the node to:
microk8s add-nodeAfter getting the output of the form:
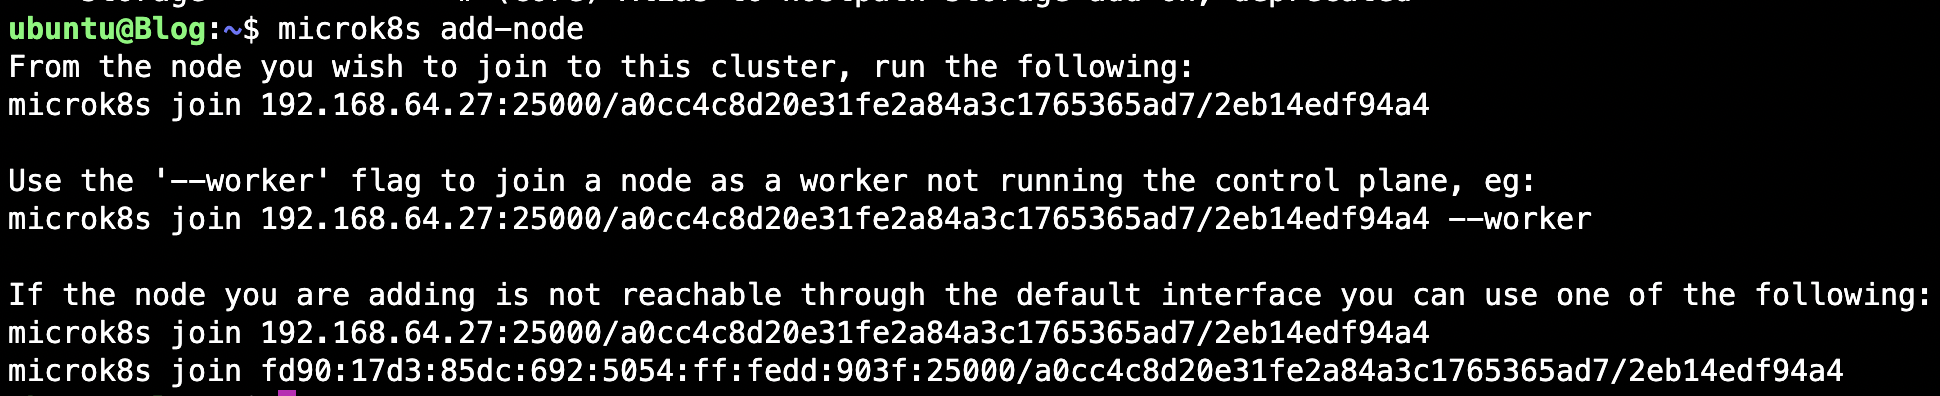
Copy and paste "microk8s join....." as per your choice in the second VM and it will be added to the initial VM completing the multi-node setup.
For example, here I ran "microk8s add-node" in Blog VM where I wanted the multi-node setup and copied the below-given command in the output of the terminal. Pasted the command in the Blog-end VM to connect it with the initial VM.

If you get the above error it is because your initial node is not able to recognize the IP address of the node to be added. To resolve this error you have to manually add the IP address of the second node to the initial node by pasting the IP address followed by the node name in the "/etc/hosts" of your initial VM.
In my example, the IP address of my Blog-end VM is 192.168.64.28
So I will just add the below line in the "/etc/hosts" file of my Blog VM:
192.168.64.28 Blog-end
Get a new microk8s join link by again running "microk8s add-node" in the initial VM and paste it into the VM whose node is to be added.

And finally, check the number of nodes by running:
microk8s kubectl get nodes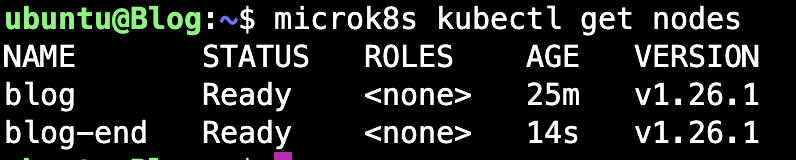
Resources #
Conclusion #
In this article, we learned about MicroK8s. There you are at the end of this blog post, I hope this blog helps you understand the use of MicroK8s. Don't forget to like and share this post if you liked this blog. Connect with me on Twitter and LinkedIn. Follow me for more such blogs.
THANKS FOR READING 😄📖!!
#LEARNINPUBLIC #LEARNWHILEDOING
Follow Kubesimplify on Hashnode, Twitter, and LinkedIn. Join our Discord server to learn with us.
Aayush is a computer science undergraduate student from India. He is a Junior Developer Evangelist at Merico. He is enthusiastic about DevOps and Cloud Native. He is a member of several communities such as Kubesimplify Ambassador, a Developer at WeMakeDevs, and a Co-Founder of SuperContributor. He has also worked at Sema Software as a Program Manager and contributed to Open-Source projects such as Kubernetes and Datree. He believes in the power of collaboration and enjoys contributing to Open-Source projects. He loves playing both outdoor and indoor games and is fond of listening to music.
Get new posts in your inbox.
Spotted a typo or want to improve this post? Edit on GitHub →