


Hello everyone 👋,
In this article, we will be covering some basic and most useful git commands.
What's Git & Github?
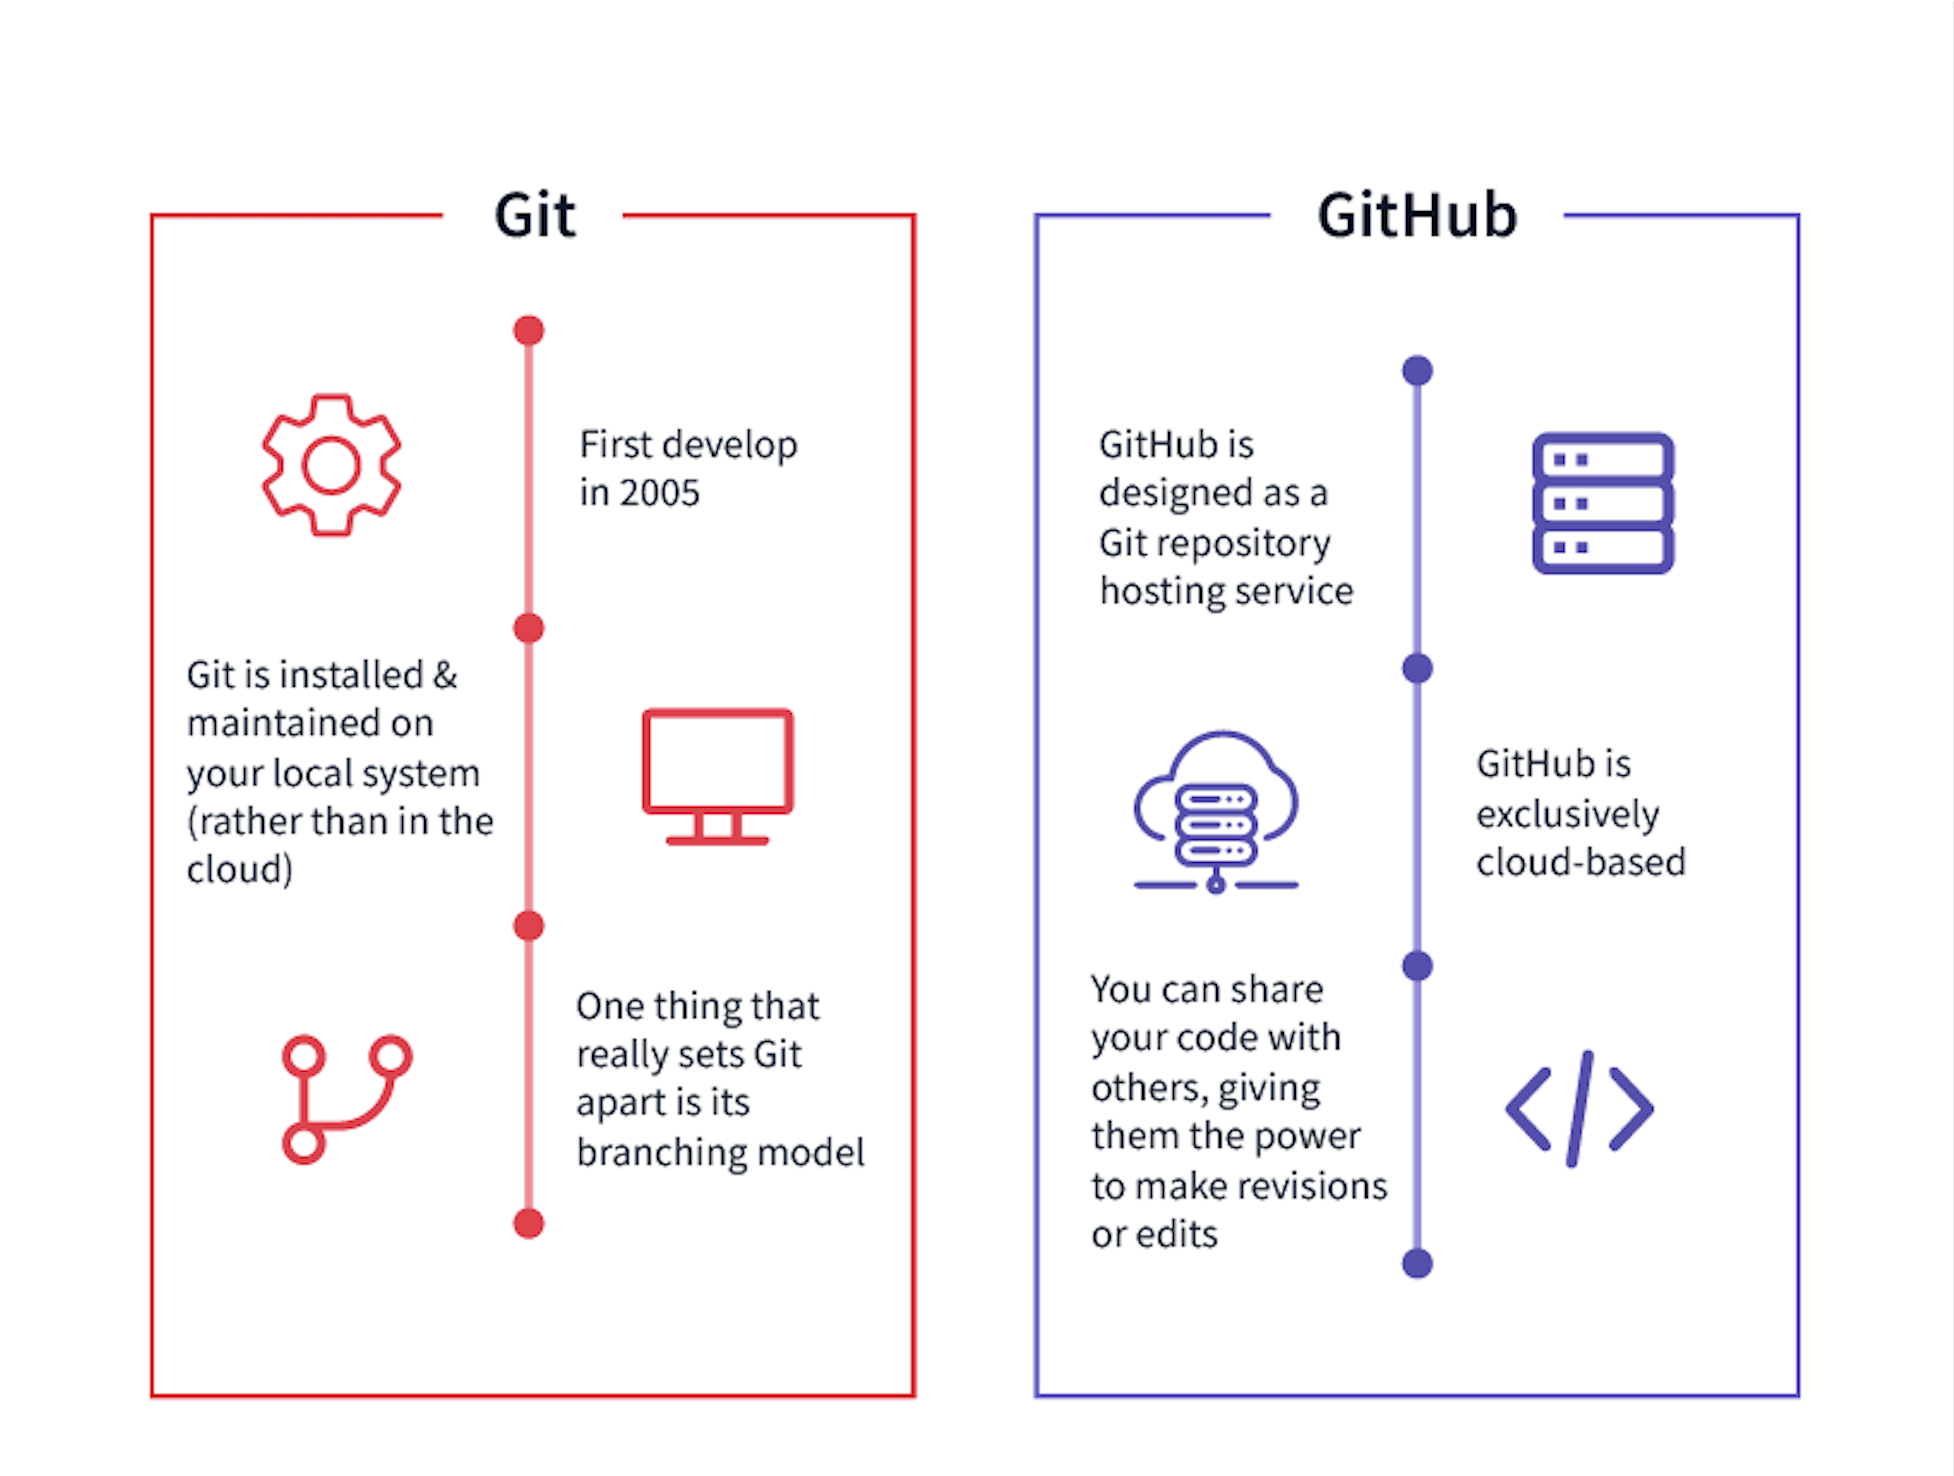
Git: Git is a free and open-source version control system, originally created by Linus Torvalds in 2005. Git is widely used by developers all around the world to manage large and small-scale projects. Since it is an open-source project it is free to use. It helps us to keep track of every modification in our project. Git has been used by various organizations, businesses, professionals, and even startups to manage their code, task allocation, and project management.
Github: GitHub is one of the most advanced development platforms in the world. It has several useful features that enable development teams to work together on the same project and easily create new versions of software without disrupting the current versions. Github is just a cloud-based hosting service that let you manage Git. There are many applications like Github like GitLab or BitBucket.
Git vs GitHub
Why Git & Github?
Git is a version control system so every time you commit some changes it remembers what changes you made on code. It is very essential when managing large databases. It simplifies the process of working with other people and makes it easy to collaborate on projects. We can say that Github is a Social media platform for developers. It is a great way to get noticed — Show off your code and your projects! Especially if you’re a student by using GitHub regularly you can learn how to work well in a development team environment. Git & Github is widely used by many tech giants as well as new startups.
Installation
Install Git by clicking on git here.
Verify Installation: To verify if git is installed locally run this command on your terminal or cmd.
git --version
If this command returns the version of your git that means git is locally installed and we are ready to go.
Git Configuration
If this is your first time using or installing git we have to set a name and email address identifiable across all repositories in Git.
- Set a name that is identifiable for credit when reviewing version history
git config --global user.name "[username]"
- Set an email address that will be associated with each history marker
git config --global user.email "[valid-email]"
If you're a Student having a domain id from a university or college you will be eligible for Github Pro Account.
Git basic terminology
So before we get started we need some basic understanding.
Repository(Repo): A repository is like a folder in Github. Your project's repository contains all its files such as code, documentation, images, etc. It tracks every code that anyone changes so if any error occurs we can go back to the previous version.
Branch: A branch in Git is simply a lightweight movable pointer to one of these commits. The default branch name in Git is "main" earlier it was used to be "master".A repository can have multiple branches. While contributing to projects on Github we should never push our code on the main branch. The best practice would be to make a new branch and commit to that branch.
Checkout: The git checkout command is used to switch between branches in a repository.
Clone: git clone is a command-line utility used to target an existing repository and clone it locally.
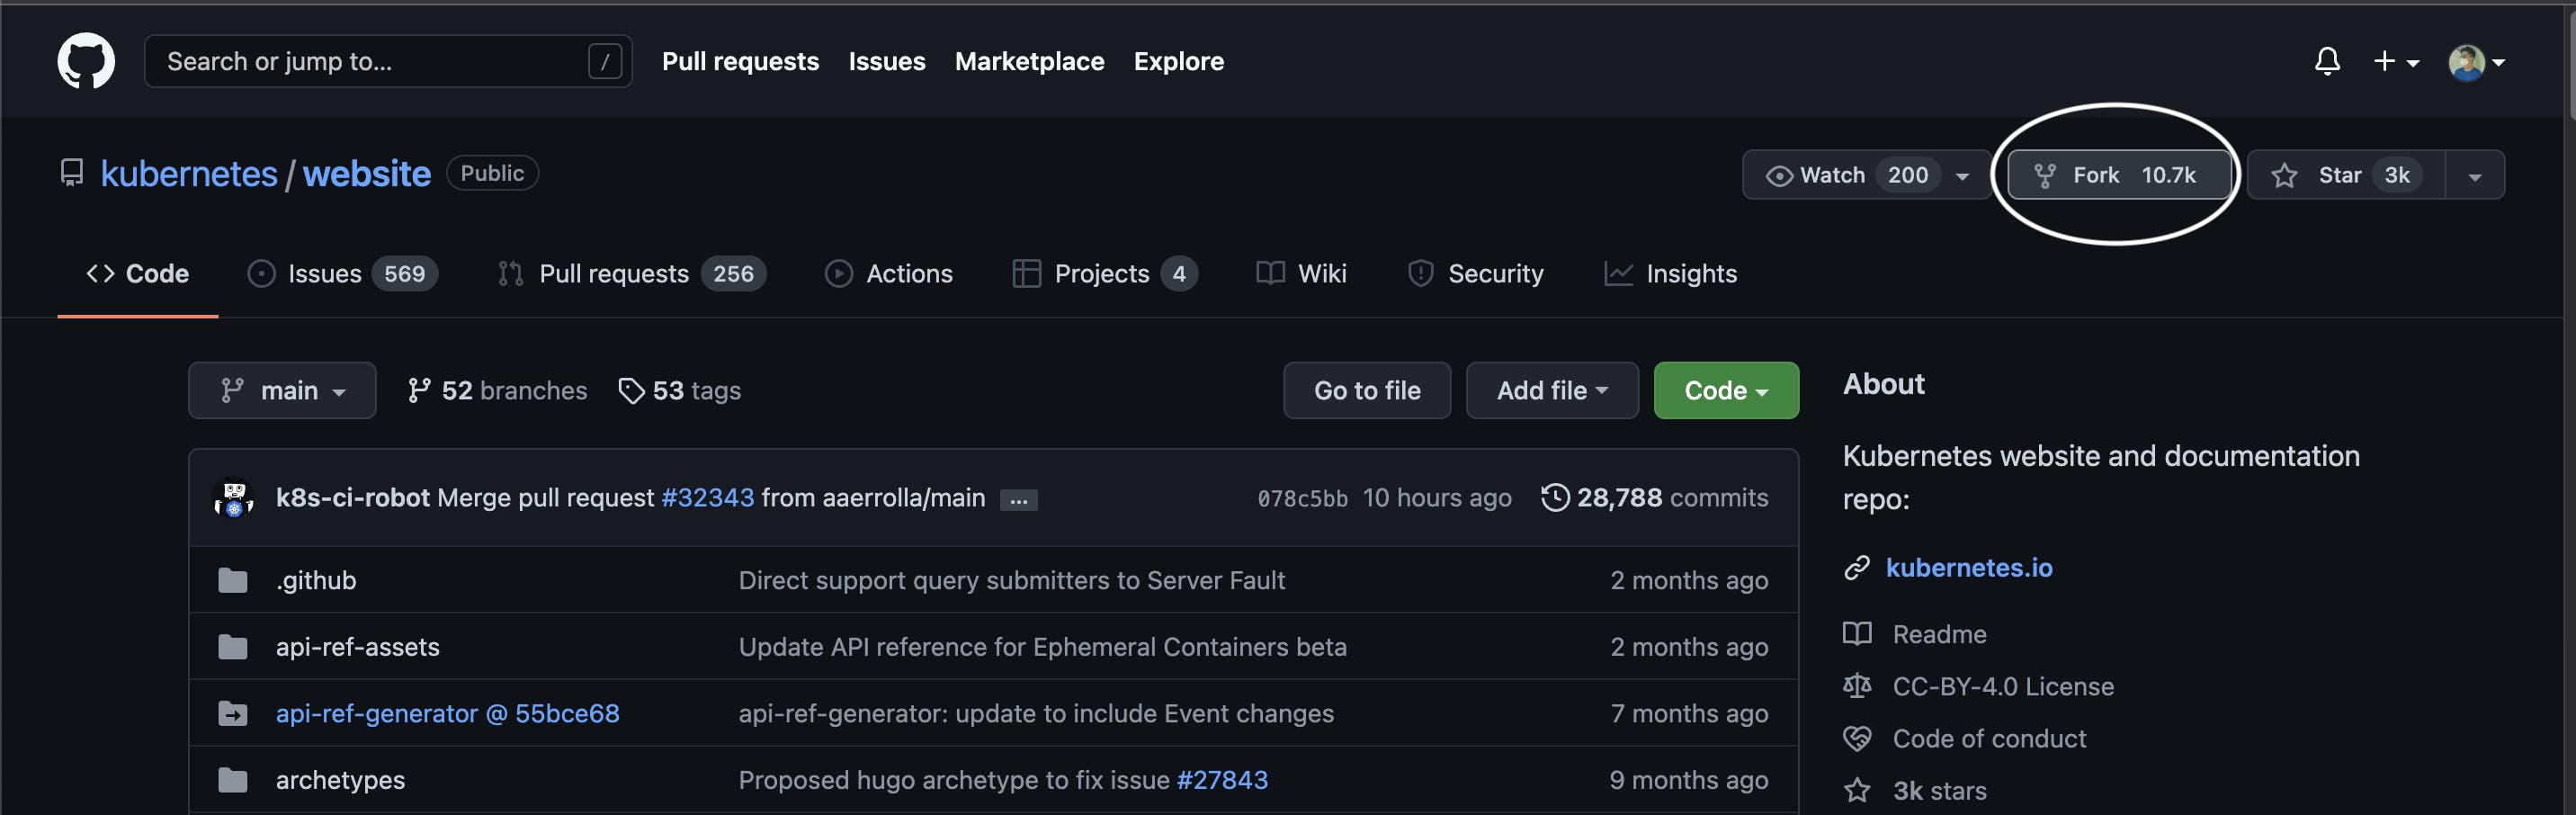
Fork: Forking a repository allows you to freely test and debug with changes without affecting the original project. Basically, it creates a copy for you on our Github.
Main/Master: Main/Master is the default name of a repository’s active development branch. The main/master is the primary branch of all your repositories.
Fetch: It will fetch all the new code merged from the upstream(original repository).
Stash: While working with Git, you may need to make multiple changes to files, but you may not want all changes to go in one commit. If you want to pause the changes you are working on now in favor of working on another issue or improvement, you can “stash” your changes, essentially clearing them from the staging area until the changes are called again.
Some Basic Linux Commands.
ls: This command is used to list files or directories.cd: Stands for change directory it can go inside a directory by using.cd ..: It is used to come outside the folder you're into.touch: It will create a new file.vim: It will help you make changes in files using your terminal.cat: The most commonly known usage is to print the content of a file onto the standard output stream.
Working With Local Repositories. (In terminal)
Step 1. To start we will be making a separate folder using mkdir command.
mkdir Git-Practice
Step 2. To make changes we will go into the folder we created.
cd Git-Practice
Step 3. We have to initialize Git into our current repository which creates a hidden .git folder inside your folder.
git init
Step 4. For practice, we will be creating some demo files using the touch command and editing them using vim.
touch demo.txt
vim demo.txt
It will open a separate vim window.
To start writing we must press i to insert &
to quit press Esc key + :x to save and exit from vim.
Step 5. Once every change has been made we can check the status. It will show what changes have been staged and what is not
git status
Step 6. To stage changes (to stage every change made in one go or we can write the name )
git add .
OR
git add <file-you-want-to-stage>
Step 7. Committing changes
git commit -m "Your message here"
Step 8. Logs check your entire commit history
git log
Since we have to push our code on Github we will be creating a new repository on Github. After that, we will copy the URL and use it on our terminal.
git remote add origin <your-git-repository-url>
Step 9. To push our code on Github
git push origin master
After refreshing you will see all your code on Github.
Working With Remote Repositories(For OpenSource)
Step 1: Fork the Repository you want to work on
Step 2: Clone the repo to work locally on the computer
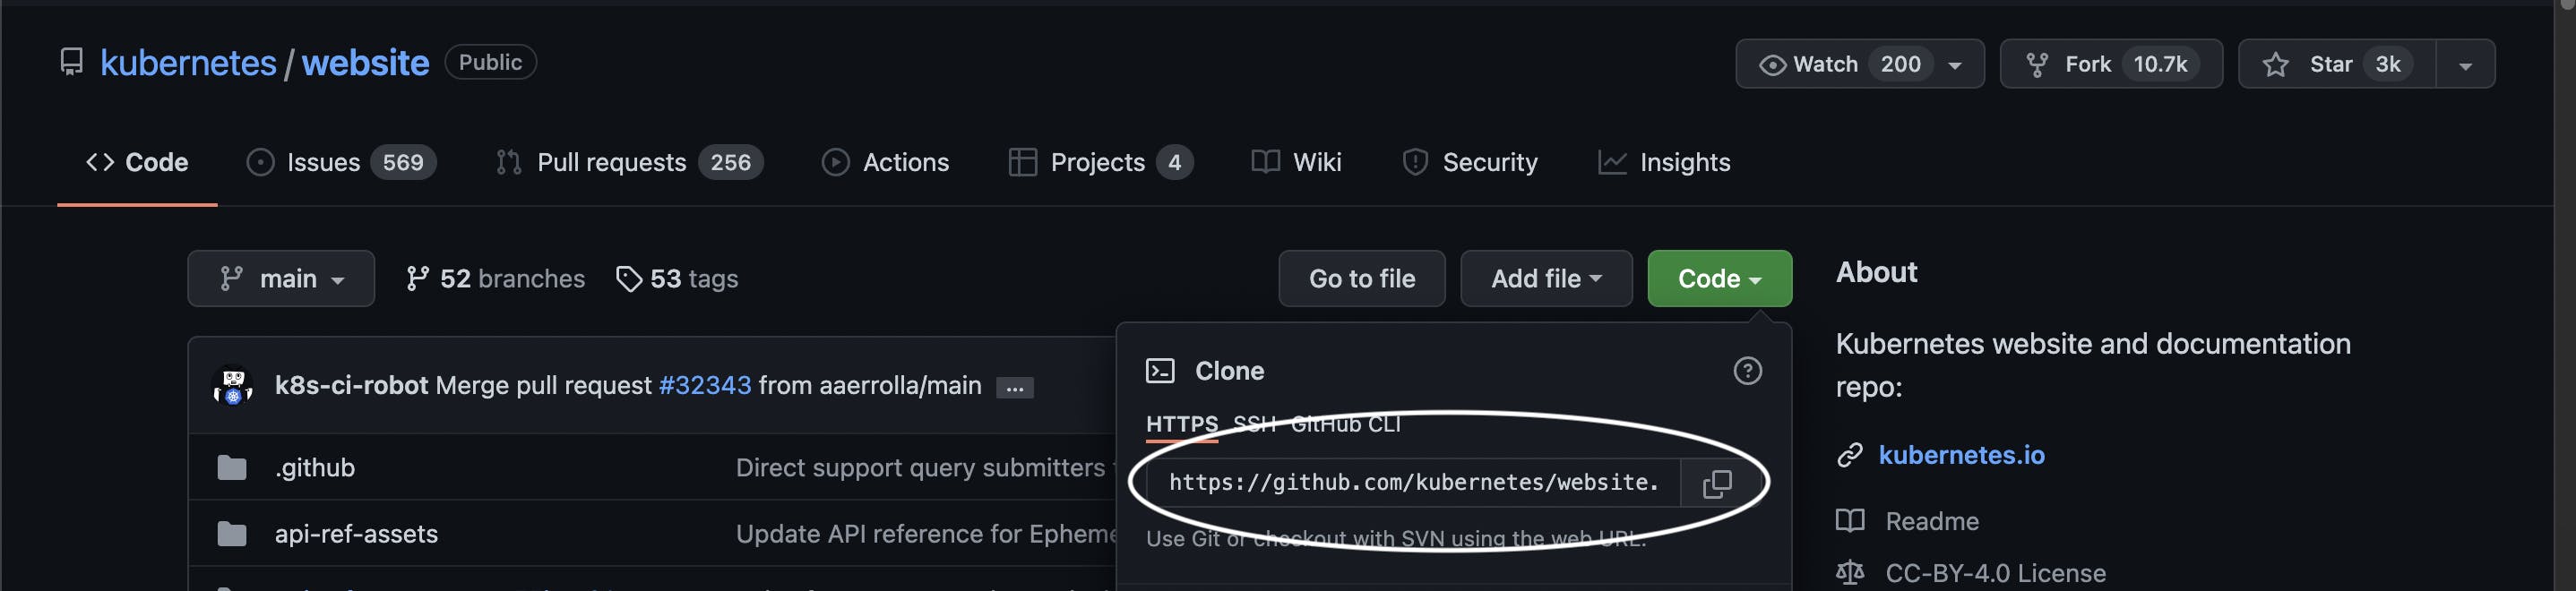
git clone <url-of-the-repo>
It will download the repository locally on your computer.
Step 3. Once downloaded open it on our favorite IDE or code editor.
Step 4. Make the desired changes you want to make.
Step 5. Once every change has been made we can check the status. It will show what changes have been staged and what is not
git status
Step 6. To stage changes (to stage every change made in one go or we can write the name )
git add .
OR
git add <file-you-want-to-stage>
Step 7. We will create a new branch and commit our changes to our branch rather than pushing it on the main/master branch.
During Open Source Contributions or contributing to projects online we must always create a new branch so that if our code has some error it will not break the system.
git branch <branch-name>
Step 8. To change the current branch from main/master -->
git checkout <branch-name>
Step 7. Committing changes on our branch
git commit -m "Your message here"
Step 8. After committing we will push it on our forked repository.
git push origin <branch-name>
Step 9. A pull request would have been opened on your forked repository.
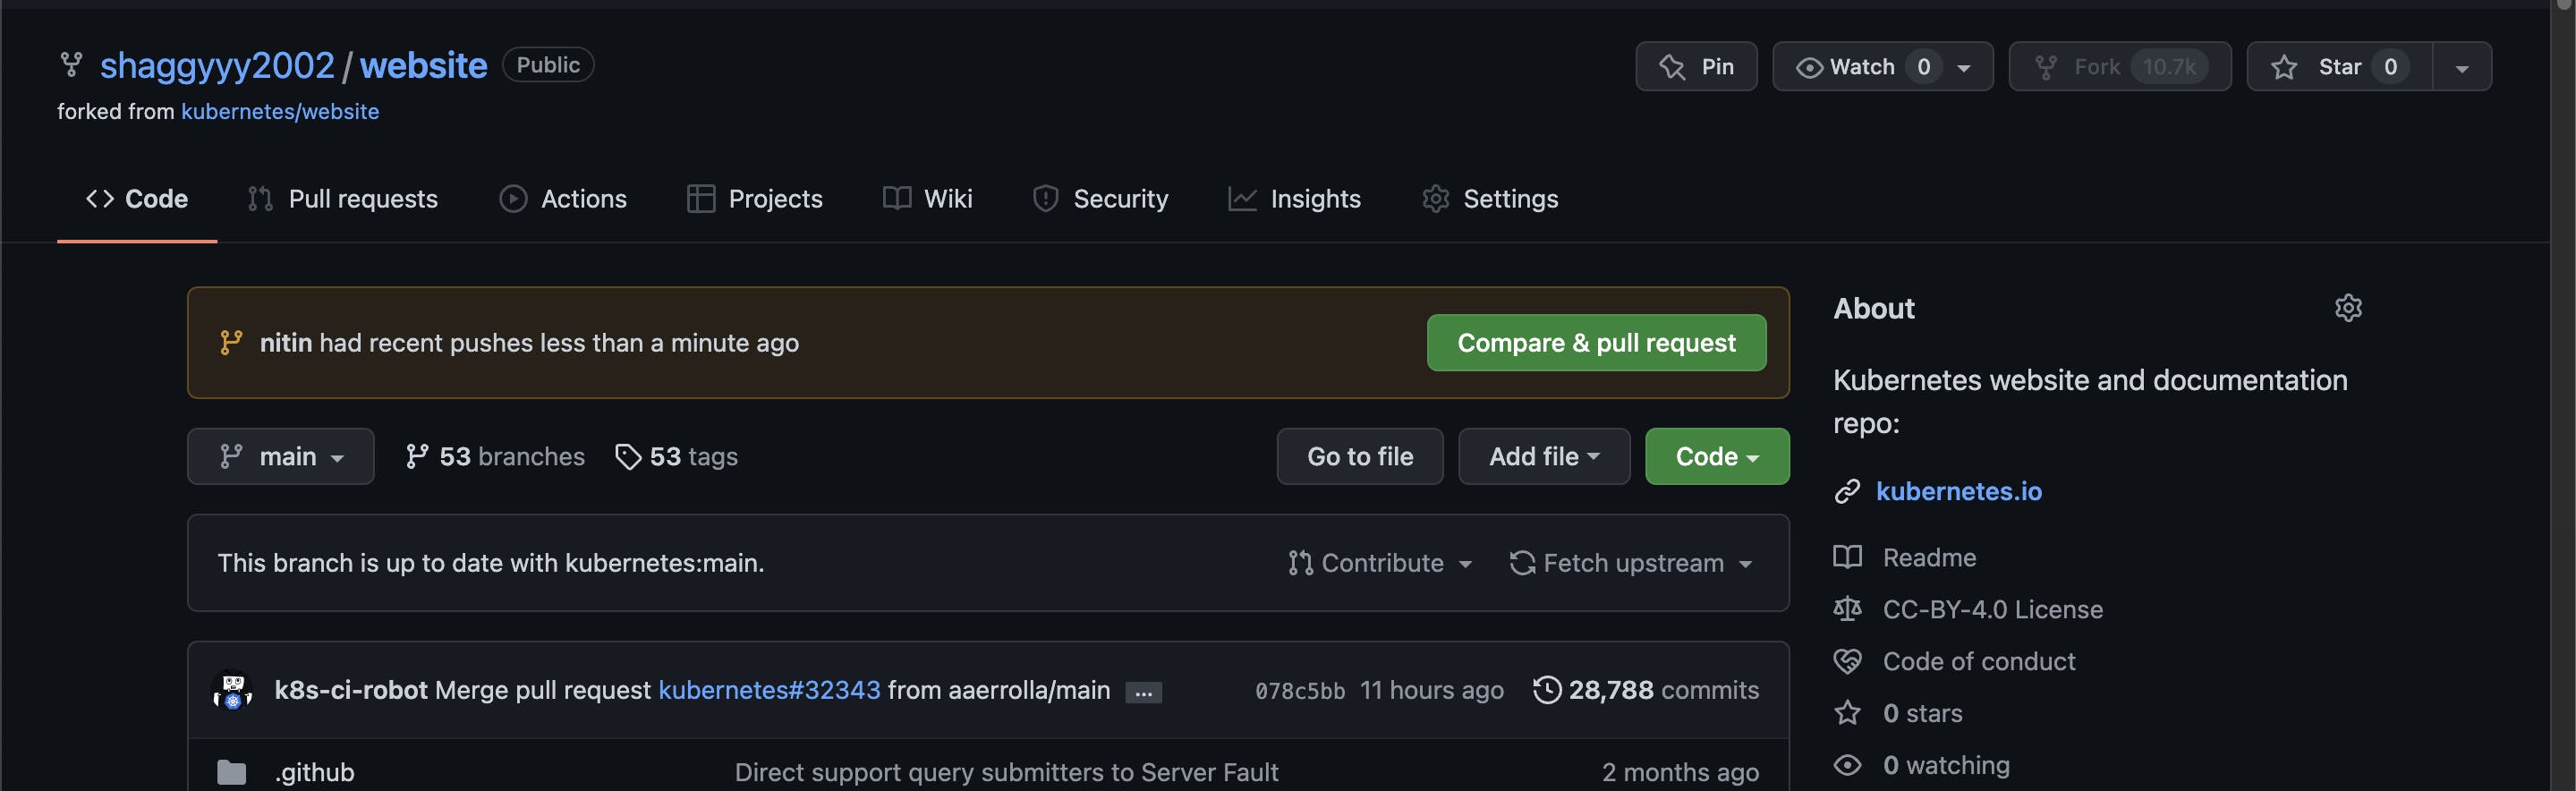
Step 10. Create a pull request.
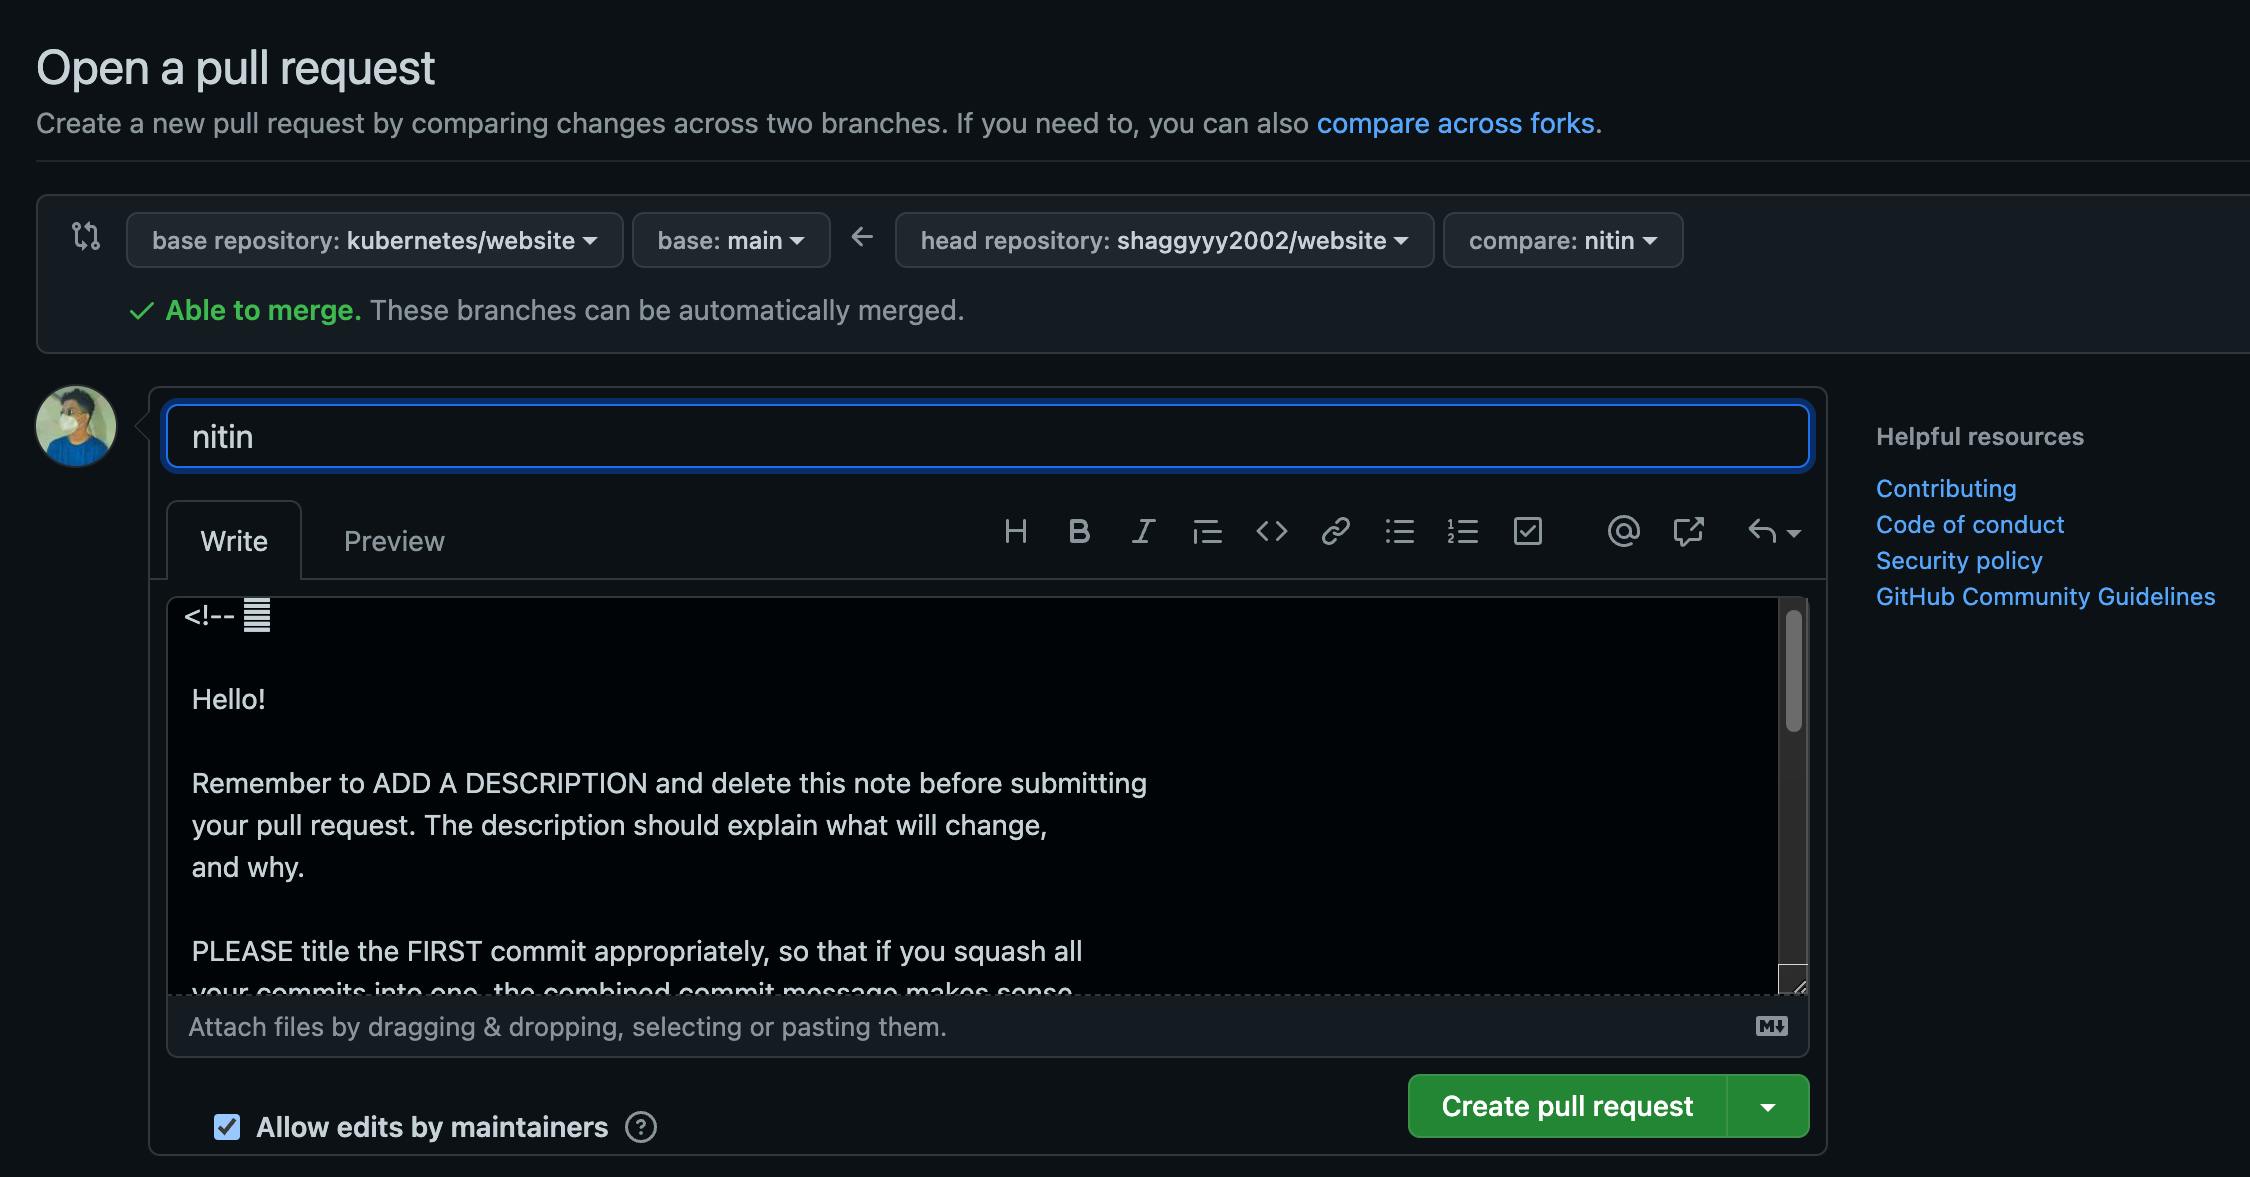
Click on create a pull request and wait till your code gets merged or reviewed by the maintainers.
Write what changes you have made in a detailed manner. Most of the time template would be given in Readme.MD file. So make sure it read it and do accordingly.
A Small Task for all to check your knowledge
Git Practice The Task is to clone this project add a file and create a pull request on your own. Let's see how much you have learned.
Join the awesome kubesimplify community for more such blogs!