A beginner's guide to Dualbooting Windows with Ubuntu: Part 1
It is a technique of keeping multiple live OS on a system.

On this page (5)
What does dual-booting mean? #
- It is a technique of keeping multiple live OS on a system.
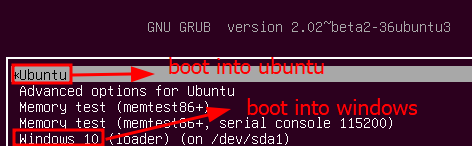
- Lets us select an OS at the initial boot sequence using GRUB (Grand Unified Bootloader - a bootloader utility).
- Advantages of Dualbooting:
- Offers the best of both worlds.
- Gives the choice of selecting an OS for a particular task to the user.
- Why choose Dualboot over a Virtual machine?
- Dual-booting cuts out the overhead of a virtual machine.
- Runs both the OS at user hardware's full, native speed, with a catch that only one OS can run at a particular instant.
- Disadvantage of Dualbooting:
- No multitasking is possible. The user must reboot the system every time to switch to the other OS.
- Requires a lot of space to be separated for the other OS on the system.
Before we start: Prerequisites and Compatibility #
Today, we will be dual-booting Windows with Ubuntu 20.04 LTS (long-term support).
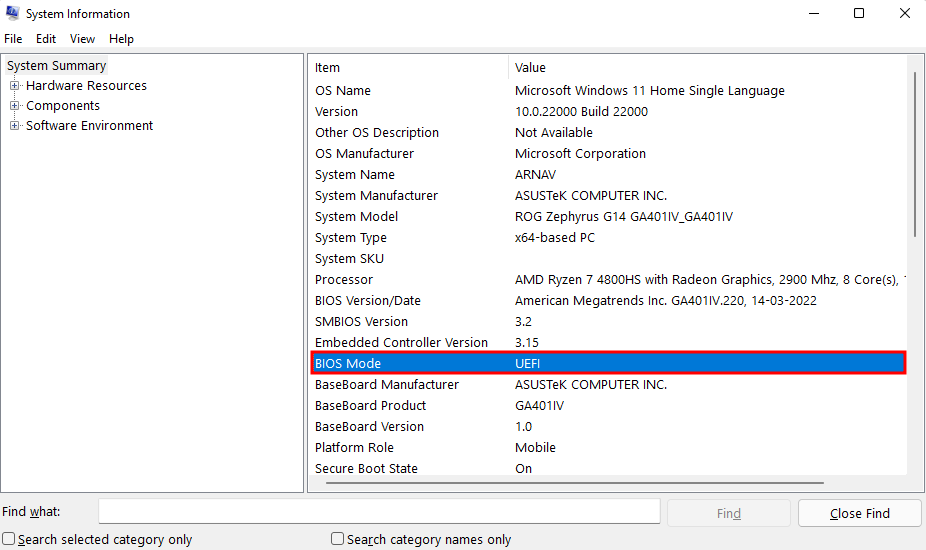
- Check the BIOS mode of your system for compatibility.
- Search
System Informationfrom the start panel. - Under the BIOS mode, you can see your boot mode.
- If it is UEFI, you're good to go. But if it is Legacy, I'll cover it up some other day.
- Make sure your system matches the requirements for Ubuntu mentioned here
- Check if you have about 120 GB of free disk space on your system.
- You will also need an empty USB drive, at least 8 GB in size.
- Download the following files and softwares:
- Check if your drive is BitLocker encrypted
- Search for
BitLockerin the start panel. If the Manage Bitlocker settings option does not show up in the search results, your drive is not BitLocker encrypted, and you can proceed with the further steps. But if the settings show up in the results, follow the steps in the expandable section below.
Note: Make a backup of your existing data somewhere before proceeding to the next steps. Also, make a windows recovery disk (to fix any significant boot issues you might run into, this is unlikely to happen, but one must better be prepared than sorry.)
Disk Partitioning #
Now that we have all the requirements complete, let's move on to the next step: Allocating some free space for Ubuntu on our drive manually. We do this as sometimes the option for it is not available during the installation process. The steps for the same are:
- In windows, launch the disk management tool (Win key+x, then select disk management from the list)
- Select the drive where you want to allocate the free space.
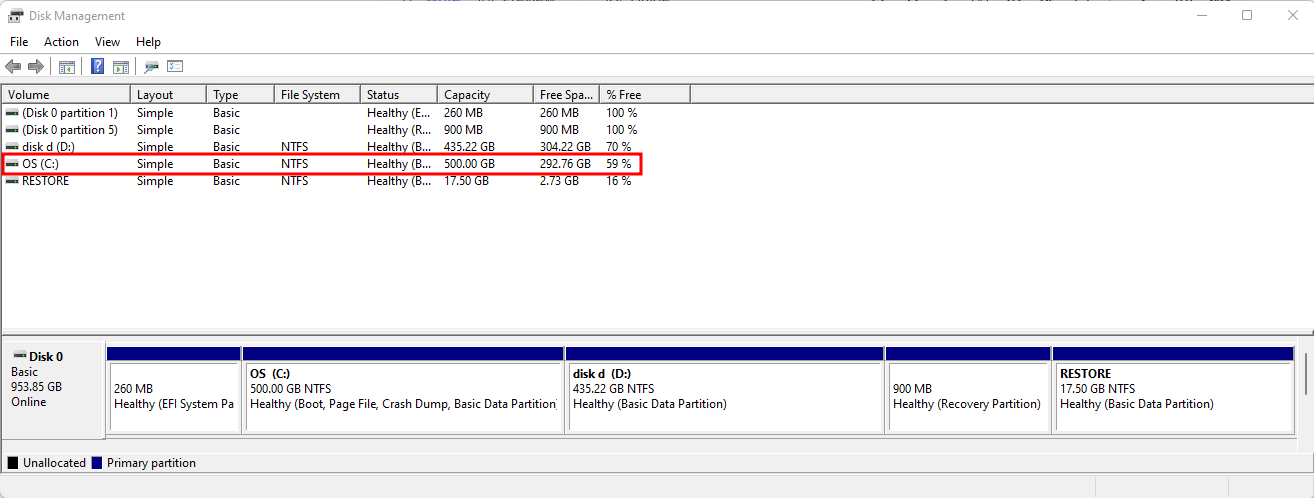
- Right-click on it and select the shrink volume option
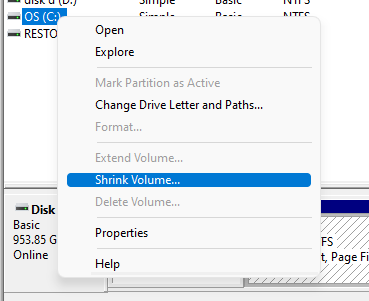
- Fill in the amount of space you need to allocate for ubuntu (This depends on the resources you need in ubuntu, anywhere from 60-80 GB might suffice). We are making an unallocated space of 120 GB (120*1024 = 131072 MB).

Note: Try to leave a bit of available space if you are creating a partition in your C drive as the Windows OS is also present in the same drive, and it might require some free space in the later day-to-day use.
- Click on the Shrink button, and you will see an unallocated data partition in your disk management tool in a moment.
Warning: Do not forget to make a backup of your data before starting the disk partitioning, as you might lose your data during this.
Creating a bootable flash drive for Ubuntu #
Now we need to flash our iso file onto our USB drive to boot into ubuntu and install it in the unallocated space in our drive. Plug the USB drive into your system and follow these steps:
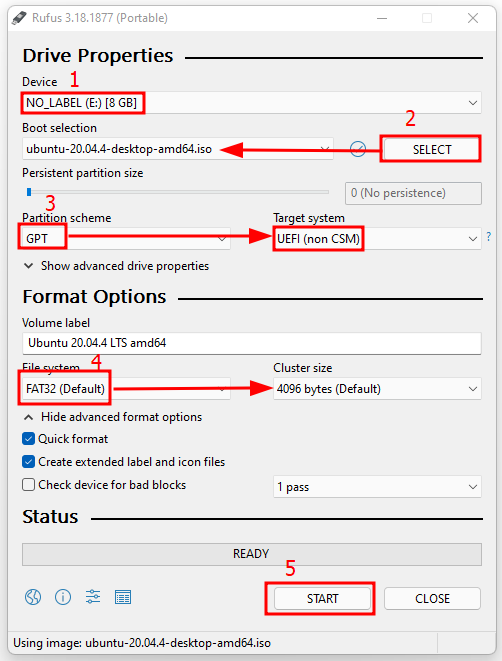
- Open Rufus and select your USB drive from the dropdown menu.
- Press the select button, browse for the downloaded Ubunto ISO file, and select it.
- Select the GPT partition scheme from the dropdown menu and ensure the target system is UEFI.
- In the format options, select FAT32 file system and set the cluster size to default.
- Make sure all the settings look similar to the screenshot attached below, and press the Start button.
- Now, wait for the process to complete, which will render you the bootable drive for your Ubuntu installation.
You can format your flash drive to bring it back to normal after ubuntu installation.
The next steps #
If you have been able to follow along till this point without any issues, congratulations! You're halfway through the process. Follow along in the second part of the guide to complete the dual-booting process!
References #
Liked the guide so far? Want to connect? You can find me here. Till then, happy learning!
Get new posts in your inbox.
Spotted a typo or want to improve this post? Edit on GitHub →