A beginner's guide to Dualbooting Windows with Ubuntu: Part 2
- Intro to Dual-booting - Compatibility checks and prerequisites for dual-booting. - Partitioning of the disk. - Live USB creation. We are now moving on…


On this page (7)
- What have we covered in [Part 1](https://kubesimplify.com/a-beginners-guide-to-dualbooting-windows-with-ubuntu-part-1) of the Dualbooting Guide.
- Booting up using the live USB
- Installing Ubuntu
- Partitioning of free space
- Finishing off the installation
- Update the Ubuntu applications and packages
- Change the boot order and boot time
What have we covered in Part 1 of the Dualbooting Guide. #
- Intro to Dual-booting
- Compatibility checks and prerequisites for dual-booting.
- Partitioning of the disk.
- Live USB creation.
We are now moving on to the next steps.
Booting up using the live USB #
We will boot up our system using the live Ubuntu USB we created using Rufus in Part 1 of the guide.
- Plug in the live USB to your system.
- Search
Change advanced start-up optionsfrom the start panel and go to the settings.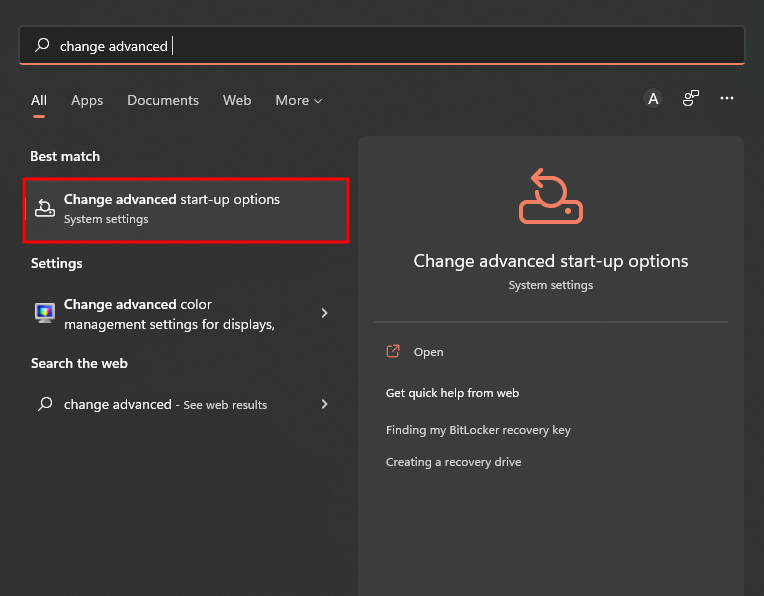
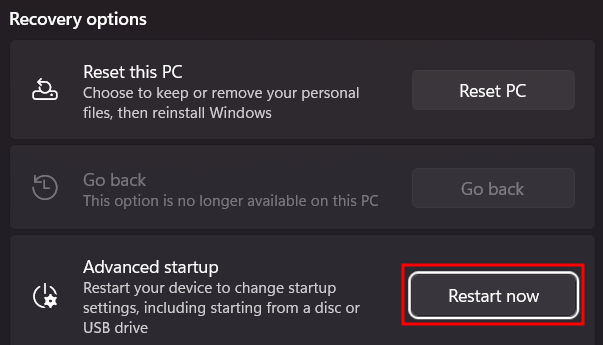
- Go to the Advanced Startup option and click Restart now.
- Select the Use a device option when prompted.
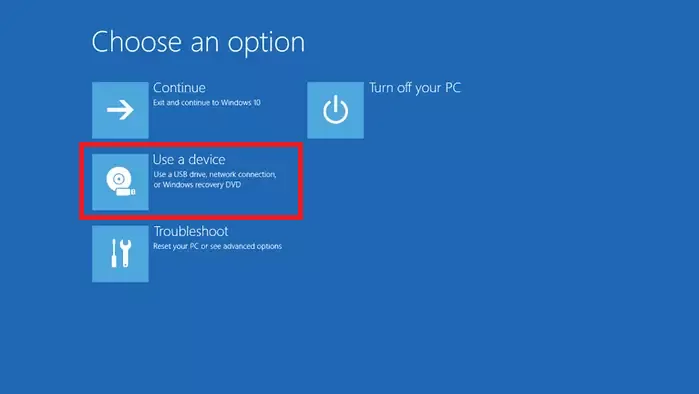
- Now, select the USB drive you have plugged into your computer.
- Your system will now boot into the disk you selected in the previous step, and you will see a similar menu.
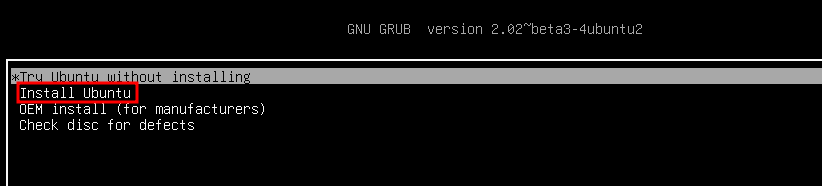
- Navigate using arrow keys and select Install Ubuntu, now press enter.
Installing Ubuntu #
Now, the Ubuntu installation wizard must be visible to you.
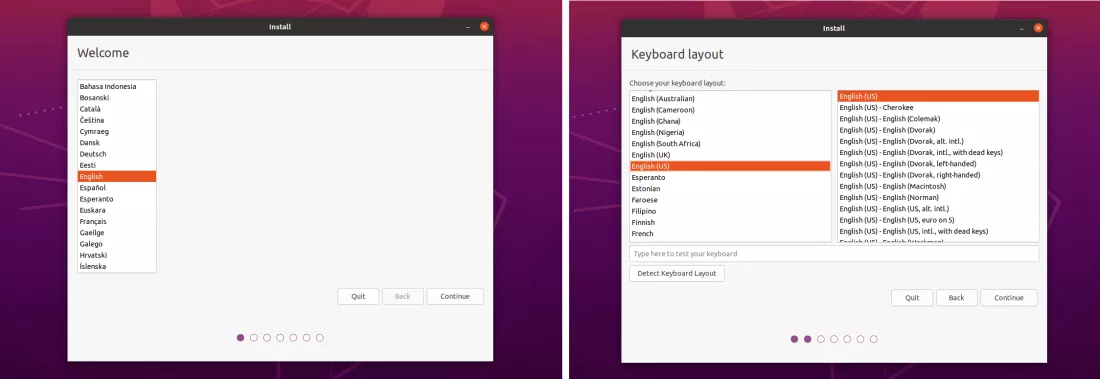
- Select your preferred language.
- Select the keyboard layout you use on your system and continue.
- You will now be asked to enter your Wi-Fi settings; skip this step without entering the information (You can do it after dualbooting).
- You will now be presented with the type of installation you want to perform and some other options. Select Normal Installation and uncheck every other option on the page to speed up the installation process.
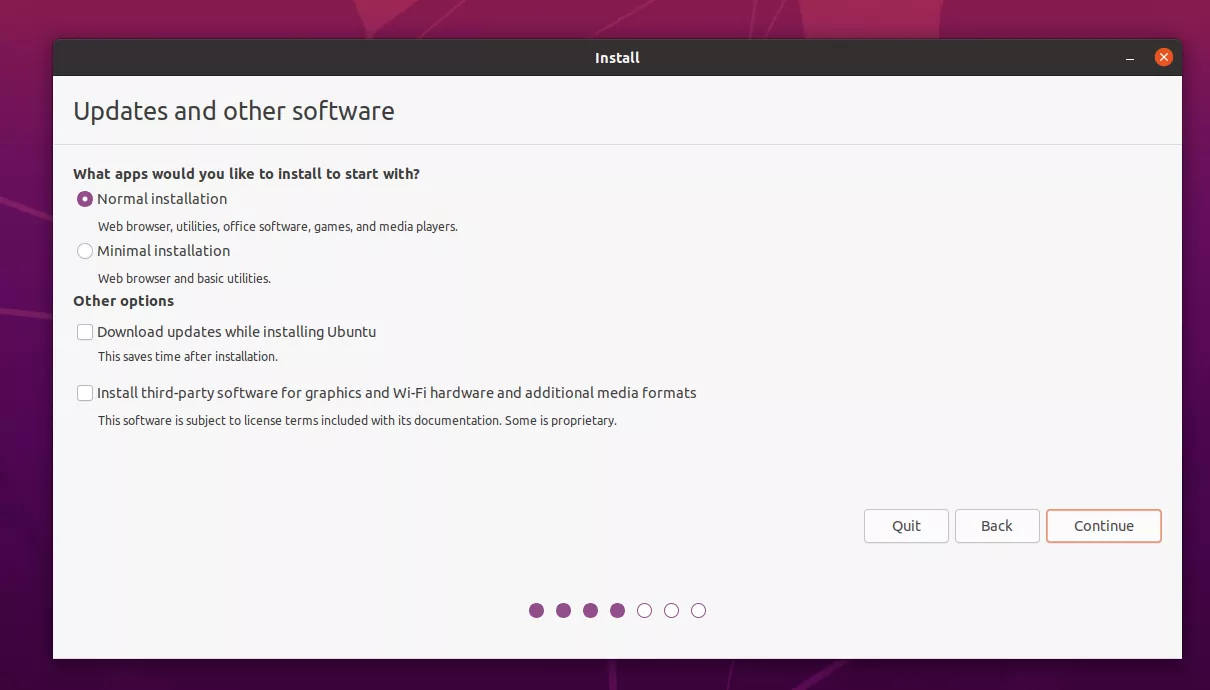
You can perform the updates and firmware installations after dual booting.
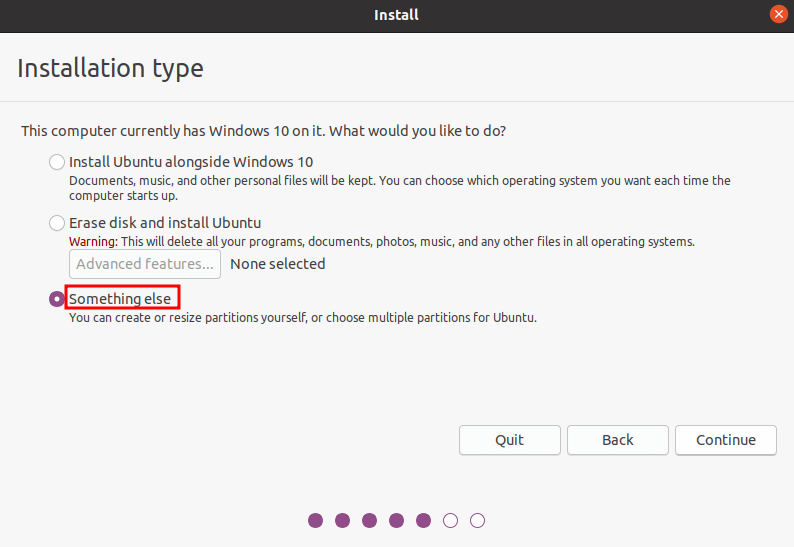
- On the next screen, select the Something Else option and continue. This way, we can create partitions for Ubuntu manually in the unallocated space that we set aside in Part 1 of the guide.
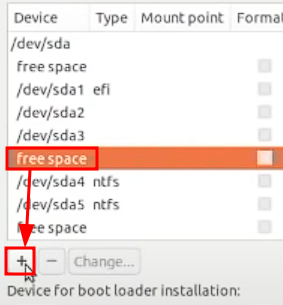
- Up next, from the list now visible, select the unallocated free space (131072 MB in our case).
- Now press the + button at the bottom to create the partitions in this free space.
Partitioning of free space #
The partition table will have the following scheme in my case, you can assign space as per your requirements:
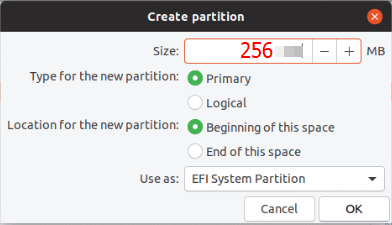
- EFI System Partition: It holds the EFI-mode bootloaders and related files.
- Size: 256 MB
- Type: Primary
- Location: Beginning of this space
- Use as: EFI system partition
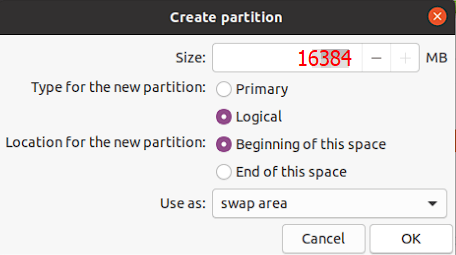
- Swap Partition: Reserved space on the drive used to swap pages if physical RAM becomes full.
- Size: 16384 MB (i.e. equal to the RAM available in the system for systems with more than 8 GB RAM, else 1.5 times that of the RAM available)
- Type: Logical
- Location: Beginning of this space
- Use as: swap area
- Root Partition: A space containing files required to run the Linux system after the kernel has been booted up.
- Size: 45773 MB (i.e. 40% of the remaining free space)
- Type: Logical
- Location: Beginning of this space
- Use as: Ext4 journaling file system
- Mount point: /

- Home partition: A space for storing personal files (application settings, downloads, documents, etc).
- Size: 68659 MB (i.e. the remaining free space)
- Type: Logical
- Location: Beginning of this space
- Use as: Ext4 journaling file system
- Mount point: /home

- Now that all four partitions are created, click on the install now button. (Press continue/yes on any warning displayed).
Finishing off the installation #
Consider this a checkpoint in your journey; if you are here after a few cups of coffee and without any significant issues, pat yourself on your back as you have almost completed the dual-boot.
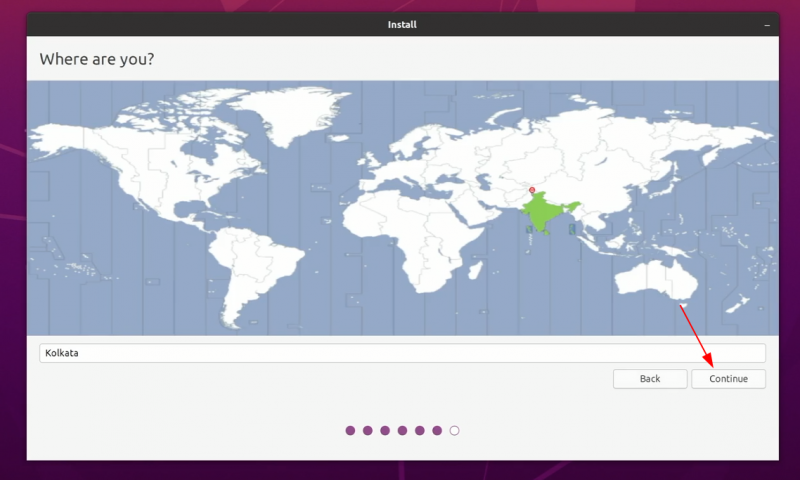
- Select the timezone you belong to when prompted.
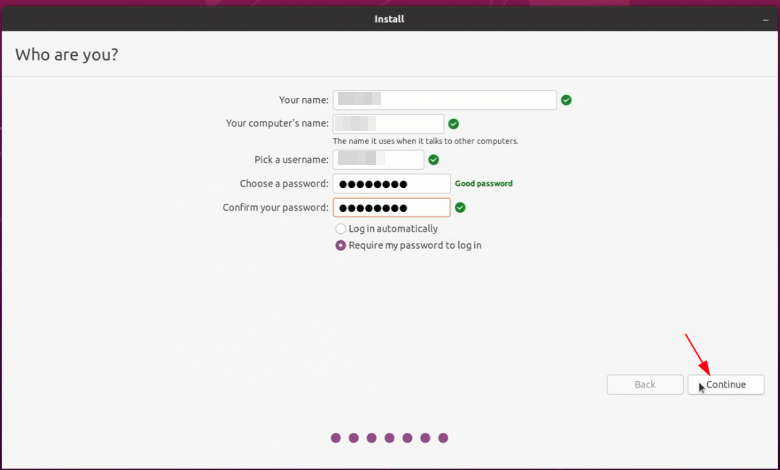
- Enter the necessary details about the system now.
- Now grab a cup of coffee and wait until the installation is completed. After the installation is done, reboot your system.
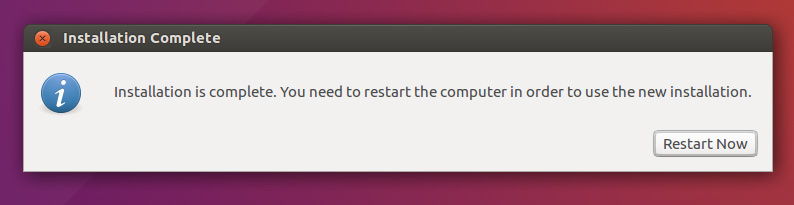
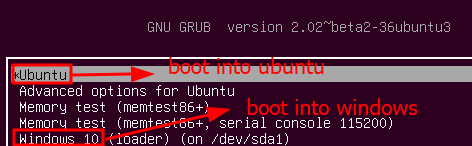
- You will be asked to remove the installation media (Live USB). Remove it, and the next thing you should see is the grub screen, where you can select the OS you want to boot into.
Update the Ubuntu applications and packages #
After logging in to Ubuntu for the first time, connect to your Wi-Fi network first. Then press ctrl+alt+t to launch the terminal. Run the following commands to update everything to the latest version. After entering a command with sudo, you will have to type in the password for the Ubuntu system that you set up:
Press y every time it is prompted
sudo apt-get updateThis is done to download package information from all configured sources.
sudo apt-get upgradeThis is done to install available upgrades of all packages currently installed on the system.
Change the boot order and boot time #
Every time you boot up your system, it shows up in the GRUB menu for 10 seconds before selecting the default OS to boot into unless the user has selected something. We will now change this waiting time and the default OS to boot into. Follow the steps to do so:
- While logged in to Ubuntu, open up the terminal (ctrl+alt+t).
- Run the following command
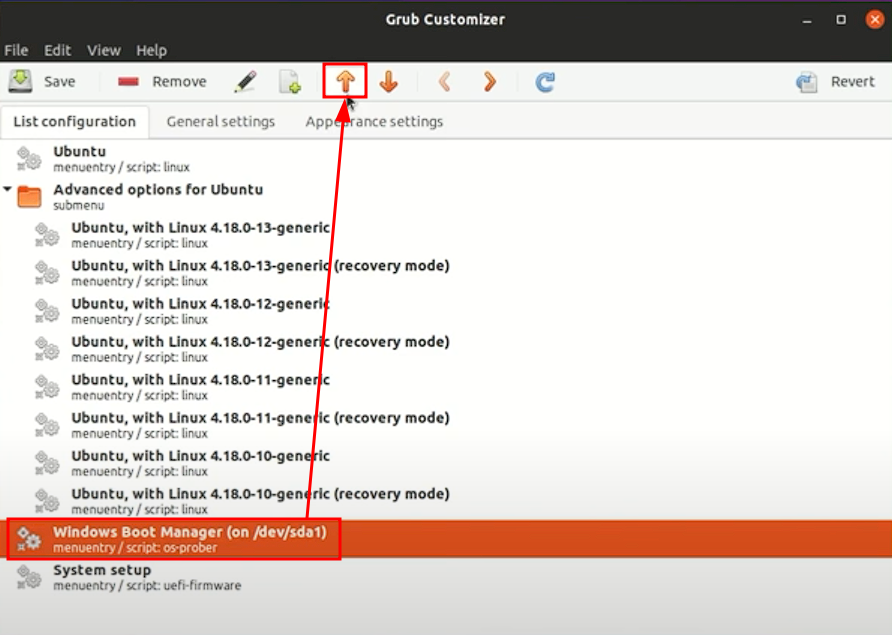
sudo apt install grub-customizer- Once installed, search for Grub customizer in the menu and open it.
Changing boot order
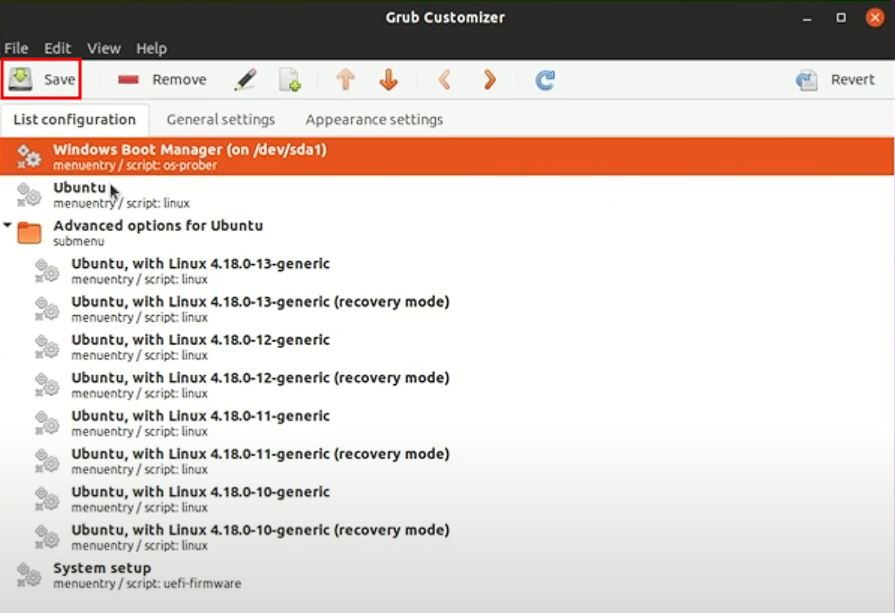
- To make windows the default OS, select it and move it up the order using the up arrow.
- Press the save button and reboot your system.
Changing the waiting time
- Open the Grub customizer software and go to the general settings.
- Change the default boot time to any value.
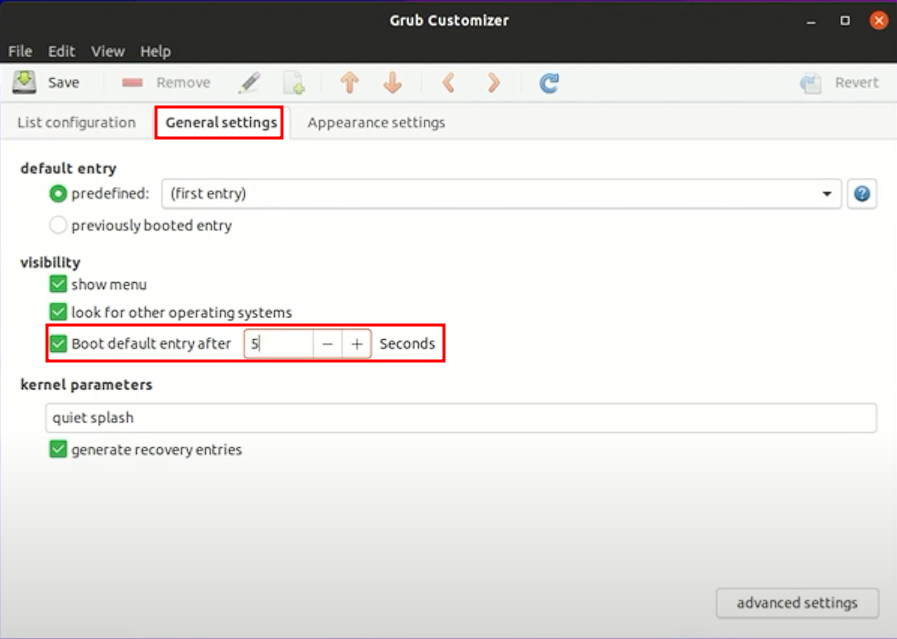
- Save the changes and reboot your system.
Troubleshooting #
For any issues that you run into, try searching google or askubuntu for the solutions.
References #
Liked the guide? Want to connect? You can find me here. Till then, happy learning!
Get new posts in your inbox.
Spotted a typo or want to improve this post? Edit on GitHub →