Kubernetes Management with Rust - A Dive into Generic Client-Go, Controller Abstractions, and CRD Macros with Kube.rs
In this blog, we dive into Generic Client-Go, Controller Abstractions, and CRD Macros with Kube.rs.


On this page (18)
- Step 1 - Initialize the project
- Step 2 - Update cargo package manager dependencies
- Step 3 - Update main.rs
- Step 4 - Deploy a sample nginx application
- Step 5 - Test the program
- Step 1 - Initialize a new project
- Step 2 - Create custom resource definition schema
- Step 3 - Update cargo package manager dependencies
- Step 4 - Run the program
- Step 5 - Verify CRD creation
- Step 6 - Create a new custom resource
- Step 7 - Apply the CRD yaml
- Step 8 - Print a specific jsonpath of CRD
- Step 1 - Initialize a new project
- Step 2 - Update cargo package manager dependencies
- Step 3 - Create the program
- Step 4 - Slack integration
- Step 5 - Run the program and deploy the application
If you've read our previous blog on performing CRUD operations on Kubernetes using Golang, you should now be familiar with the basics of client-go. In this post, we will explore a more efficient way to use Rust with Kubernetes.
A Rust client for Kubernetes, found at kube-rs/kube, is designed similarly to the more general client-go. It incorporates a runtime abstraction modeled after controller-runtime and includes a derive macro for Custom Resource Definitions (CRDs) inspired by Kubebuilder. This project is hosted by the Cloud Native Computing Foundation (CNCF) as a Sandbox Project.
These crates extend Kubernetes' API machinery and API principles to support generic abstractions. These abstractions make it easier to develop Rust-based applications by enabling the use of reflectors, controllers, and custom resource interfaces.
Prerequisites #
Before we dive into using Rust with Kubernetes, make sure you have the following set up:
-
Rust installed on your machine.
-
minikubeor an alternative Kubernetes distribution installed. -
kubectl installed.
Part 1 - List all Pods in the Cluster #
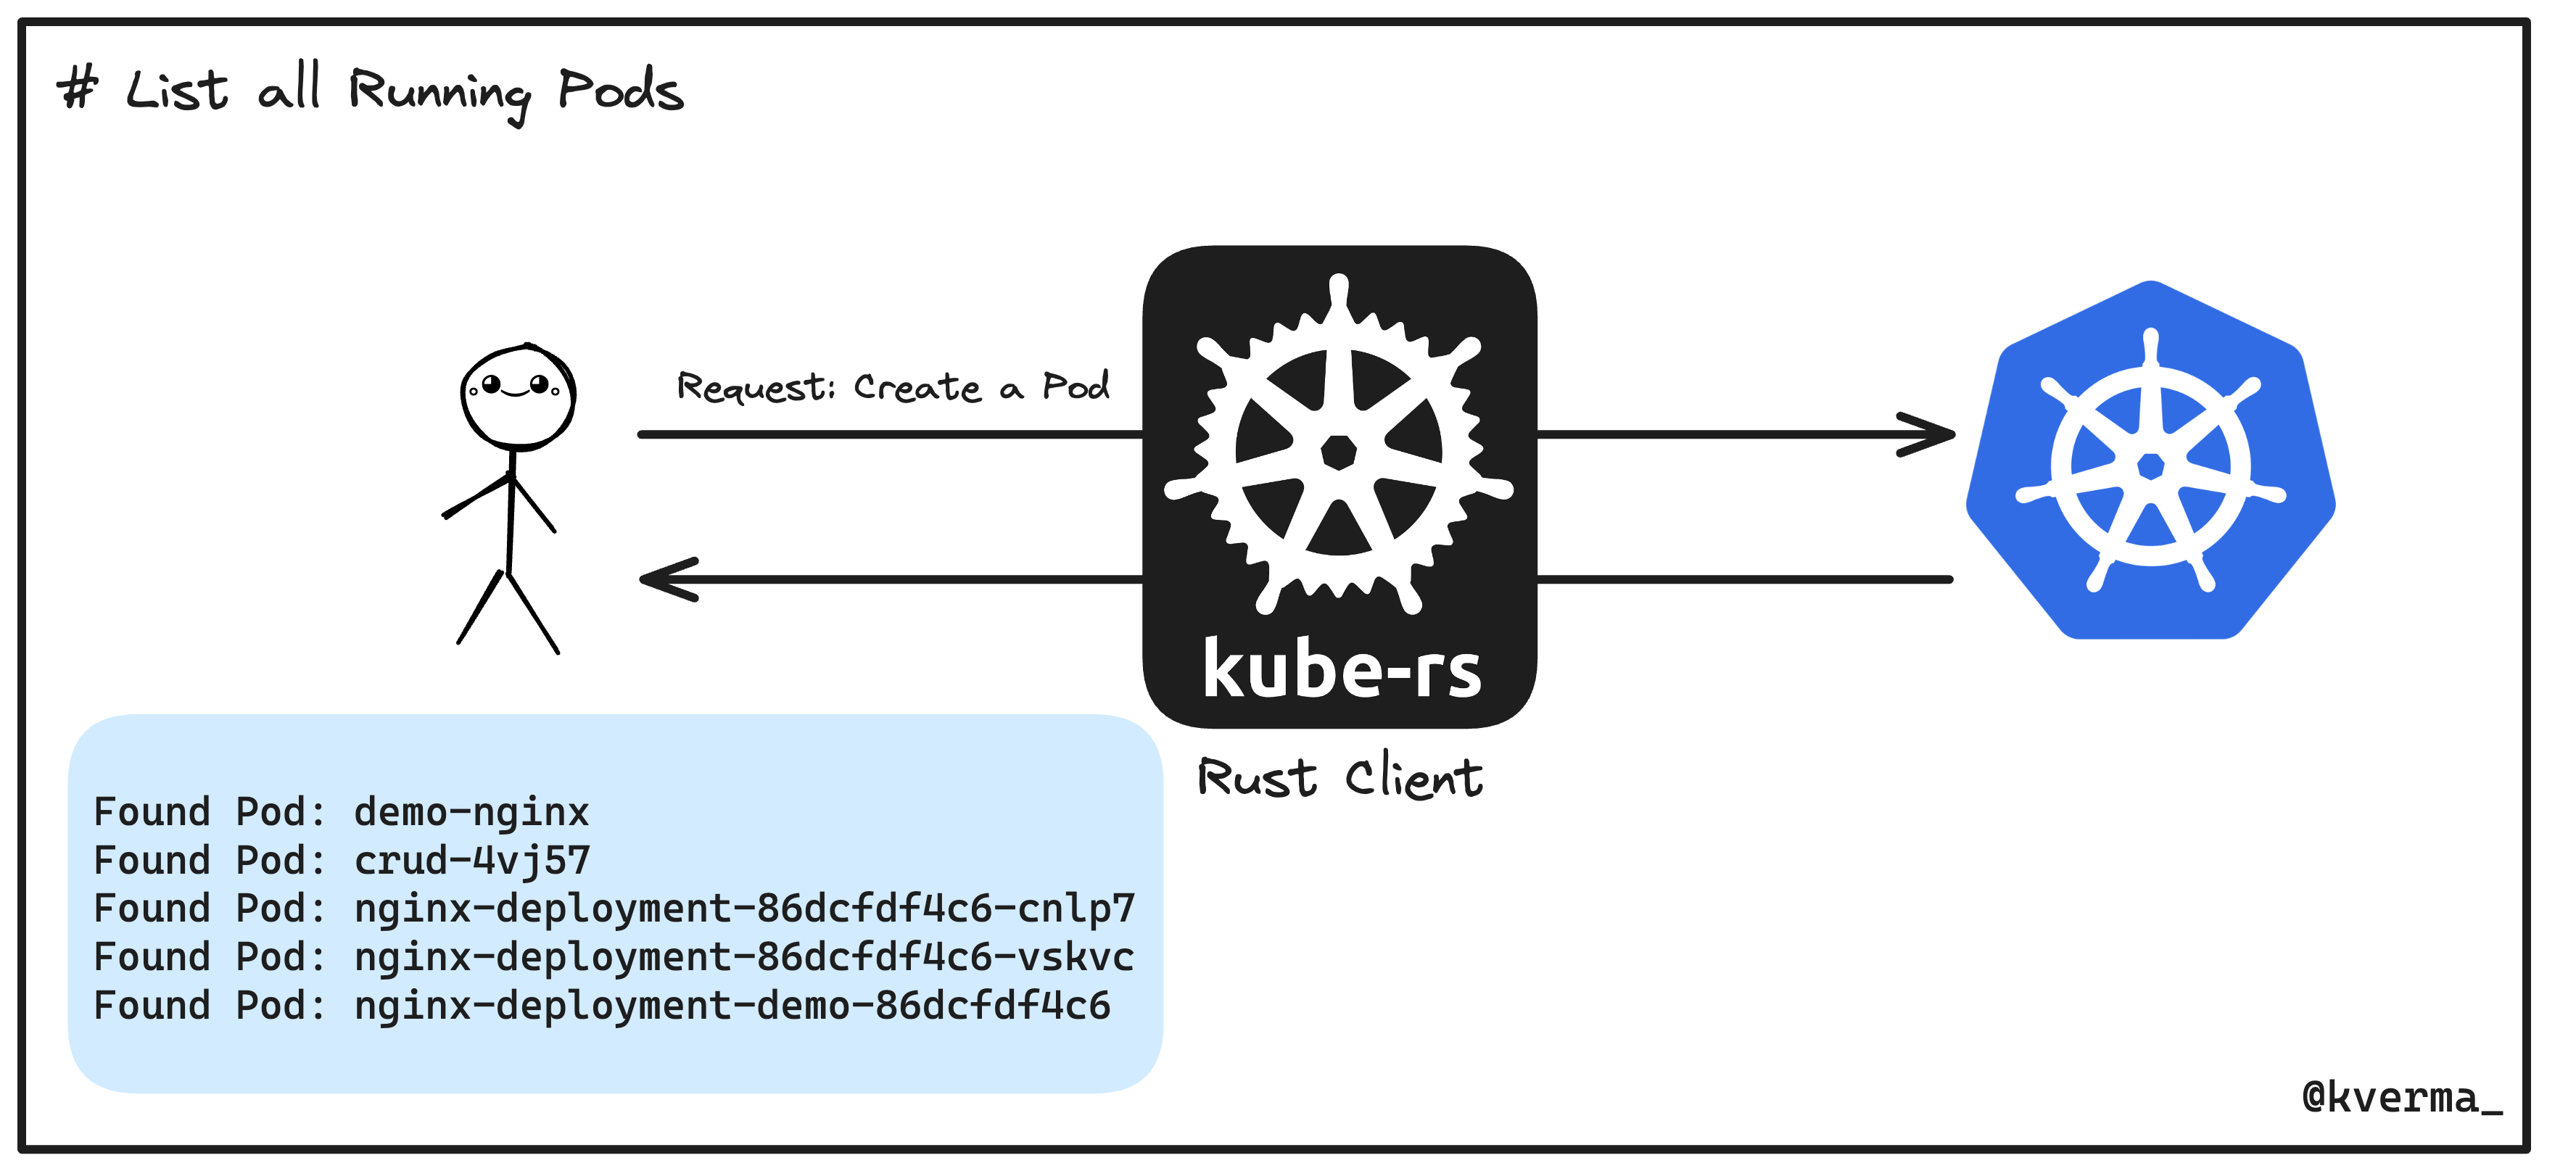
In this section, we'll learn the basics of using the kubernetes rust client, by listing down all running pods in our cluster.
Step 1 - Initialize the project #
For this, let's use Cargo to initiate the project:
cargo init kubers-demo
You can view the default project structure using the following command:
tree .Output:
.
├── Cargo.toml
└── src
    └── main.rs

2 directories, 2 files
Step 2 - Update cargo package manager dependencies #
Update the list of dependencies in the default kubers-demo/Cargo.toml file:
[package]
name = "kubers-demo"
version = "0.1.0"
edition = "2021"

# See more keys and their definitions at https://doc.rust-lang.org/cargo/reference/manifest.html

[dependencies]
kube = { version = "0.87.2", features = ["client","runtime", "derive", "rustls-tls"] }
k8s-openapi = { version = "0.20.0", features = ["latest"] }
tokio = { version = "1.0", features = ["full"] }  # Use the latest version
[dev-dependencies]
k8s-openapi = { version = "0.20.0", features = ["latest"] }
async-std = "1.0"  # Use the latest version
Step 3 - Update main.rs #
Update kubers-demo/src/main.rs, which contains our first simple program demonstrating how to interact with the Kubernetes API to list all pods within the default namespace.
use kube::{Client, Api};
use kube::api::ListParams;
use k8s_openapi::api::core::v1::Pod;
use std::error::Error;

#[tokio::main]
async fn main() -> Result<(), Box<dyn Error>> {
    // Load the kubeconfig file.
    let config = kube::Config::from_kubeconfig(&kube::config::KubeConfigOptions::default()).await?;
    let client = Client::try_from(config)?;

    // Work with Kubernetes API.
    let pods: Api<Pod> = Api::default_namespaced(client);
    let lp = ListParams::default();

    for p in pods.list(&lp).await? {
        println!("Found Pod: {}", p.metadata.name.unwrap_or_default());
    }

    Ok(())
}
Code Explanation:
Let's break down the above code to understand how our first simple program demonstrates interacting with the Kubernetes API to list all pods within the default namespace. Here's a step-by-step explanation:
-
Imports: The necessary crates and modules are imported:
-
kube::{Client, Api}: Provides the main Kubernetes client and the API wrapper. -
kube::api::ListParams: Allows parameterizing list queries. -
k8s_openapi::api::core::v1::Pod: Defines the Pod resource from the Kubernetes core API. -
std::error::Error: Handles error types.
-
-
Main Function: The
mainfunction is declared with the#[tokio::main]attribute to enable asynchronous execution using the Tokio runtime.#[tokio::main] async fn main() -> Result<(), Box<dyn Error>> { -
Load Kubeconfig: The Kubernetes configuration is loaded from the default kubeconfig file (typically found at
~/.kube/config).let config = kube::Config::from_kubeconfig(&kube::config::KubeConfigOptions::default()).await?; -
Create Client: A Kubernetes client is created from the loaded configuration.
let client = Client::try_from(config)?; -
Define API for Pods: An
Apiobject forPodresources is created, scoped to the default namespace using the client.let pods: Api<Pod> = Api::default_namespaced(client); -
List Parameters: Default parameters for listing resources are set up using
ListParams.let lp = ListParams::default(); -
List Pods:The code lists the Pods in the default namespace using the
listmethod on thepodsAPI object. It iterates over the list of Pods and prints their names.for p in pods.list(&lp).await? { println!("Found Pod: {}", p.metadata.name.unwrap_or_default()); } -
Return: The function returns
Ok(())to signify successful execution.Ok(()) }
Initializes a connection to a Kubernetes cluster using the local kubeconfig file, then lists all pods in the default namespace and prints their names. The use of async/await with the Tokio runtime allows for efficient, non-blocking interaction with the Kubernetes API.
Step 4 - Deploy a sample nginx application #
kubectl apply -f https://k8s.io/examples/application/deployment.yamlStep 5 - Test the program #
Use the following command to list down all the current pods in our Kubernetes cluster:
cargo run -- --kubers-demo kubectl -- get poYou'll get the following output:
Finished `dev` profile [unoptimized + debuginfo] target(s) in 3.77s
Running `target/debug/k8s-client --kubers-demo kubectl -- get po`
Found Pod: demo-nginx
Found Pod: crud-4vj57
Found Pod: nginx-deployment-86dcfdf4c6-cnlp7
Found Pod: nginx-deployment-86dcfdf4c6-vskvc
...Part 2 - Building a Custom Resource Definition (CRD) #
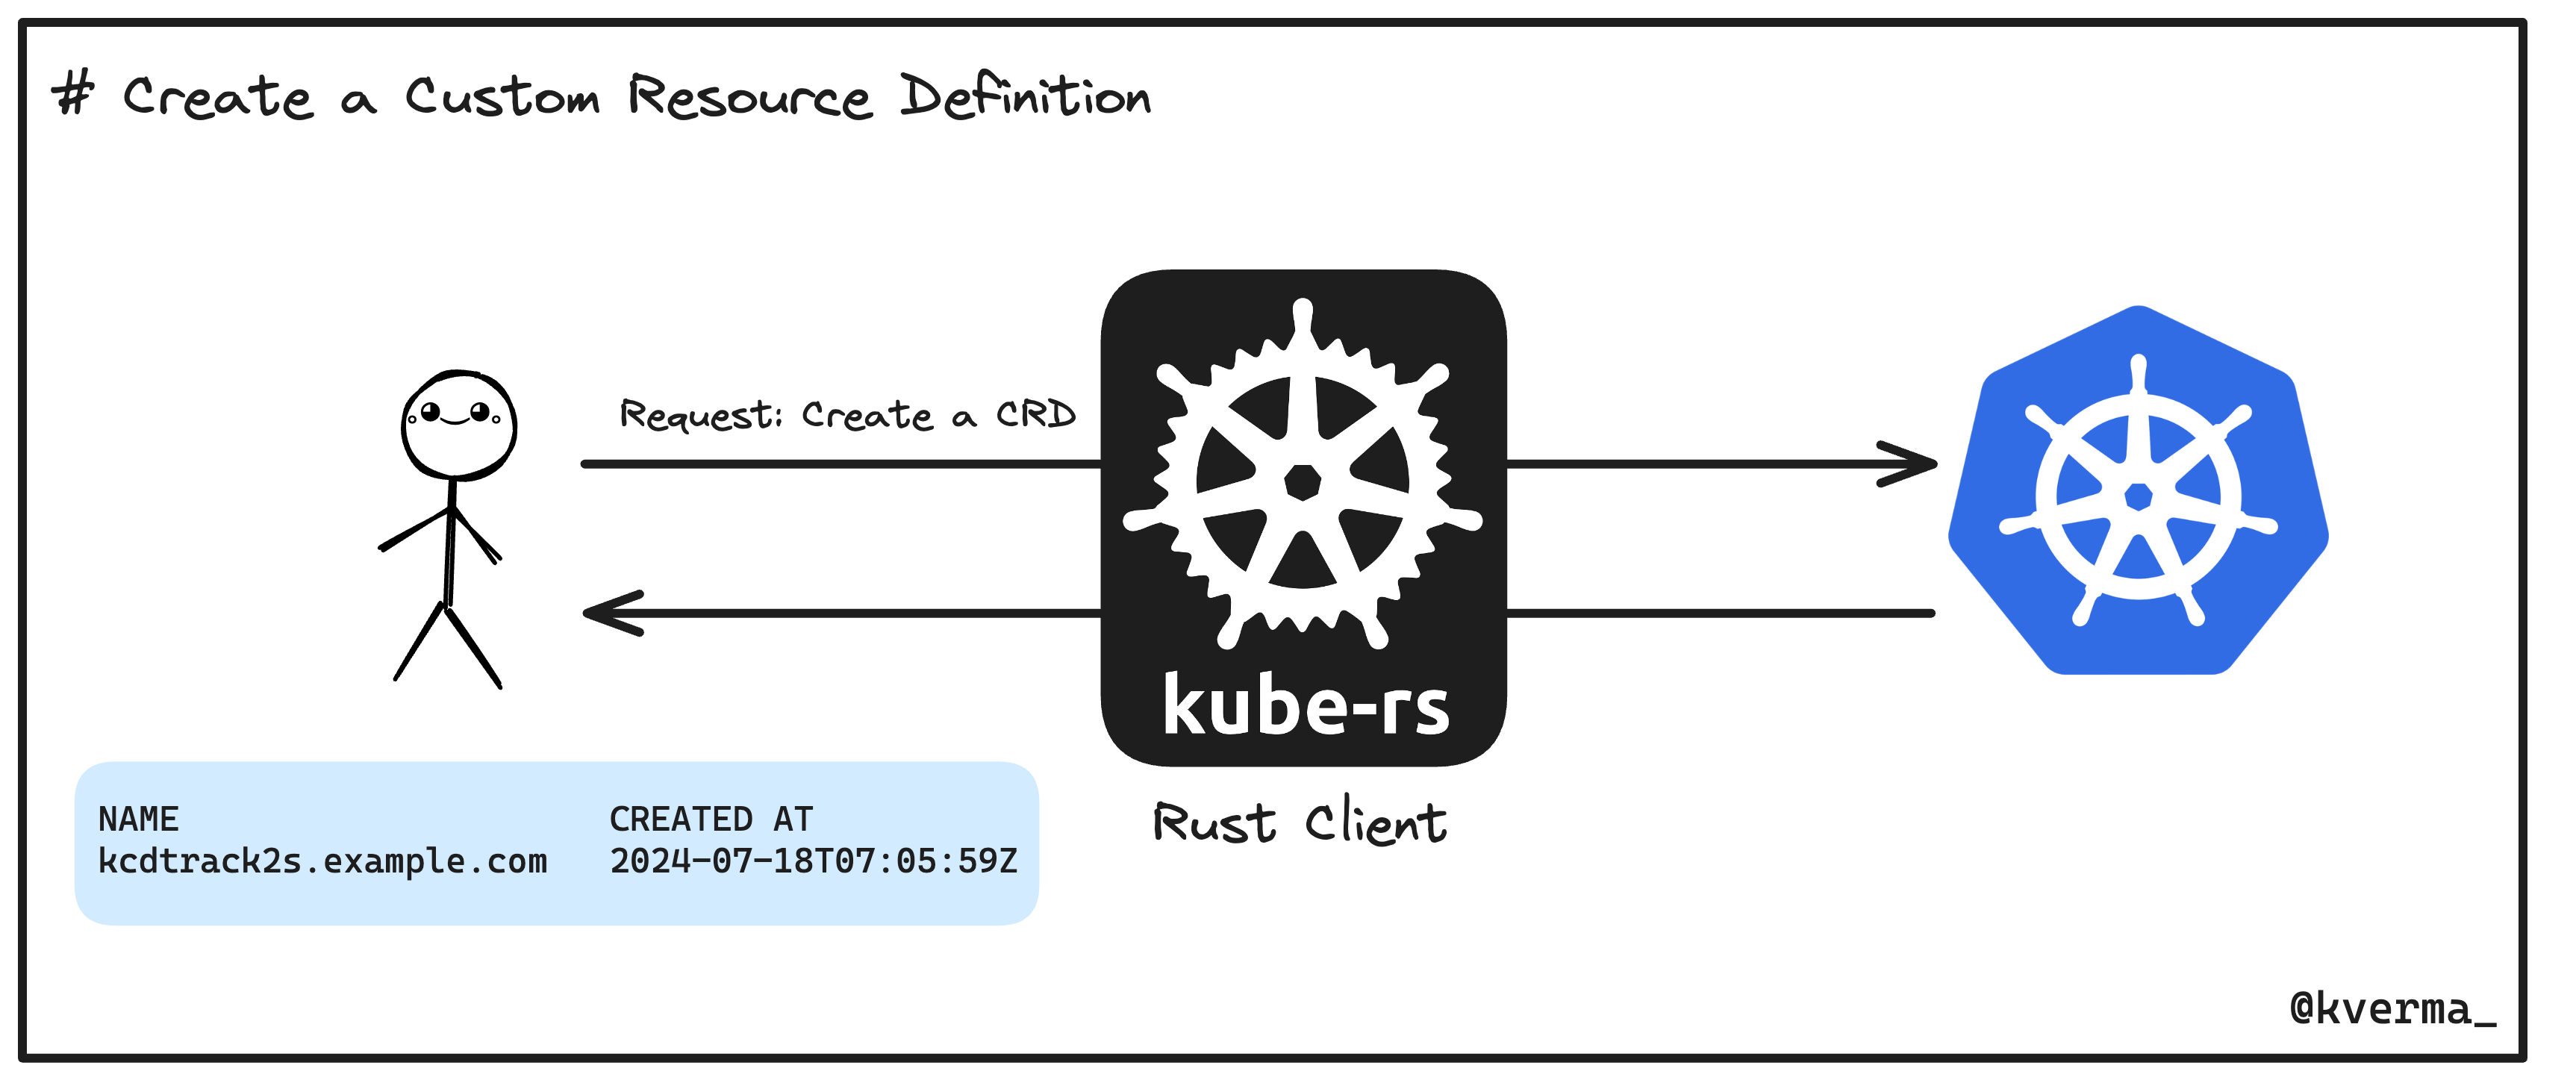
Kubernetes Custom Resource Definitions (CRDs) let you extend the Kubernetes API by defining your own custom objects. These objects can represent any kind of resource specific to your applications or workflows, such as database configurations, networking policies, or even complex deployment patterns. CRDs provide a way to manage these custom resources using the familiar Kubernetes tools and APIs, bringing consistency and automation to your Kubernetes environment.
In this section, we'll use the knowledge from the previous section to build a custom resource definition and then a custom resource for our Kubernetes cluster, using the rust client.
Step 1 - Initialize a new project #
Let us initialize a new project for this part. Use the following command to do so:
cargo init kube-crdStep 2 - Create custom resource definition schema #
Add the following code in src/main.rs:
use kube::{Api, Client};
use kube::api::PostParams;
use serde::{Serialize, Deserialize};
use k8s_openapi::apiextensions_apiserver::pkg::apis::apiextensions::v1::{
CustomResourceDefinition,
CustomResourceDefinitionSpec,
CustomResourceDefinitionNames,
CustomResourceDefinitionVersion,
JSONSchemaProps,
CustomResourceValidation,
JSONSchemaPropsOrArray,
};
use k8s_openapi::apimachinery::pkg::apis::meta::v1::ObjectMeta;
use schemars::JsonSchema;
use kube::CustomResource;
use std::collections::BTreeMap;
// Define the spec of our custom resource
#[derive(CustomResource, Deserialize, Serialize, Clone, Debug, JsonSchema)]
#[kube(group = "example.com", version = "v1", kind = "KCDTrack2", namespaced)]
pub struct MeetupSpec {
organizer: String,
topic: String,
attendees: Vec<String>,
conference: String,
time: String,
session_type: String,
speaker: String,
}
// Main function to create the CRD in the cluster
#[tokio::main]
async fn main() -> Result<(), kube::Error> {
let client = Client::try_default().await?;
let crds: Api<CustomResourceDefinition> = Api::all(client);
let pp = PostParams::default();
// Define the CRD for our KCDTrack2 resource
let kcd_crd = CustomResourceDefinition {
metadata: ObjectMeta {
name: Some("kcdtrack2s.example.com".to_string()),
..Default::default()
},
spec: CustomResourceDefinitionSpec {
group: "example.com".to_string(),
versions: vec![
CustomResourceDefinitionVersion {
name: "v1".to_string(),
served: true,
storage: true,
schema: Some(CustomResourceValidation {
open_api_v3_schema: Some(JSONSchemaProps {
type_: Some("object".to_string()),
properties: Some({
let mut props = BTreeMap::new();
props.insert("spec".to_string(), JSONSchemaProps {
type_: Some("object".to_string()),
properties: Some({
let mut spec_props = BTreeMap::new();
spec_props.insert("organizer".to_string(), JSONSchemaProps {
type_: Some("string".to_string()),
..Default::default()
});
spec_props.insert("topic".to_string(), JSONSchemaProps {
type_: Some("string".to_string()),
..Default::default()
});
spec_props.insert("attendees".to_string(), JSONSchemaProps {
type_: Some("array".to_string()),
items: Some(JSONSchemaPropsOrArray::Schema(Box::new(JSONSchemaProps {
type_: Some("string".to_string()),
..Default::default()
}))),
..Default::default()
});
spec_props.insert("conference".to_string(), JSONSchemaProps {
type_: Some("string".to_string()),
..Default::default()
});
spec_props.insert("time".to_string(), JSONSchemaProps {
type_: Some("string".to_string()),
..Default::default()
});
spec_props.insert("session_type".to_string(), JSONSchemaProps {
type_: Some("string".to_string()),
..Default::default()
});
spec_props.insert("speaker".to_string(), JSONSchemaProps {
type_: Some("string".to_string()),
..Default::default()
});
spec_props
}),
..Default::default()
});
props
}),
..Default::default()
}),
}),
..Default::default()
}
],
names: CustomResourceDefinitionNames {
plural: "kcdtrack2s".to_string(),
singular: Some("kcdtrack2".to_string()),
kind: "KCDTrack2".to_string(),
short_names: Some(vec!["kcdt2".to_string()]),
..Default::default()
},
scope: "Namespaced".to_string(),
..Default::default()
},
status: None,
};
// Create the CRD
crds.create(&pp, &kcd_crd).await?;
Ok(())
}Step 3 - Update cargo package manager dependencies #
Add the following code in kube-crd/Cargo.toml file:
[package]
name = "kube-crd"
version = "0.1.0"
edition = "2021"

# See more keys and their definitions at https://doc.rust-lang.org/cargo/reference/manifest.html
[dependencies]
schemars = "0.8.15"
kube = { version = "0.87.1", features = ["runtime", "derive"] }
k8s-openapi = { version = "0.20.0", features = ["latest"] }
tokio = { version = "1.0", features = ["full"] }  # Use the latest version
serde = "1.0.155"
serde_derive = "1.0.155"
serde_json = "1.0.94"
serde_yaml = "0.9.19"
Step 4 - Run the program #
cargo run Output:
Finished `dev` profile [unoptimized + debuginfo] target(s) in 0.07s
Running `target/debug/kube-crd`
Step 5 - Verify CRD creation #
kubectl get crdIf everything goes well, you will get the following output:
NAME                     CREATED AT
kcdtrack2s.example.com   2024-06-23T04:46:25Z
Step 6 - Create a new custom resource #
Create a new k8s manifest file using vi kube-crd/kcdhyd.yaml and add the following configuration to create a custom resource, based on our CRD:
apiVersion: example.com/v1
kind: KCDTrack2
metadata:
  name: integrating-rust
spec:
  organizer: "kcdhyd"
  topic: "Building the Bridge: Integrating Rust with Kubernetes Controller Runtime"
  attendees: []
  conference: "KCD Hyderabad"
  time: "15:55 - 16:20"
  session_type: "Session"
  speaker: "Sangam Biradar, CloudNativeFolks"
Step 7 - Apply the CRD yaml #
kubectl apply -f kcdhyd.yaml Output:
kcdtrack2.example.com/integrating-rust createdStep 8 - Print a specific jsonpath of CRD #
kubectl get kcdtrack2 integrating-rust -o jsonpath='{.spec.speaker}' Output:
Sangam Biradar, CloudNativeFolksPart 3 - Monitor Kubernetes pods and send updates to the slack channel #
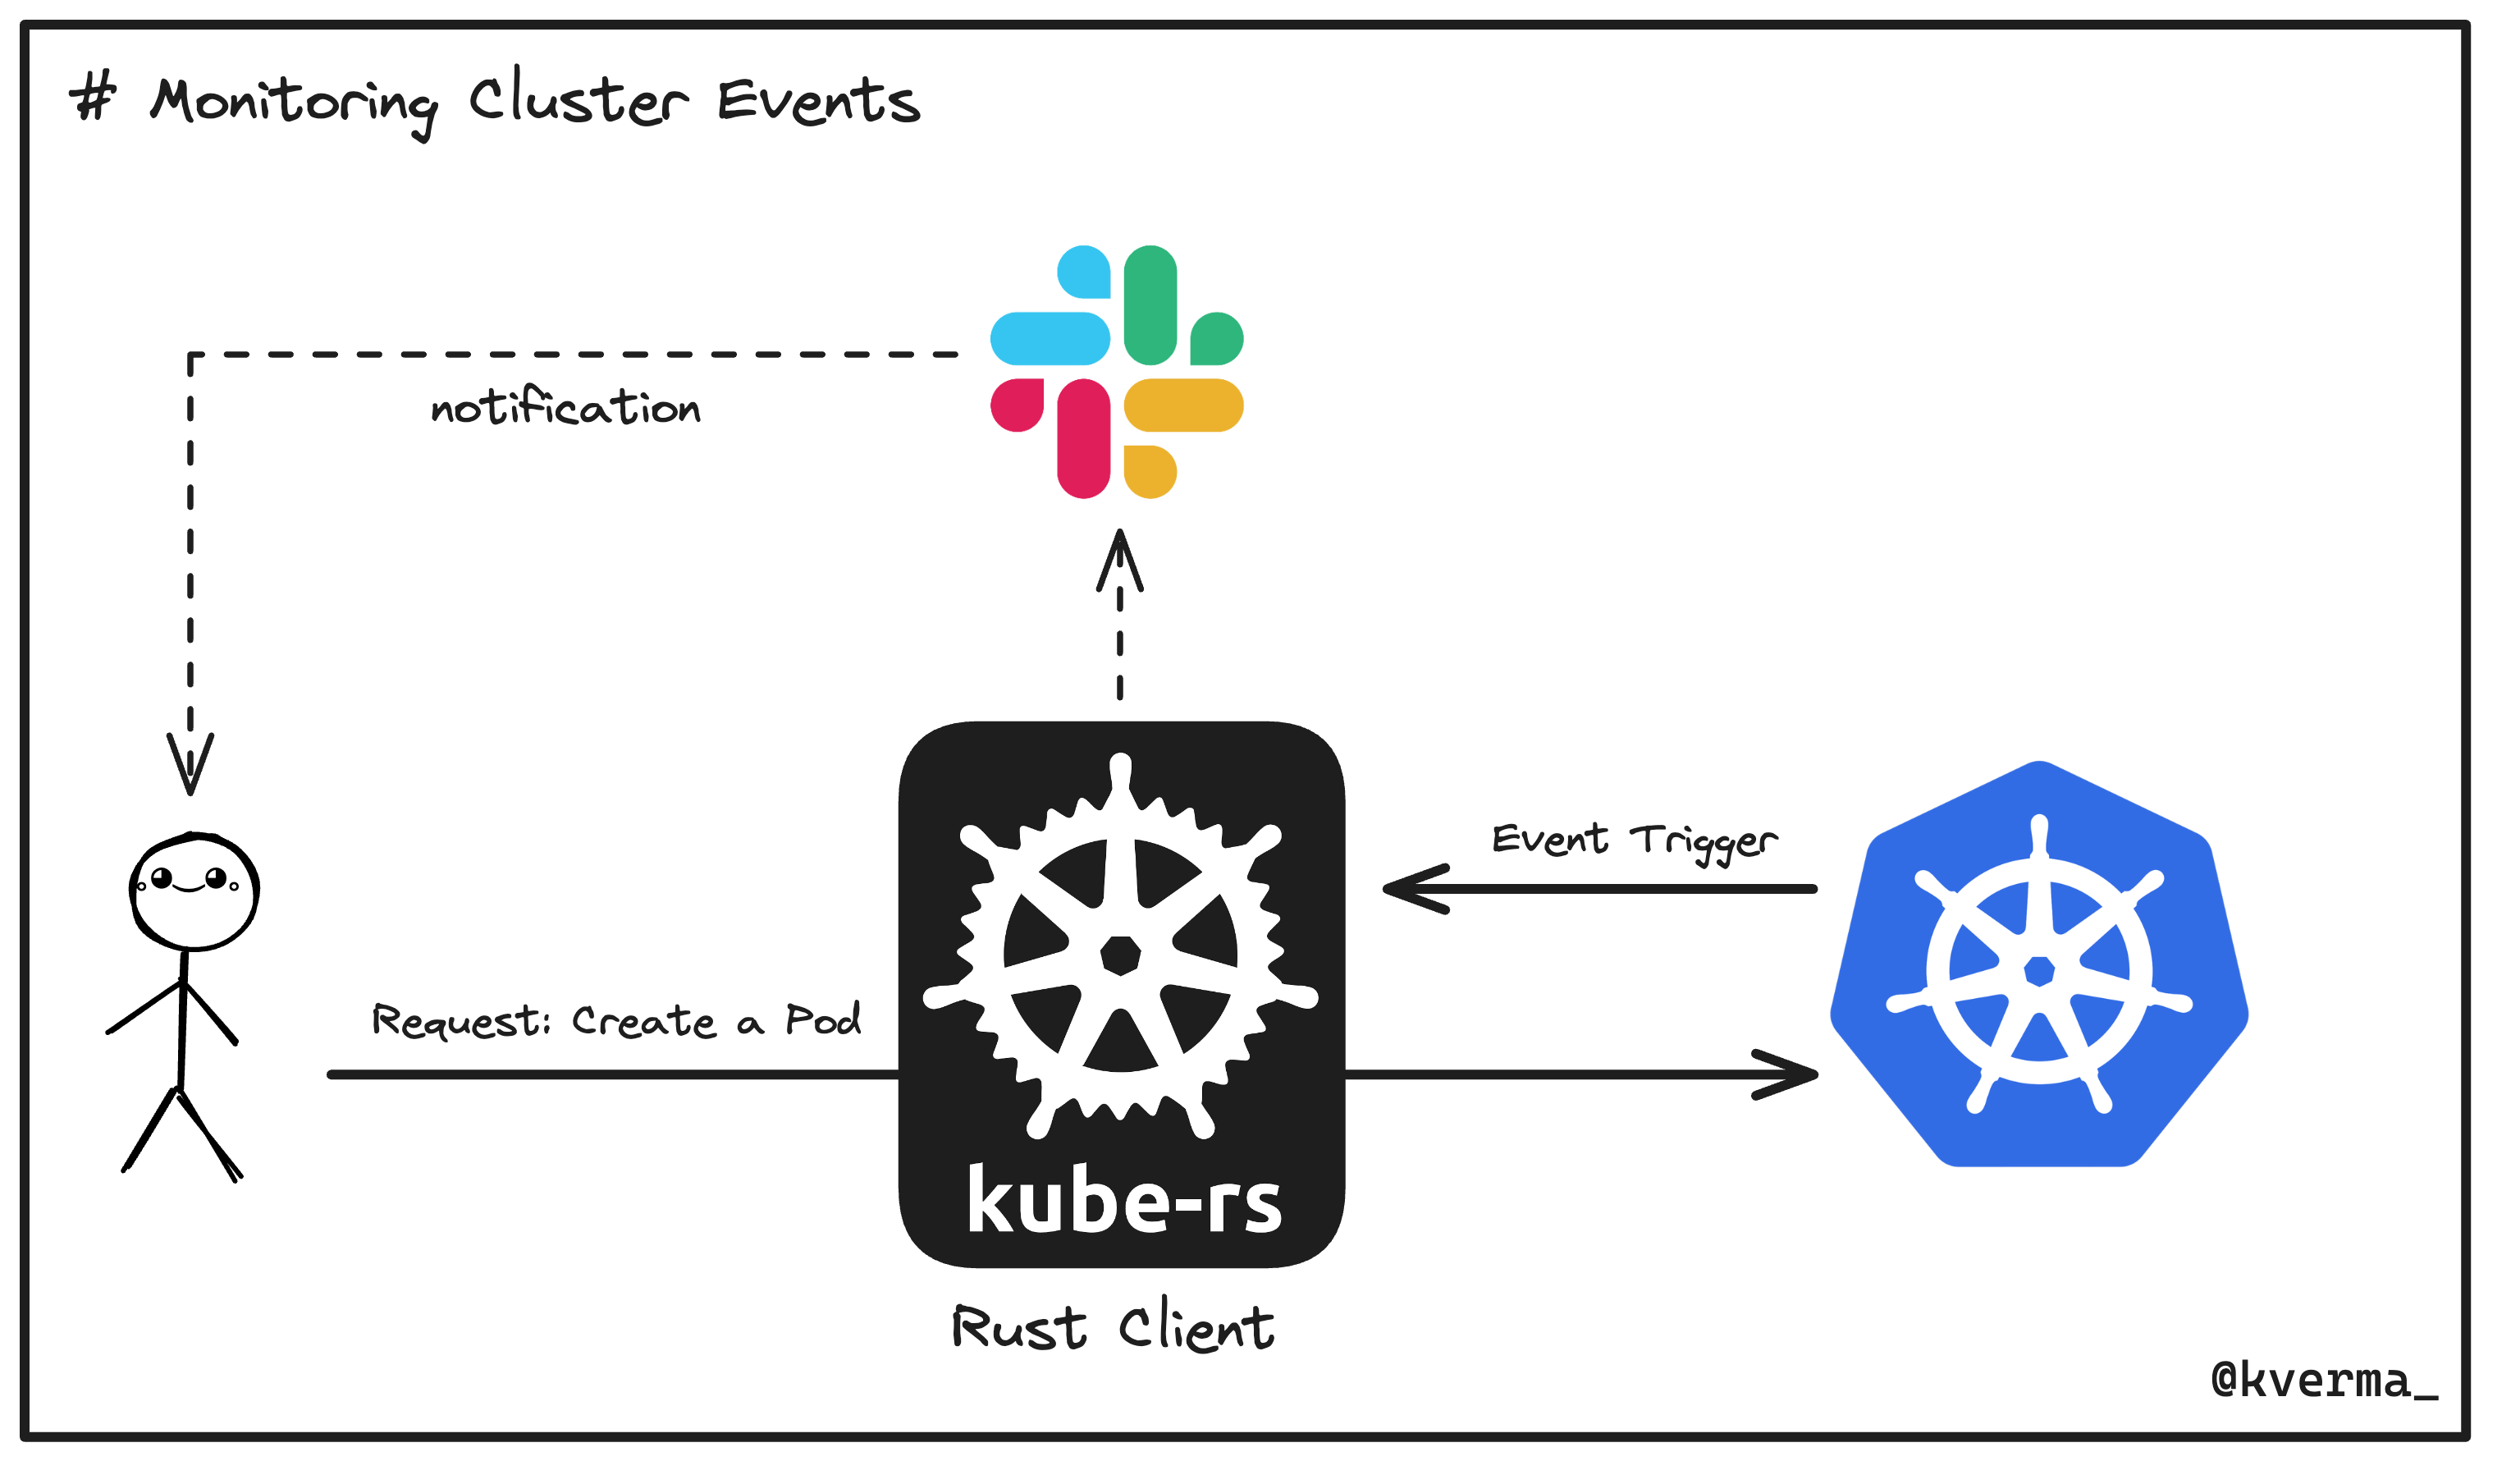
In this section, we'll use what we've learned from the above sections, to create a program that watches Kubernetes pod events using the kube runtime, filter for changes, and trigger Slack notifications when pod statuses change.
Step 1 - Initialize a new project #
Let us initialize a new project called slack-integration:
cargo init slack-integrationStep 2 - Update cargo package manager dependencies #
Update the default slack-integration/Cargo.toml with the following configuration:
[package]
name = "slack-integration"
version = "0.1.0"
edition = "2021"

[dependencies]
kube = { version = "0.87.2", features = ["runtime"] }
kube-runtime = "0.87.2"
k8s-openapi = { version = "0.20.0", features = ["latest"] }
serde = { version = "1.0", features = ["derive"] }
serde_json = "1.0"
tokio = { version = "1", features = ["full"] }
reqwest = { version = "0.11.23", features = ["json"] }  # Enable the json feature
schemars = "0.8"
futures-util = "0.3.30"
Step 3 - Create the program #
Let us first import all the necessary libraries to manage Kubernetes resources, make HTTP requests, handle JSON data, and support asynchronous programming.
Add the following libraries in src/main.rs:
use kube::{Client, Api};
use kube::runtime::watcher;
use k8s_openapi::api::core::v1::Pod;
use tokio;
use reqwest;
use serde_json::json;
use futures_util::TryStreamExt;
use tokio::sync::mpsc;
Next up, we'll create a new function called send_slack_message, which would be responsible for sending messages to Slack.
async fn send_slack_message(client: &reqwest::Client, webhook_url: &str, messages: Vec<String>) {
    let payload = json!({ "text": messages.join("\n") });
    if let Err(e) = client.post(webhook_url)
        .json(&payload)
        .send()
        .await {
        eprintln!("Failed to send message to Slack: {}", e);
    }
}
Let us now create the main function for our program:
#[tokio::main]
async fn main() -> Result<(), Box<dyn std::error::Error>> {
    let client = Client::try_default().await?;
    let pods: Api<Pod> = Api::all(client);
    let watcher = watcher(pods, Default::default());

    let slack_webhook_url = "https://hooks.slack.com/services/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"; // Replace with your Slack webhook URL
    let reqwest_client = reqwest::Client::new();

    let (tx, mut rx) = mpsc::channel(100);

    // Task to batch and send Slack messages periodically
    let webhook_task = tokio::spawn(async move {
        let mut messages = Vec::new();
        while let Some(message) = rx.recv().await {
            messages.push(message);
            if messages.len() >= 10 {
                send_slack_message(&reqwest_client, slack_webhook_url, messages.split_off(0)).await;
            }
        }
        if !messages.is_empty() {
            send_slack_message(&reqwest_client, slack_webhook_url, messages).await;
        }
    });

    tokio::pin!(watcher);
    while let Some(event) = watcher.try_next().await? {
        if let watcher::Event::Applied(pod) = event {
            let pod_name = pod.metadata.name.unwrap_or_default();
            let message = format!("Pod update: {}", pod_name);
            tx.send(message).await?;
        }
    }

    drop(tx); // Close the channel to stop the webhook task
    webhook_task.await?;

    Ok(())
}
Here's a breakdown of the core logic:
-
Tokio Main Function:
- Uses
#[tokio::main]to enable asynchronous execution.
- Uses
-
Kubernetes Client and Watcher:
-
Initializes a Kubernetes client with
Client::try_default().await?. -
Sets up a watcher for all Pods with
Api::all(client)andwatcher(pods, Default::default()).
-
-
Slack Webhook Setup:
-
Defines the Slack webhook URL to send notifications.
-
Creates an HTTP client using
reqwest::Client::new().
-
-
Message Channel:
- Creates a channel for message passing with
mpsc::channel(100).
- Creates a channel for message passing with
-
Batching and Sending Slack Messages:
-
Spawns a task to batch and send messages asynchronously.
-
Collects messages and sends them in batches to Slack.
-
-
Processing Pod Events:
-
Watches for pod events and extracts pod names.
-
Sends formatted messages to the channel when a pod event occurs.
-
-
Cleanup:
-
Closes the channel to stop the message-sending task.
-
Waits for the task to complete before exiting the program.
-
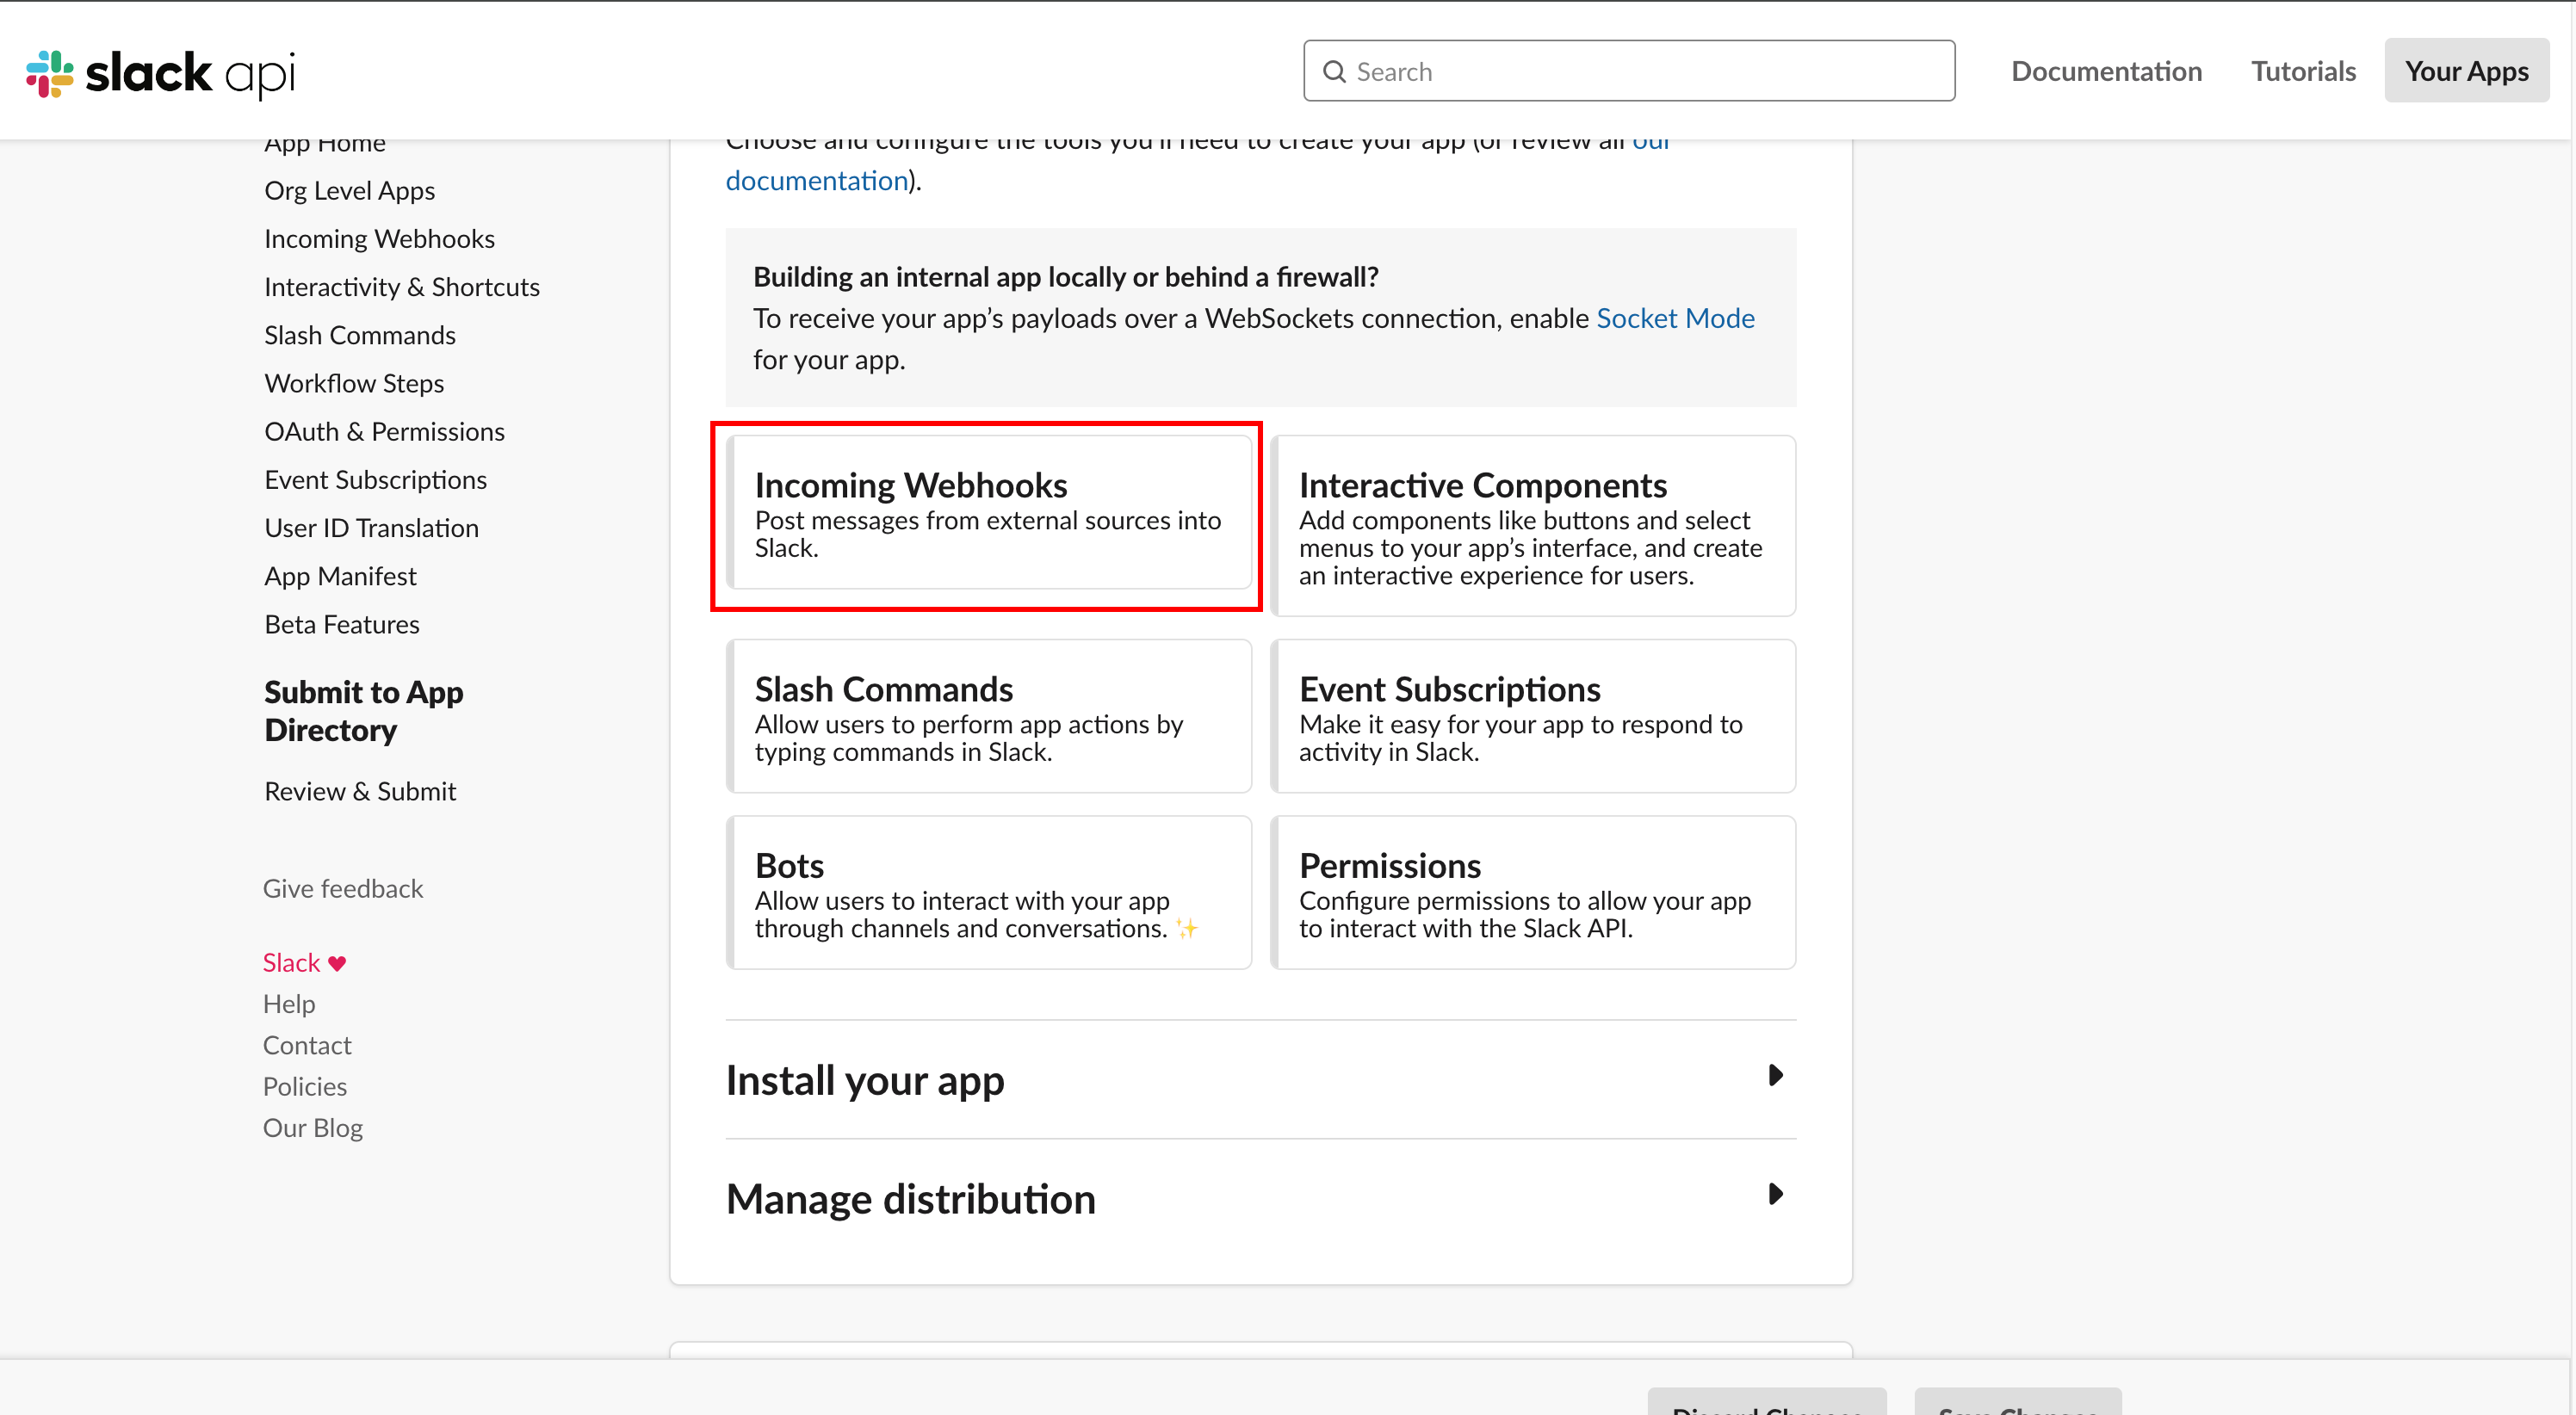
Step 4 - Slack integration #
Create a new Slack app by heading over to Slack Apps and enable the "app incoming webhooks", as shown below. Additionally, copy webhook URL to add in our program.
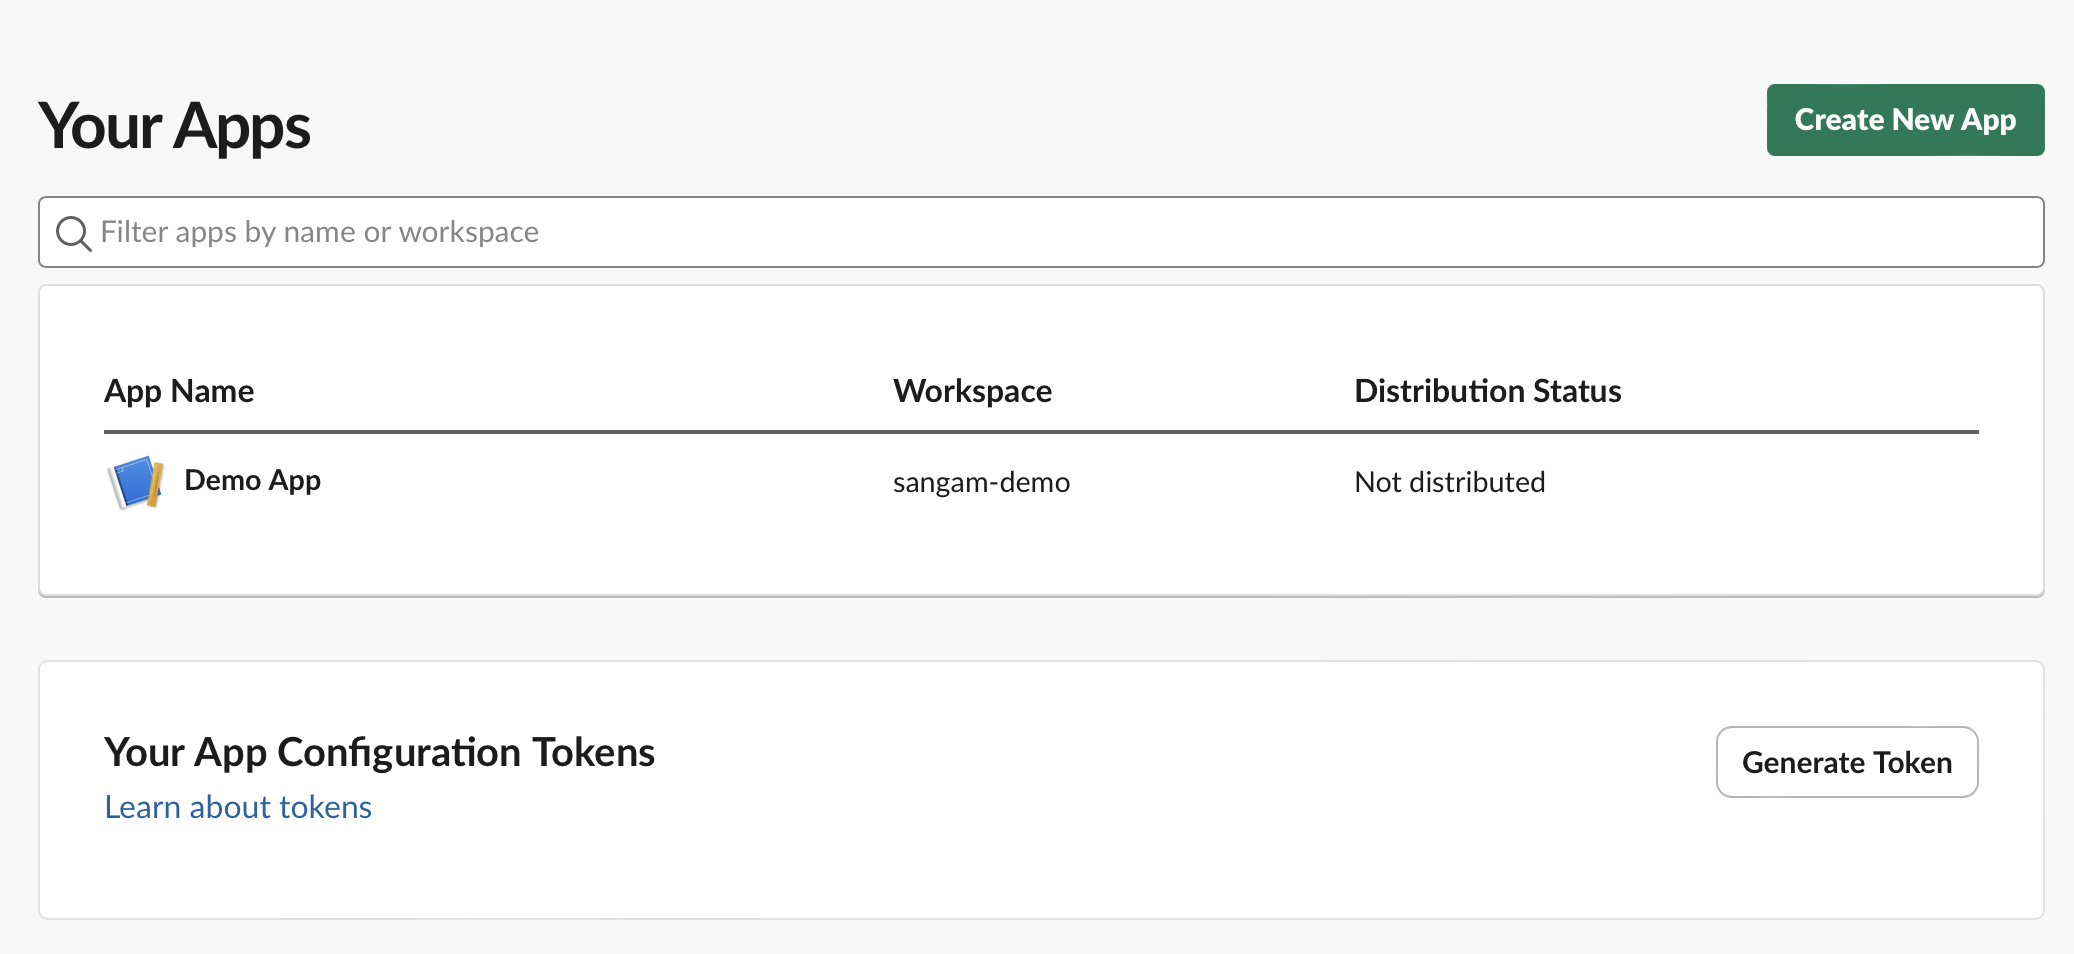

After this, make sure to paste the Slack webhook URL in your code (in slack-integration/src/main.rs):
let slack_webhook_url = "Slack webhook URL here"; // Replace with your Slack webhook URLStep 5 - Run the program and deploy the application #
cargo run Output:
Compiling slack-integration v0.1.0 (/Users/sangambiradar/Documents/GitHub/kubers-demo/slack-integration)
Finished `dev` profile [unoptimized + debuginfo] target(s) in 2.24s
Running `/Users/sangambiradar/Documents/GitHub/kubers-demo/target/debug/slack-integration`
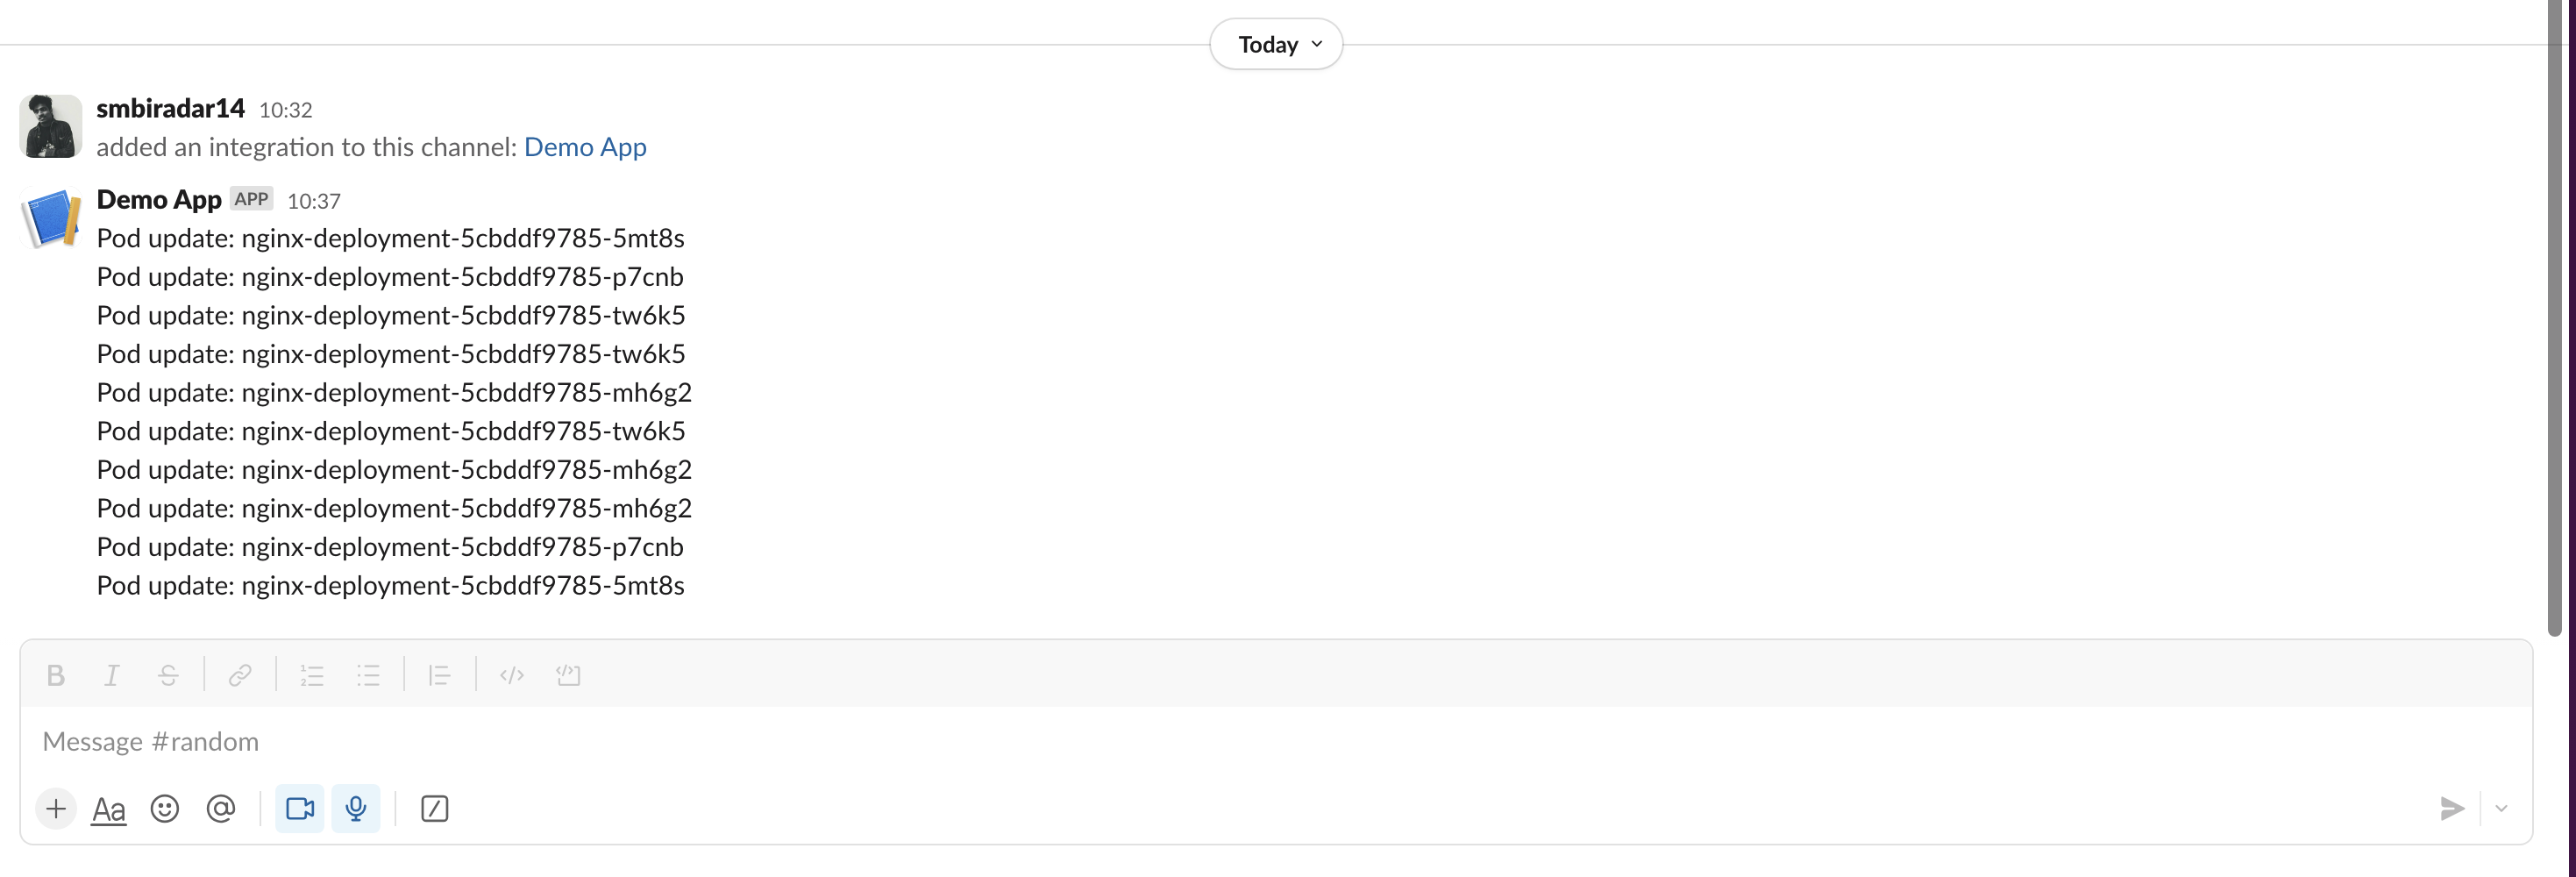
... In another terminal, deploy any application using a sample YAML:
kubectl apply -f nginx2.yamlYou will see real-time updates on the Slack channel 🎉
Conclusion #
We explored how to efficiently use Rust with Kubernetes by leveraging the kube-rs crate. We started with setting up the Rust environment, Minikube, and initializing a Rust project using Cargo. We demonstrated how to interact with the Kubernetes API to list all pods within the default namespace. Additionally, we covered creating a Custom Resource Definition (CRD) in Rust, including defining custom resources, building CRDs, and verifying their creation in Kubernetes.
Furthermore, we built a simple Rust application that monitors Kubernetes pods and sends updates to a Slack channel using a webhook. This application demonstrated asynchronous programming with Rust's Tokio runtime and efficient communication with Slack through batched messages.
Resources #
Follow Kubesimplify on Hashnode, Twitter/X and LinkedIn. Join our Discord server to learn with us!
DevRel at StackGen | Formerly at Deepfence ,Tenable , Accurics | AWS Community Builder also Docker Community Award Winner at Dockercon2020 | CyberSecurity Innovator of Year 2023 award by Bsides Bangalore | Docker/HashiCorp Meetup Organiser Bangalore & Co-Author of Learn Lightweight Kubernetes with k3s (2019) , Packt Publication & also run Non Profit CloudNativeFolks / CloudSecCorner Community To Empower Free Education reach out me twitterhttps://twitter.com/sangamtwts or just follow on GitHub -> https://github.com/sangam14 for Valuable Resources
Get new posts in your inbox.
Spotted a typo or want to improve this post? Edit on GitHub →