How to backup Kubernetes with Kasten Community Edition?
Data protection has become one of the fundamental aspects of IT security. The need to back up data is no longer just an "Enterprise endeavor".

Data protection has become one of the fundamental aspects of IT security. The need to back up data is no longer just an "Enterprise endeavor" but also essential for the average user in both offices and homes.
The situation with Kubernetes is no different. While Kubernetes has many self-healing features and is very robust, nevertheless it is also vulnerable to all the threats that exist for conventional IT systems.
Today, I want to walk you through your own Kubernetes backup exercise. We will start by creating a Minikube single node cluster on Windows 11. We will then deploy a simple application and back it up, leveraging Kasten by Veeam community edition.
To start off with, we will install the windows package manager Chocolatey. The installation instructions can be found here: https://chocolatey.org/install
In fact, all you need to do to perform the installation is to enter this PowerShell command:
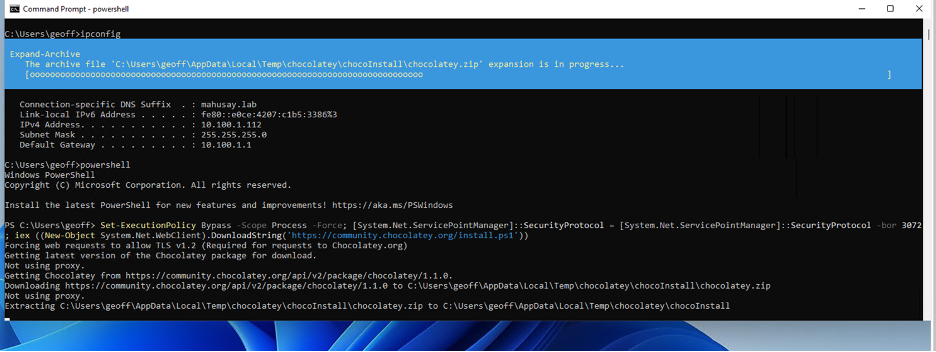
Set-ExecutionPolicy Bypass -Scope Process -Force; [System.Net.ServicePointManager]::SecurityProtocol = [System.Net.ServicePointManager]::SecurityProtocol -bor 3072; iex ((New-Object System.Net.WebClient).DownloadString('https://community.chocolatey.org/install.ps1'))You should see something like this as the installation progresses:
Now that Chocolatey is ready, we are all set to install Minikube and some other components necessary for our project.
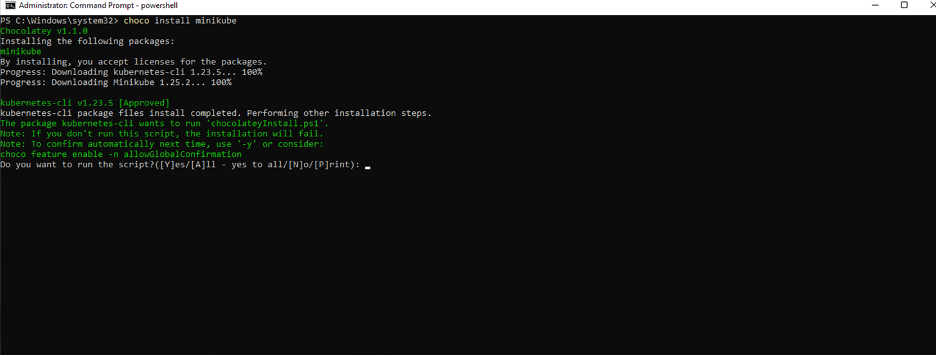
Using chocolatey is very simple and in order to install Minikube we need only type
choco install minikubeIt will ask to confirm the script run:
We also want to install helm. Helm is a package manager for Kubernetes and later on we will use it for our Kasten deployment:
choco install kubernetes-helm
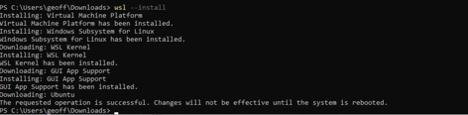
If you are used to using Linux bash CLI, then you can also install the Windows subsystem for Linux by typing:
wsl --installThis will require a reboot.
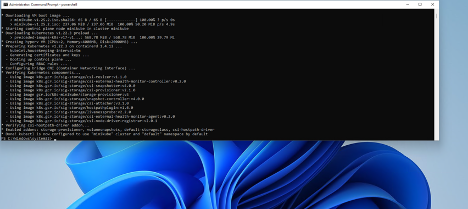
It is now time to set up our cluster. We are going to use Kubernetes version 1.22.3 and enable some add-ons that will help us emulate production, like volumesnapshots and the csi-hostpath-driver. In my Windows 11 I enabled Hyperv, but you could also use Virtualbox.
minikube start --addons volumesnapshots,csi-hostpath-driver --container-runtime=containerd --kubernetes-version=1.22.3 --vm-driver=hyperv --forceAfter completing, you should see something like this:
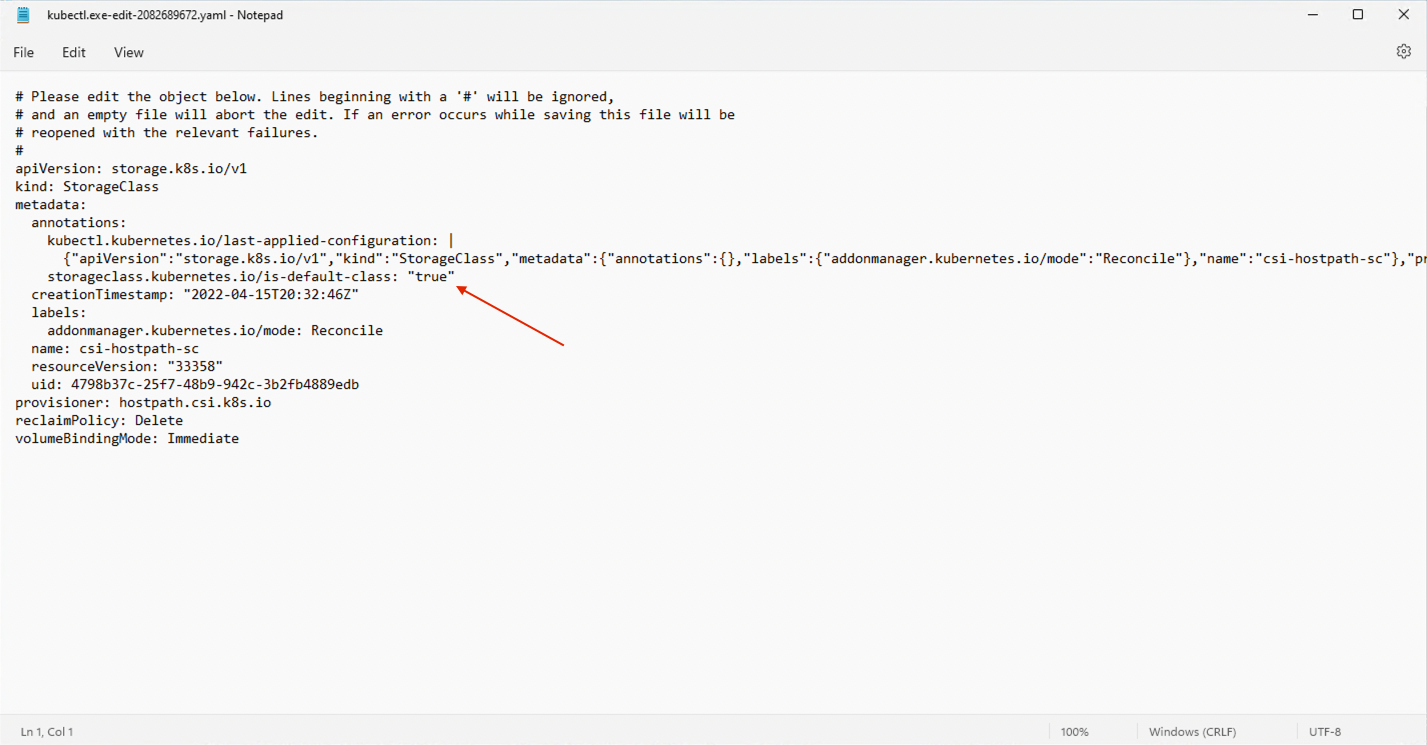
We want our csi-hostpath-sc (storageclass) to be the only storageclass in the cluster, so we will disable the default storage class that comes with Minikube:
minikube addons disable default-storageclassWe will now edit our csi-hostpath-sc and make it the default one by typing:
kubectl edit sc csi-hostpath-scwhich in windows will open notepad, and we want to change the false to true in here:
We are now ready to install our application:
First, let's create a namespace named nginx:
kubectl create ns nginxNext copy this the contents of this file below into a file called nginx.yaml
kind: PersistentVolumeClaim
apiVersion: v1
metadata:
  name: nginxpvcclaim
  namespace: nginx
spec:
  accessModes:
    - ReadWriteMany
  resources:
    requests:
      storage: 1Gi
---
kind: Pod
apiVersion: v1
metadata:
  name: nginxwebsite
  namespace: nginx
  labels:
    run: nginx
spec:
  volumes:
    - name: storage
      persistentVolumeClaim:
       claimName: nginxpvcclaim
  containers:
    - name: nginxwebsite
      image: nginx
      ports:
        - containerPort: 80
          name: "http-server"
      volumeMounts:
        - mountPath: "/usr/share/nginx/html"
          name: storage
Now create the application
kubectl create -f nginx.yaml
This will create a pod with persistent storage that we can backup later.

It is now time to install Kasten.
The Kasten documentation can be found here: https://docs.kasten.io/latest/
Let's create a namespace:
kubectl create ns kasten-ioAdd the Kasten helm repo
helm repo add kasten https://charts.kasten.io/We will need to tell Kasten what the default snapshotclass is with this command:
kubectl annotate volumesnapshotclass csi-hostpath-snapclass k10.kasten.io/is-snapshot-class=trueWe are ready now to install.
helm install k10 kasten/k10 -namespace=kasten-io --set global.persistence.storageClass=csi-hostpath-scYou should now see this:
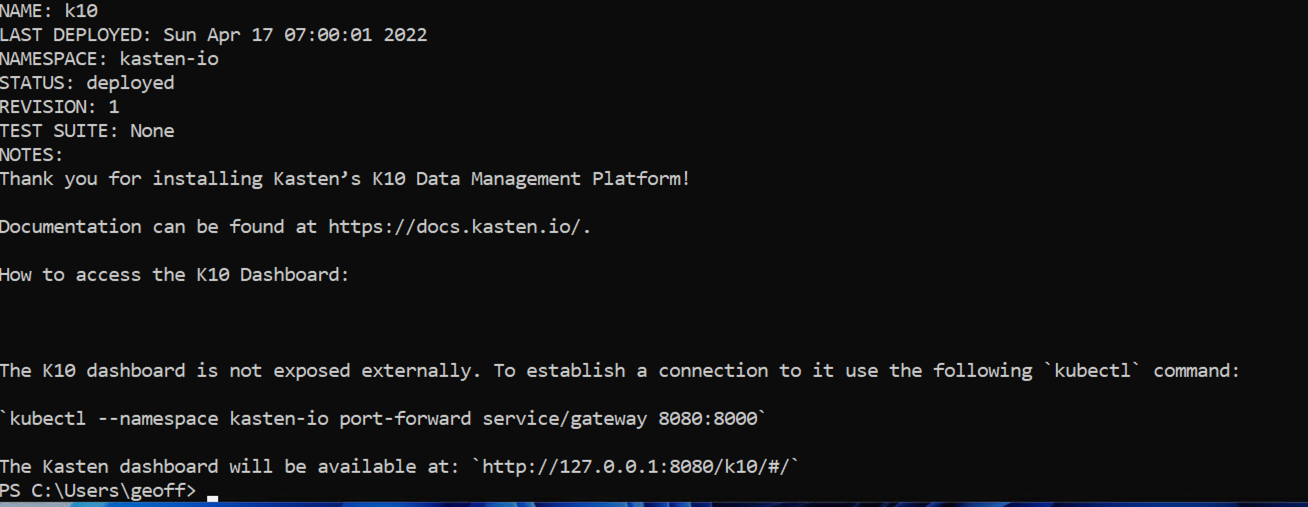
After a few minutes, the Kasten Dashboard should be accessible :
kubectl --namespace kasten-io port-forward service/gateway 8080:8000Open your browser and head to address:
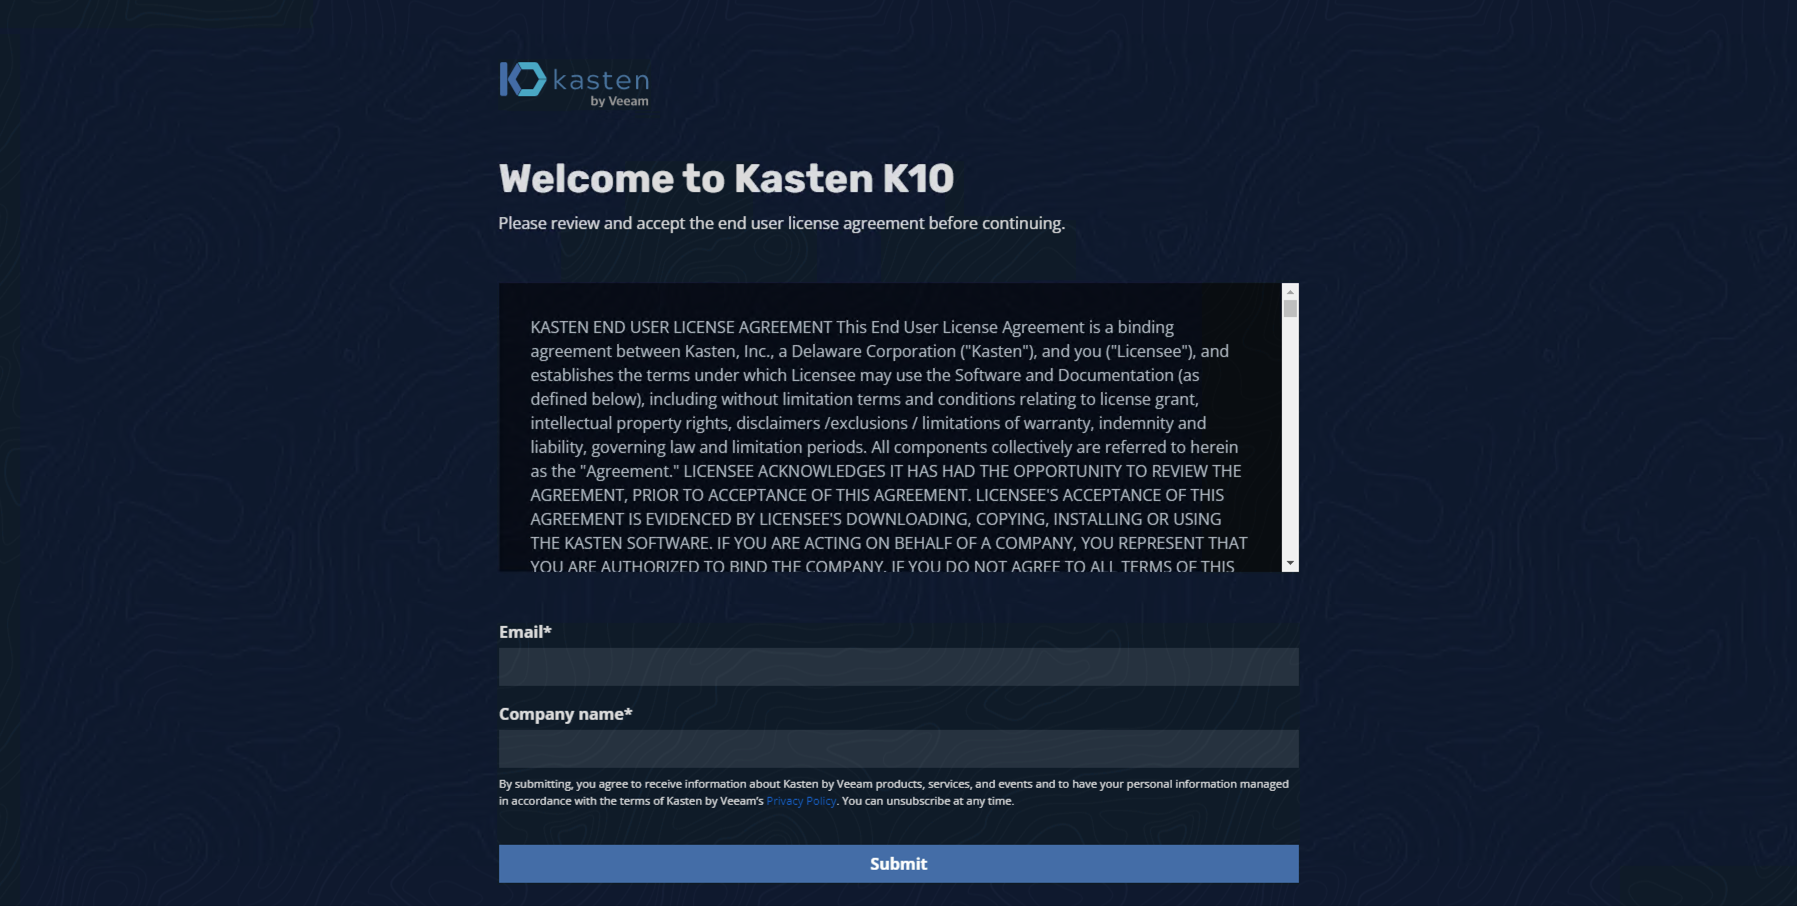
After filling in the email and company name, you should now see the dashboard:
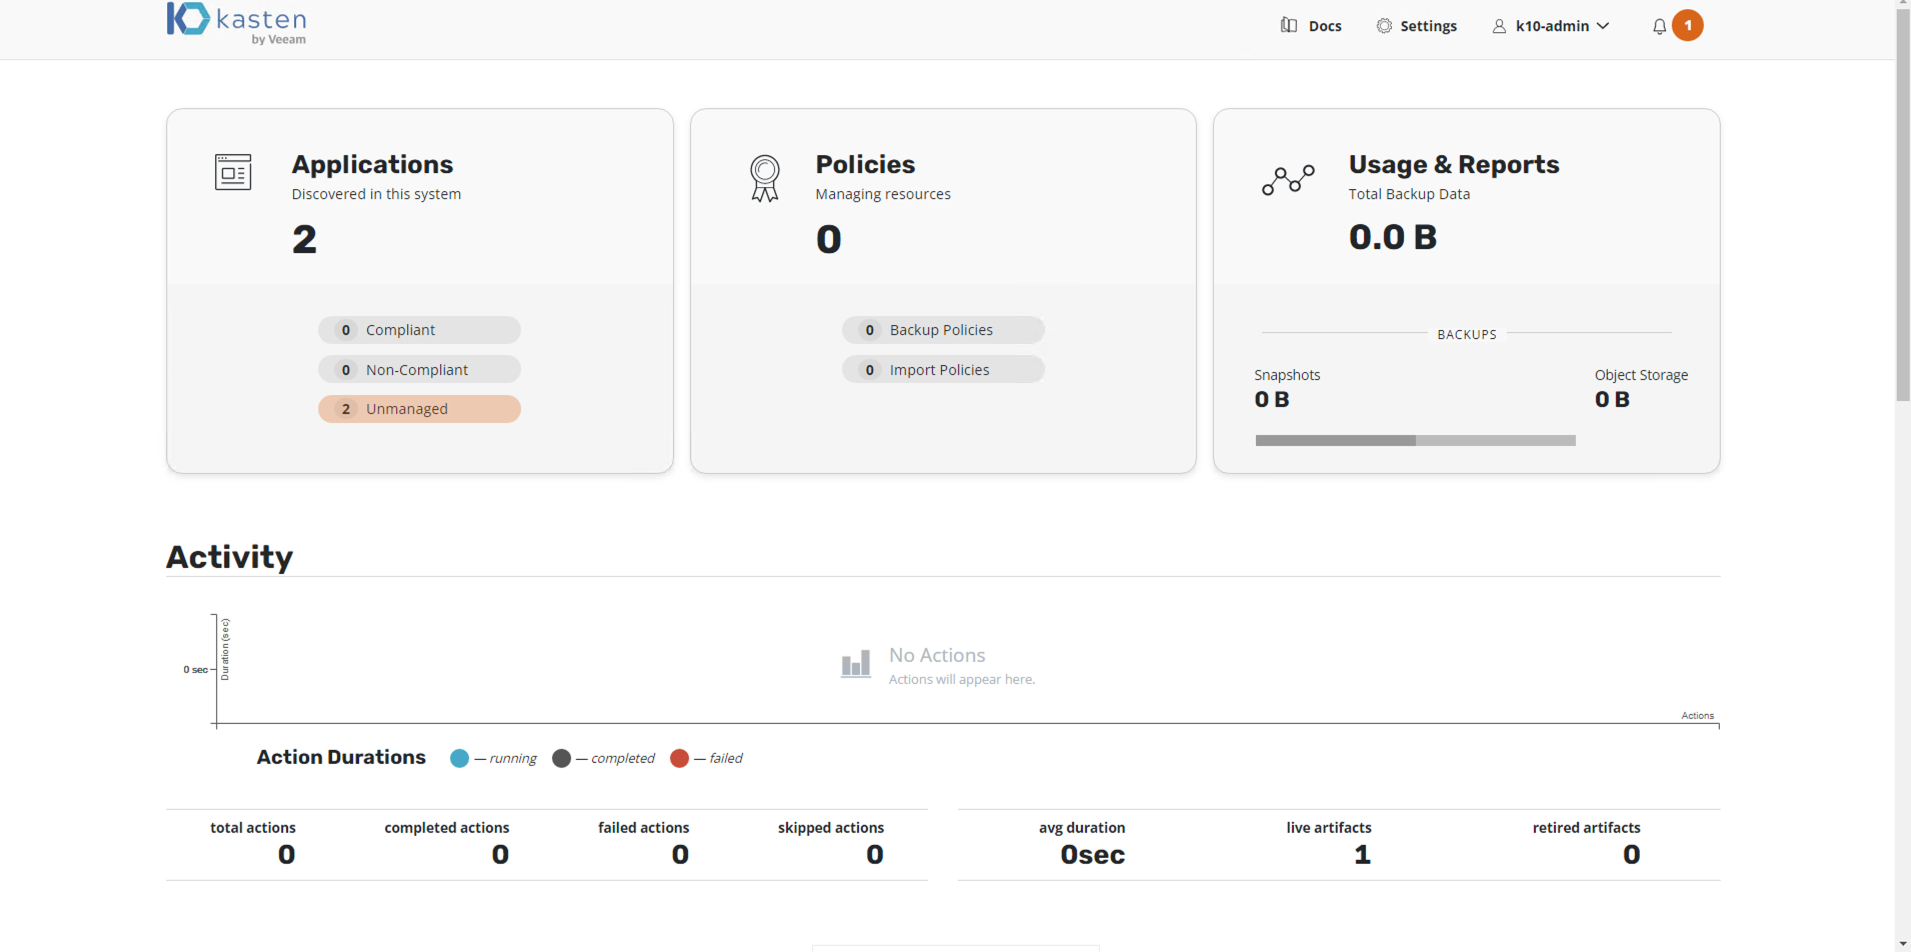
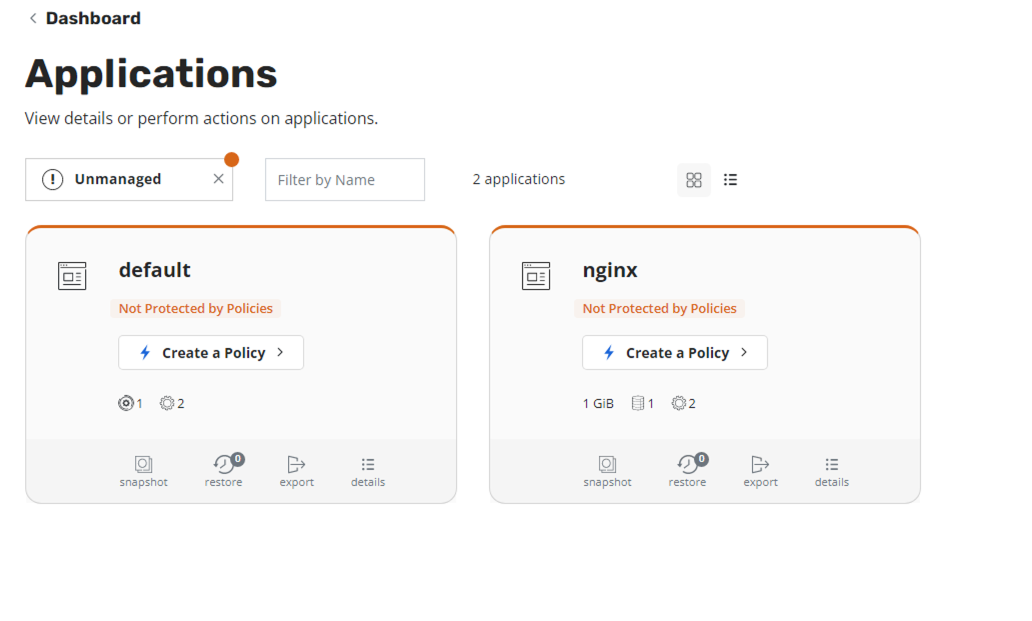
If we go to unmanaged applications
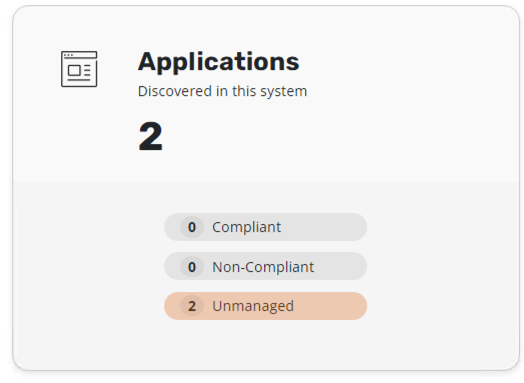
The nginx namespace that was created earlier will be visible
Let's create a simple backup policy by pressing the "Create a Policy" button:
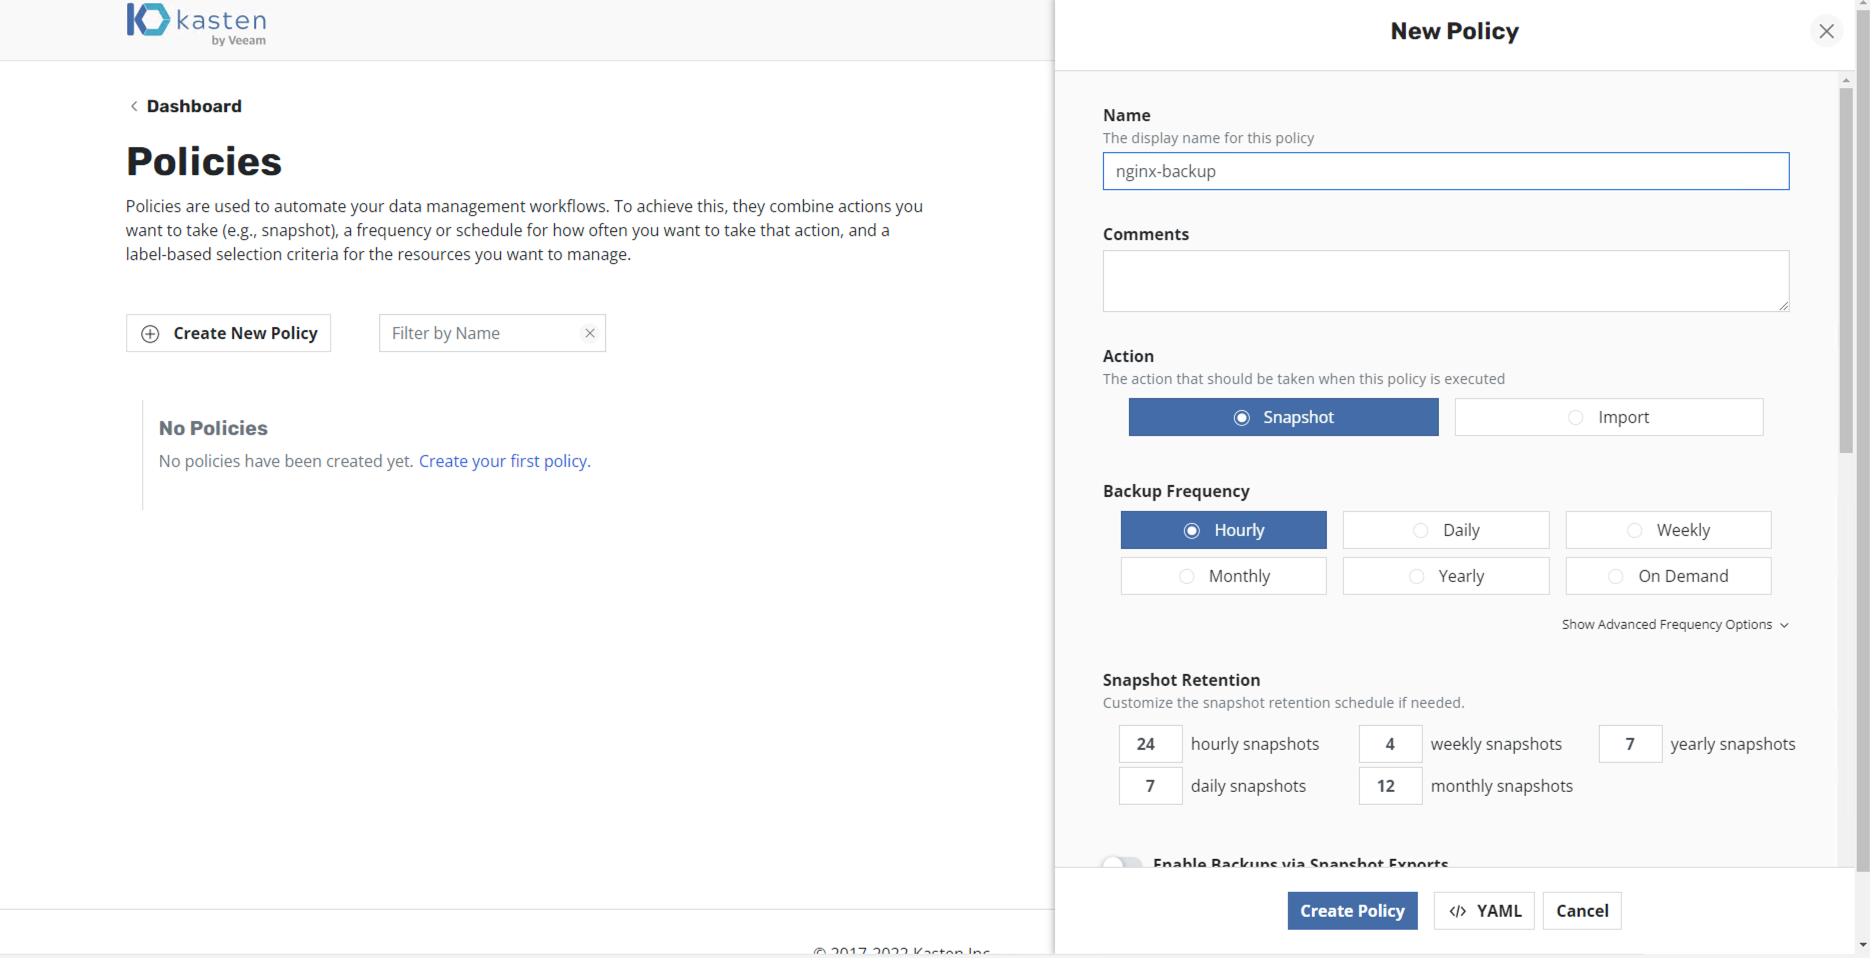
We will leave the defaults and press create policy.
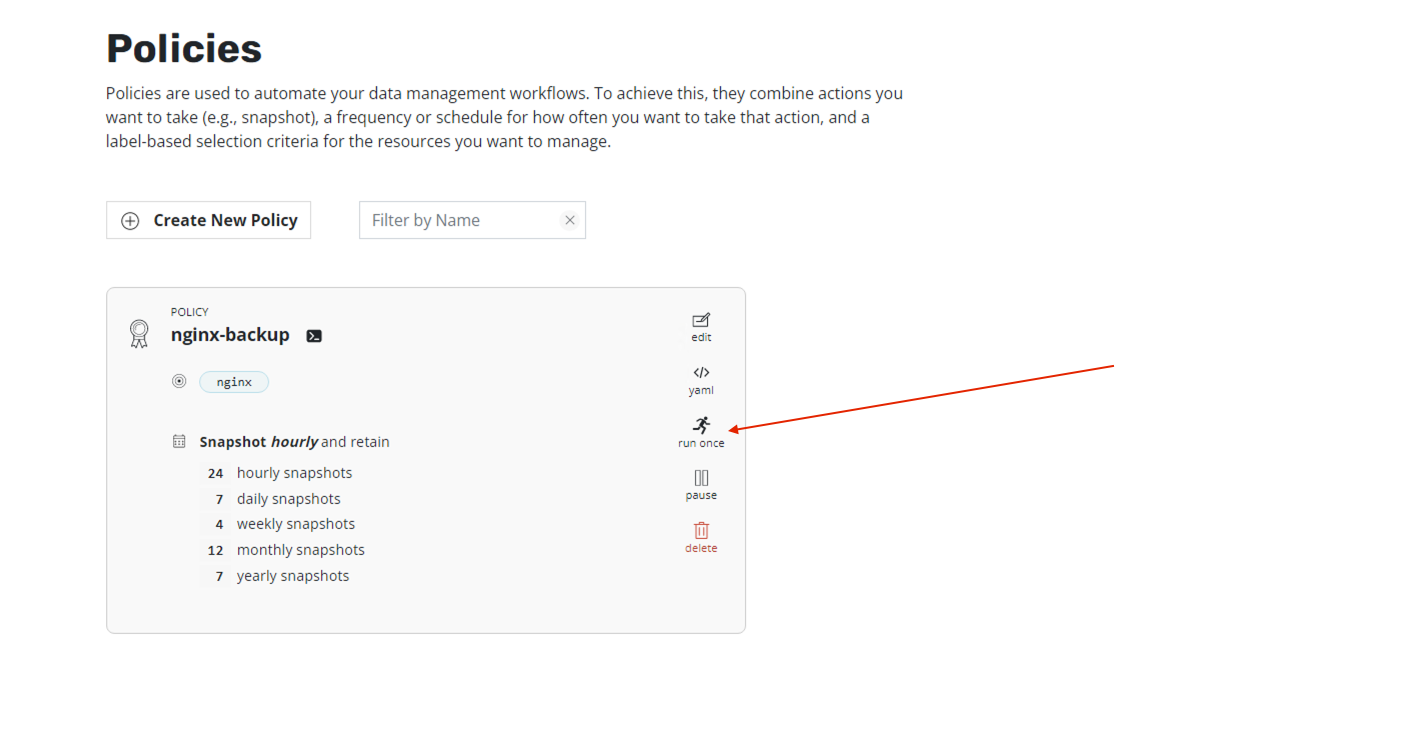
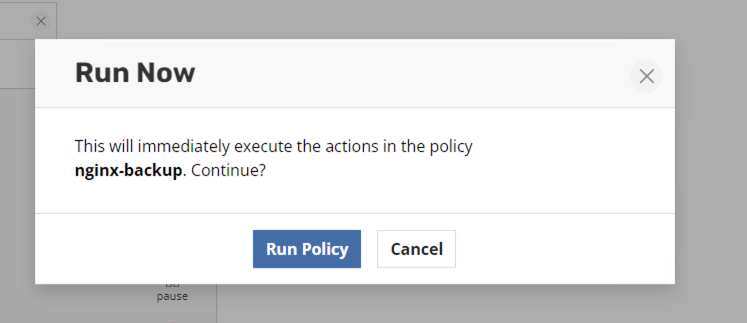
The Policy should be created, and we can press run one and try it out:
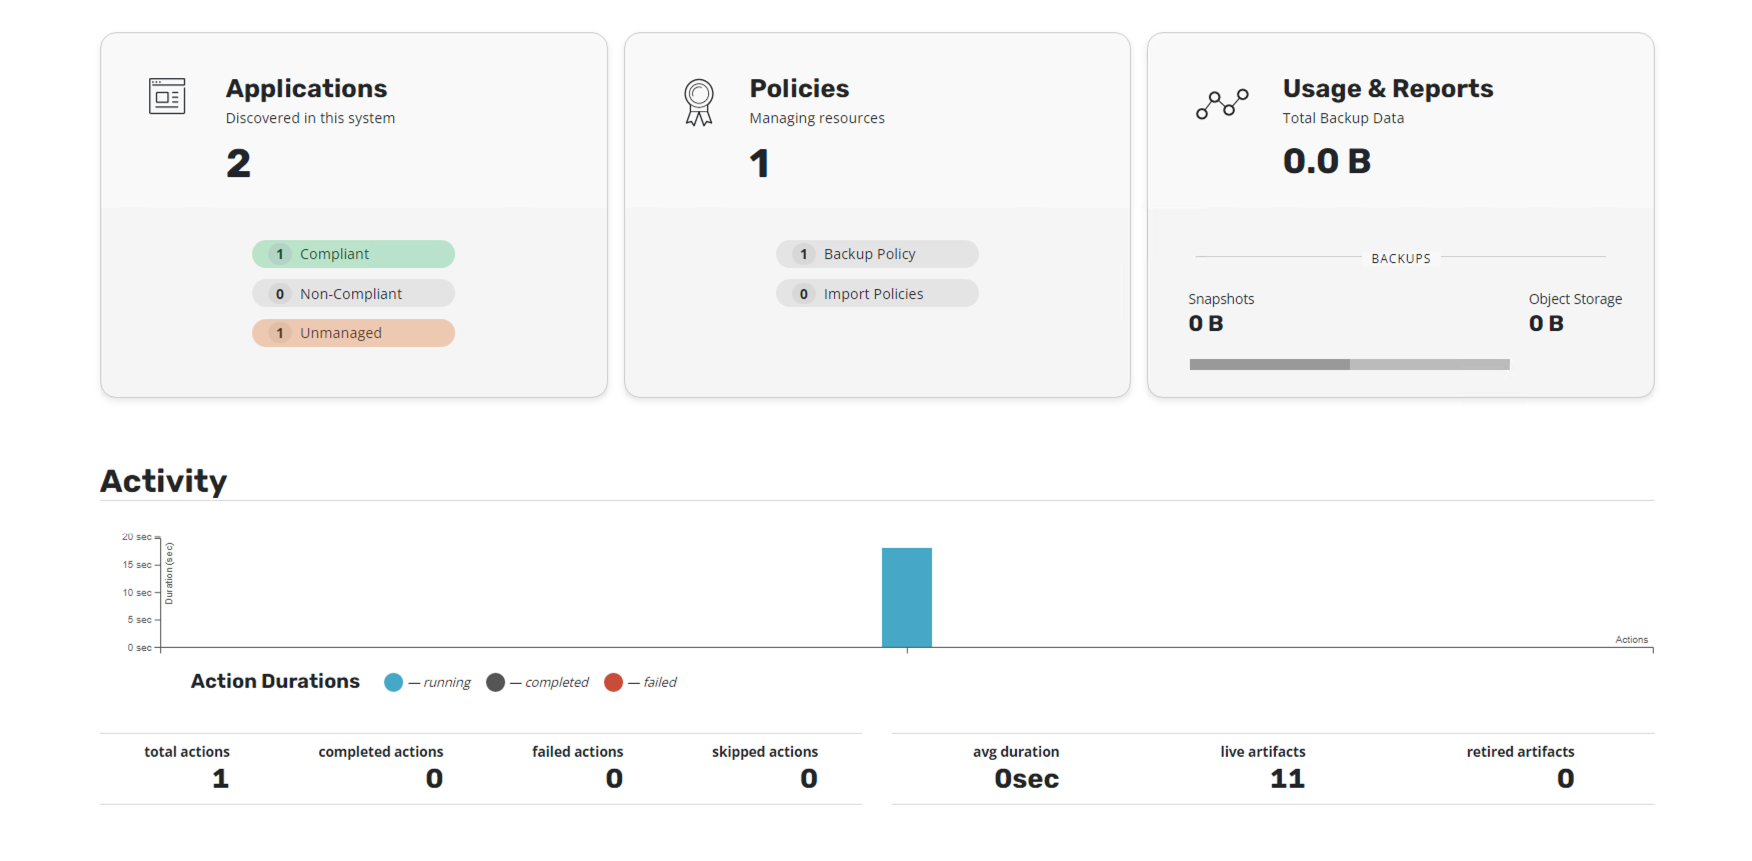
Back on the dashboard, we can see the policy running:
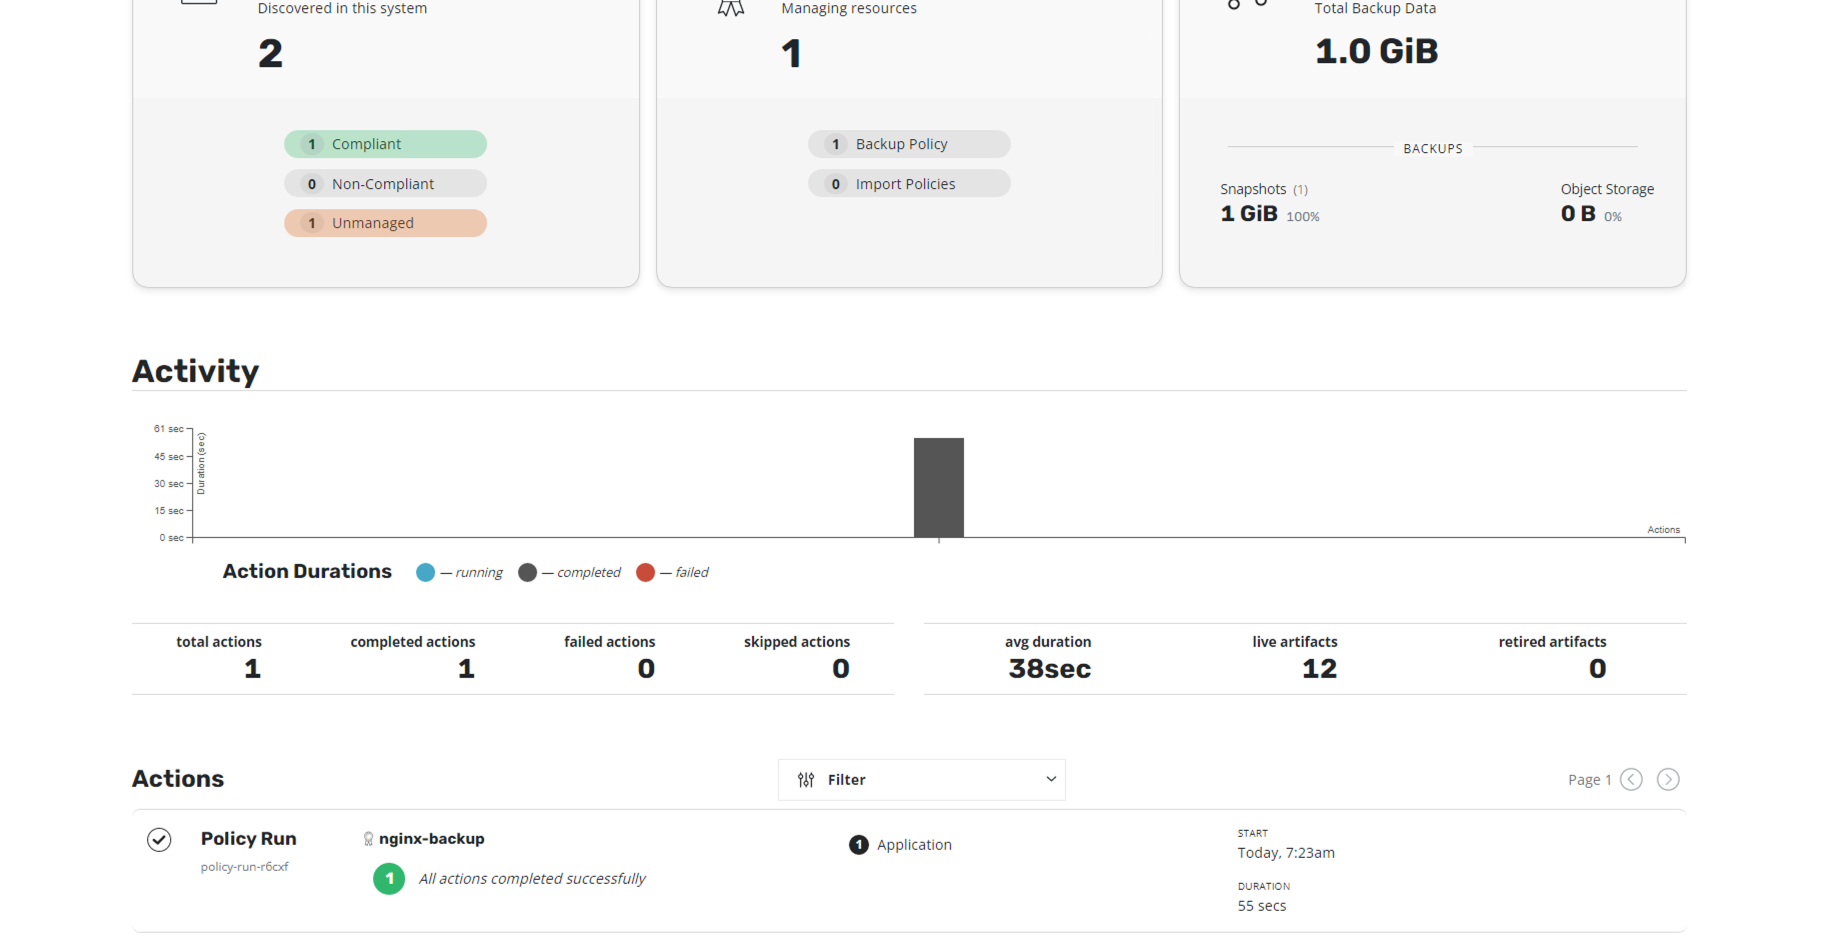
The backup was successful:
That was a basic Kubernetes backup setup with Kasten. You can do a lot more with Kasten, so please go through the documentation and try out some of its other features.
Geoff Burke
Get new posts in your inbox.
Spotted a typo or want to improve this post? Edit on GitHub →