Kyverno CLI
- If you are using kyverno, you should know about kyverno CLI. In this guide we will go through kyverno CLI. - Just run the command kyverno in your…


On this page (11)
- If you are using kyverno, you should know about kyverno CLI. In this guide we will go through kyverno CLI.
How to Install? #
Commands Overview #
- Just run the command
kyvernoin your terminal, and you should see this.
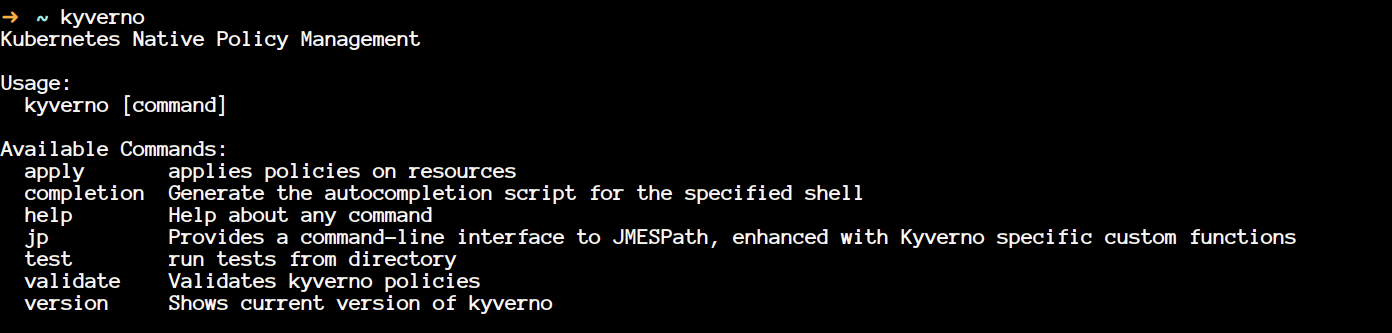
- We will be looking at all of that in the immediate next section. I will not be covering flags because that will make the article boring I guess.
kyverno apply #
- kyverno apply applies policy to the resources. It is intuitive that now you need to policy now and a resource. You need a policy that will enforce some behaviour on your resource.
- Let's clone some policies, and we will be leveraging that to test our policies and understand how kyverno CLI works.
git clone https://github.com/kyverno/policies- Go to your
~/policies/best-practices/required_probesdirectory, and you will see three files there.
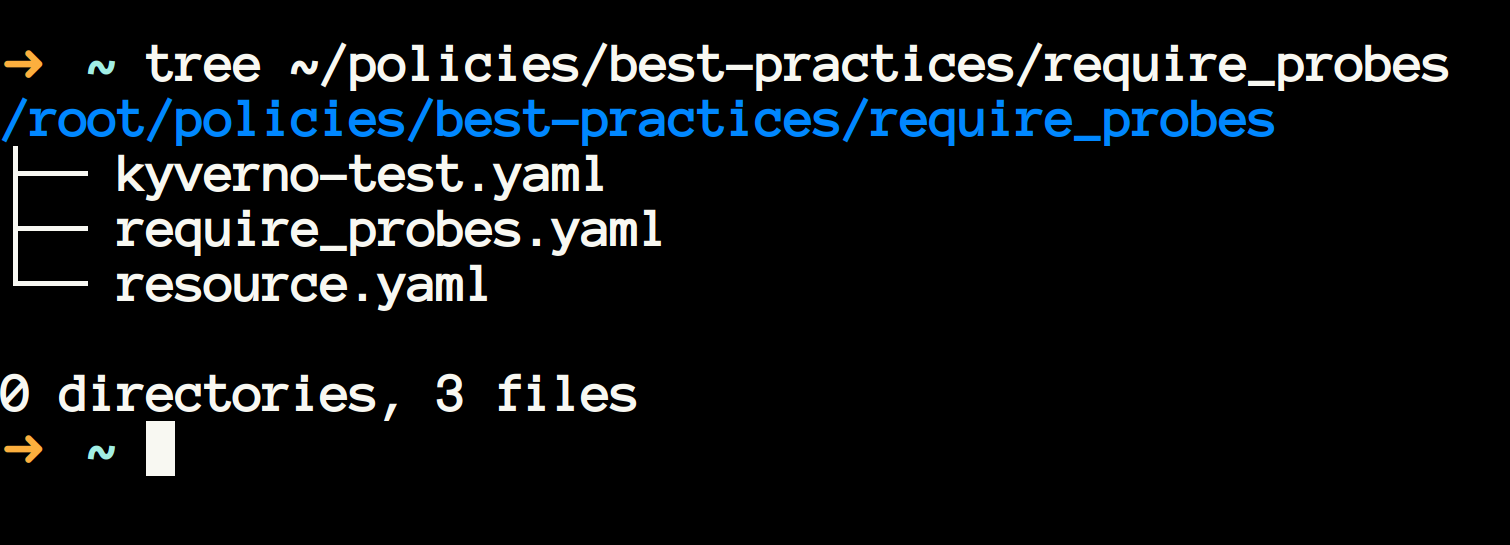
- These sample policies are provided by kyverno community, and you can learn with these policies, and even you can use it in your cluster to enforce desired policies.
- I will encourage you to spend some time and have a look at the resource manifest and policy manifest. If you don't understand the policy manifest, then check out the previous articles on kyverno here.
- The given
required_probes.yamlis having the policy defintion which enforces to have probes in the resource manifest. - Kyverno apply performs a dry run on the given resource.yaml file with the corresponding policy.
- It means that you can use this to check in advanced how a policy will affect the resource prior to deploying your policies/resources to the cluster.
- Let's apply our policy to the resource. This is how the command looks like.
kyverno apply /path/to/policy.yaml --resource /path/to/resource.yaml- You should see something like this
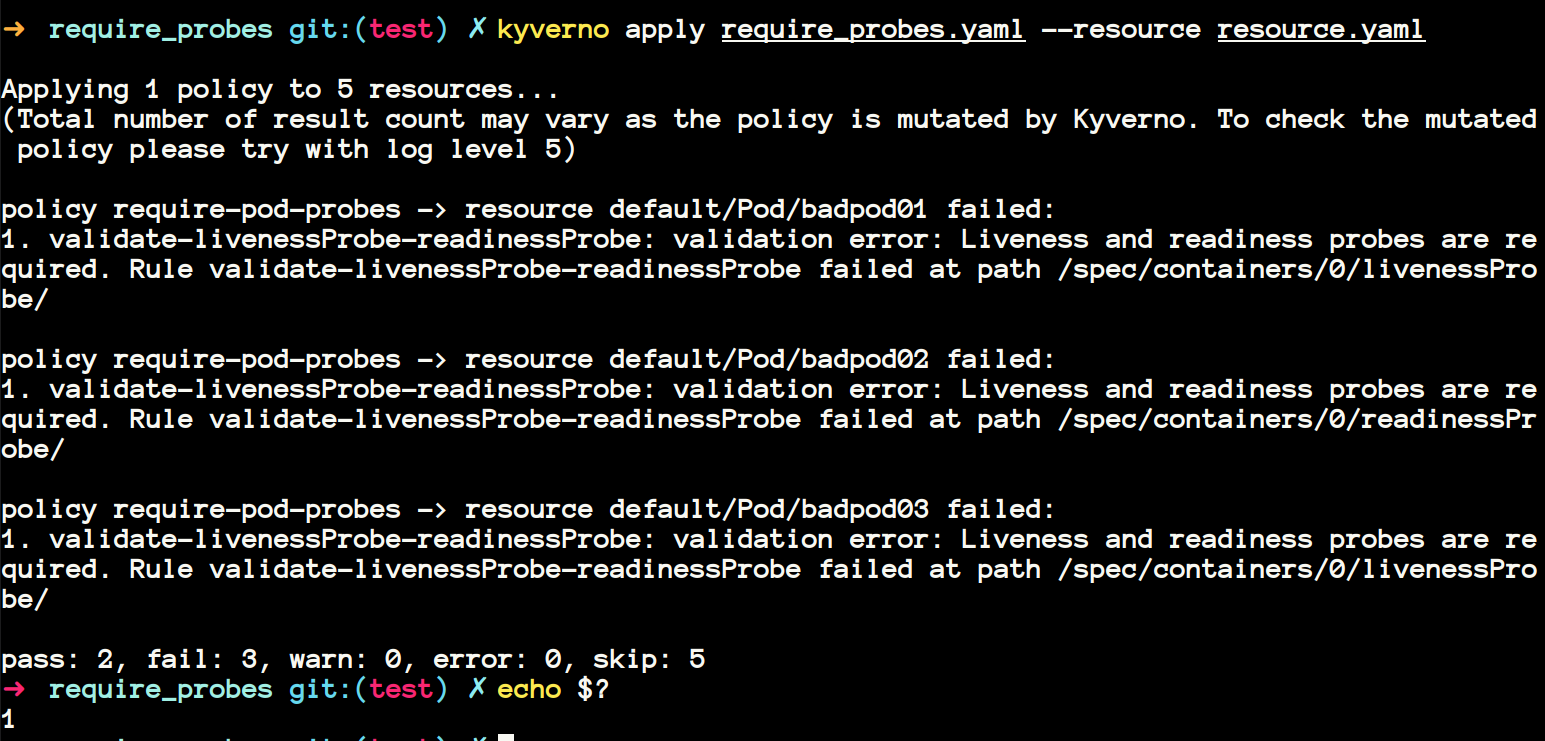
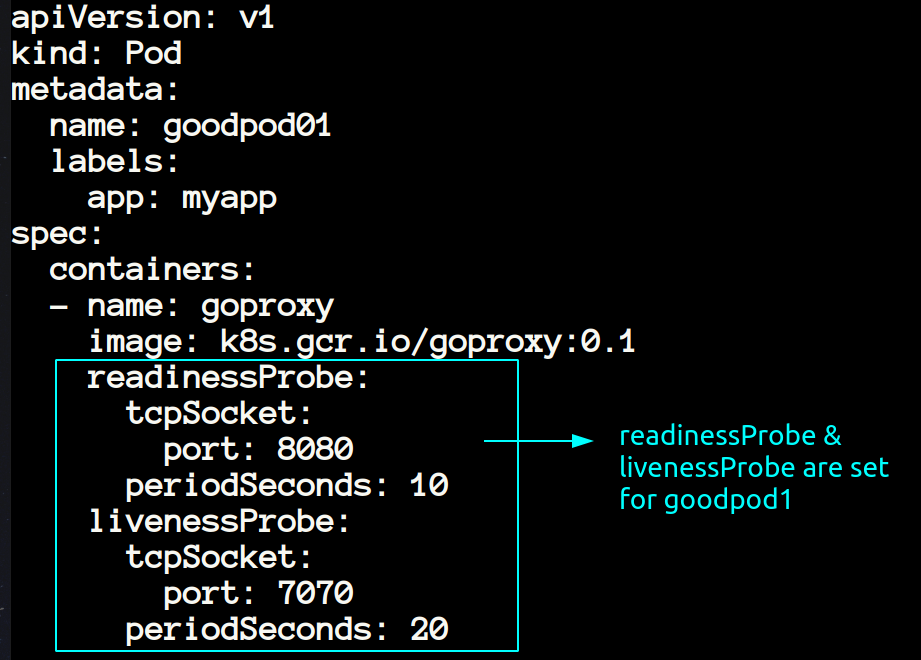
- If you have given time to understand the resource.yaml file, then you would have noticed that the first two resources
goodpod1andgoodpod2were havingreadinessProbeandlivenessProbeset, so they pass the test. Let me illustrate.
- Again if you will look at the last 3 pods in the same resource.yaml then you will notice that they are not having the readinessProbe and livenessProbe.
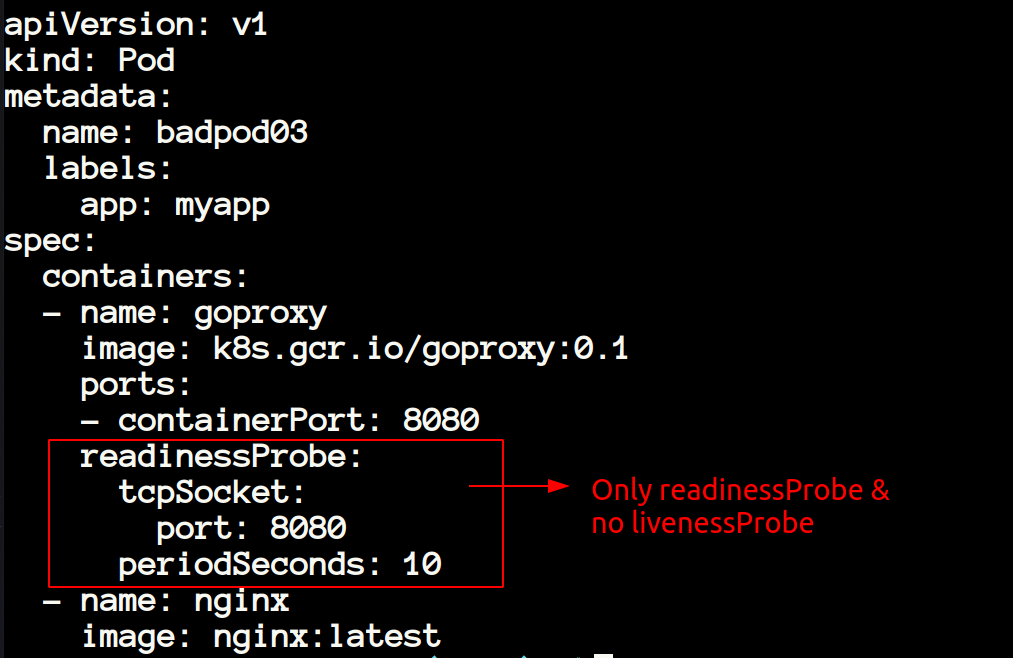
- In the resource below we can see livenessProbe is missing so when we will apply the policy then these resources is not going to pass.
In the CI-CD Pipeline #
-
In the image above I have shown you that after failing the policies the exit status
$?of the last command is 1 meaning something is wrong with our manifests, and we need to change that. It is useful when you're using Gitops methodology. So, we can easily integrate this with any CI-CD tool. -
If you're using Gitops, then most probably you will have all your policies in one directory and all your resource manifests in another directory. In this case, you can also apply all the policies to all the resources using
kyverno apply /path/to/policies --resource /path/to/folder- You can also apply multiple policies to one resource and vice-versa by executing the command
kyverno apply policy1.yaml policy2.yaml --resource resource1.yaml resource2.yaml Mutating resources using kyverno apply #
- Up until now we have only checked the policies which were of validation type. Now let's look at the mutating type.
- Once again, spend some time inspecting the resource and the policy manifest.
- Upon inspecting the resource, you will notice that it looks like the simple pod having the nginx image. Notice that this pod is not having any security context set.
apiVersion: v1
kind: Pod
metadata:
    name: myapp-pod
    labels:
      foo: bar
spec:
    containers:
    - name: nginx
image: nginx:latest- Now let's apply our policy
add-default-security-contextto theresource.yaml
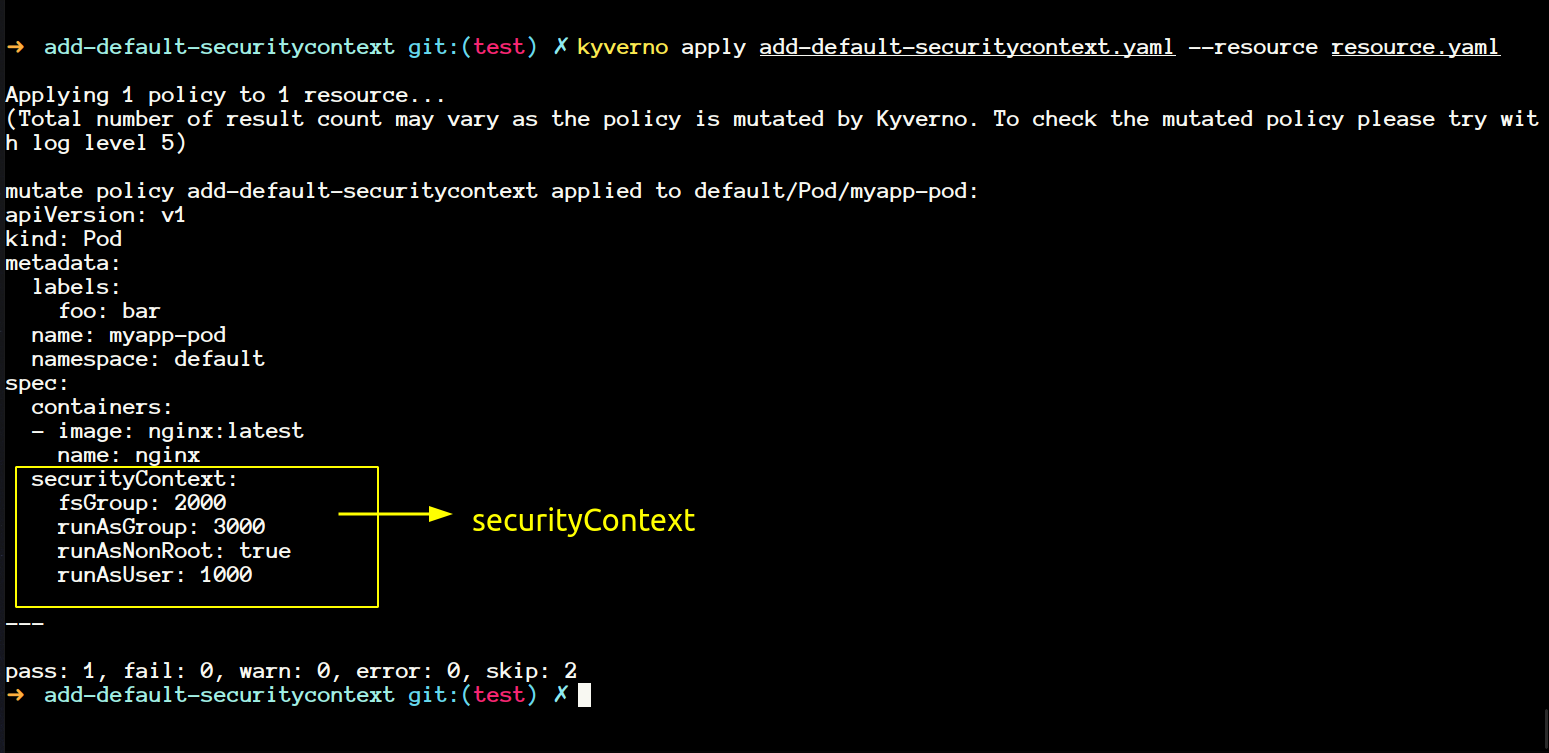
- You will notice that our resource has been modified now.
- If you want to save a copy of the resource, then you can save it using the command
kyverno apply add-default-securitycontext.yaml --resource resource.yaml -o mutatedresource.yaml- In the message above, you will have noticed
log level 5I'm really not sure what is that? - If I run the command below then I get a long value output in stdout which I don't understand.
kyverno apply add-default-securitycontext.yaml --resource resource.yaml -o mutatedresource.yaml -v=5- That completes our
kyverno applycommand. We will explore some other commands now.
Kyverno completion #
- This command generates the autocompletion script for the specified shell.
- You can generate and source it to make working kyverno easy for you.
source <(kyverno completion zsh)Kyverno help #
- This is also self-explanatory. It gives you the help about any command.
kyverno help apply
kyverno help validate- I prefer mainly this
kyverno validate -hKyverno jp #
- Before going into
jpcommand, let's spend some time learning about JMESPath. - JP stands for JMESPath. JMESPath is used to filter, sort and transform JSON data. If you're aware of jsonpath functionality in Kubernetes then it's kind of like that.
- Kyverno used JMESPath under the hood to filter the resources when you apply any policy.
- kyverno jp also have some custom filter that you can use in the Kubernetes context. You can have a look at all of them here
- If you will look at the policy under
/root/policies/best-practices/add_network_policy.yamlthen you will notice that it is using a JMESPath expression to generate a default-deny network policy upon creation of namespace in the cluster.
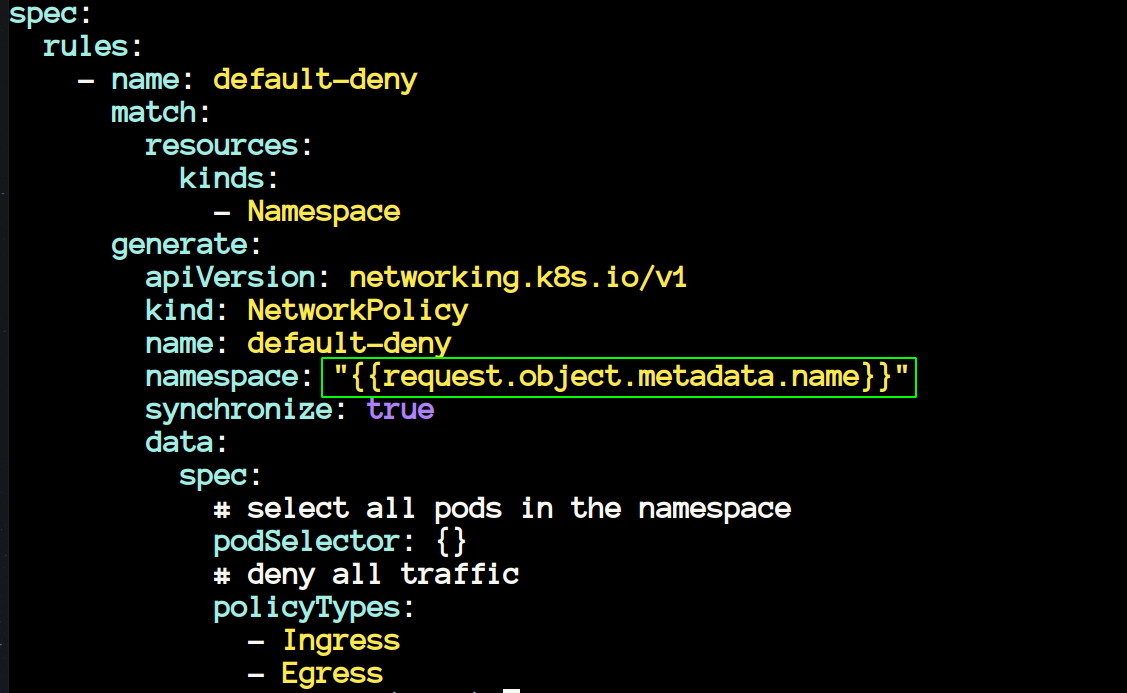
- The above policy generates a NetworkPolicy whenever you create a new namespace in your cluster. Let's see this in action.
- Now we will have a look at another policy that uses JMESPath. The policy is available at
/root/policies/other/restrict_pod_count_per_node/restrict_pod_count_per_node.yaml
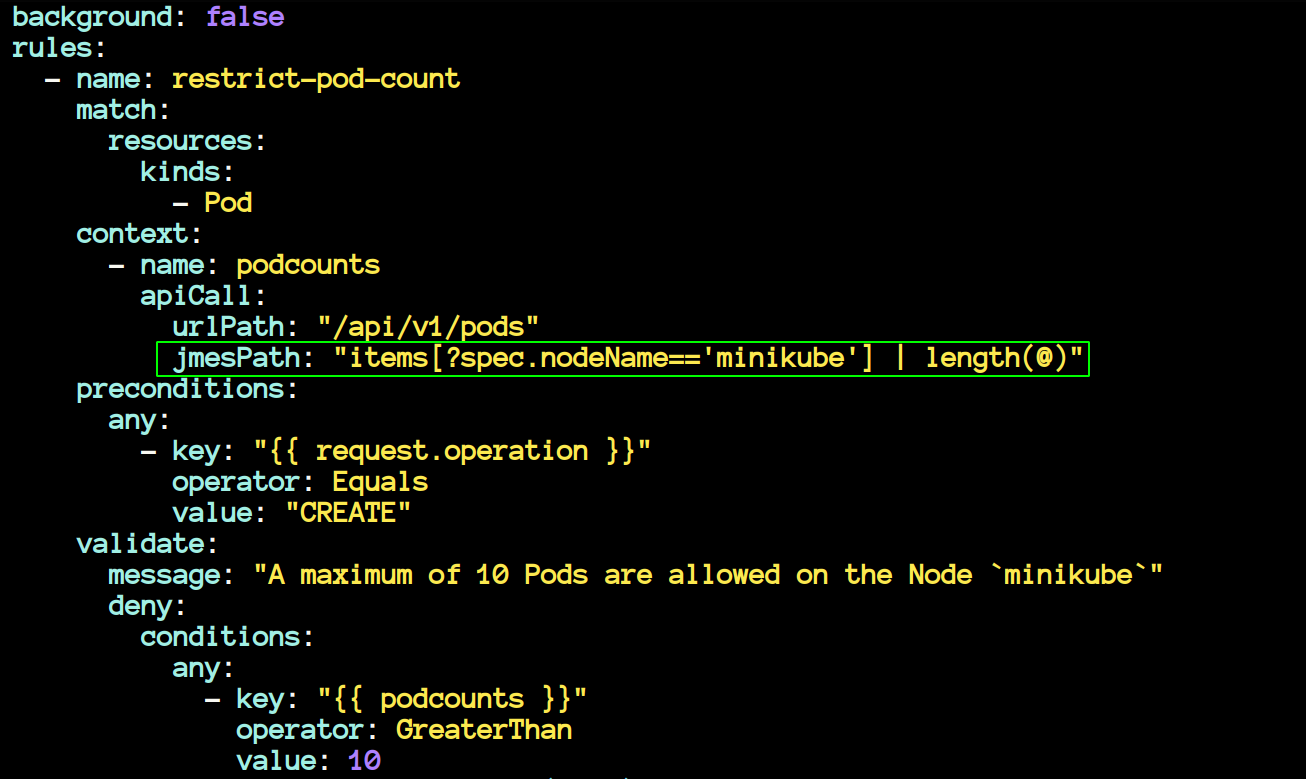
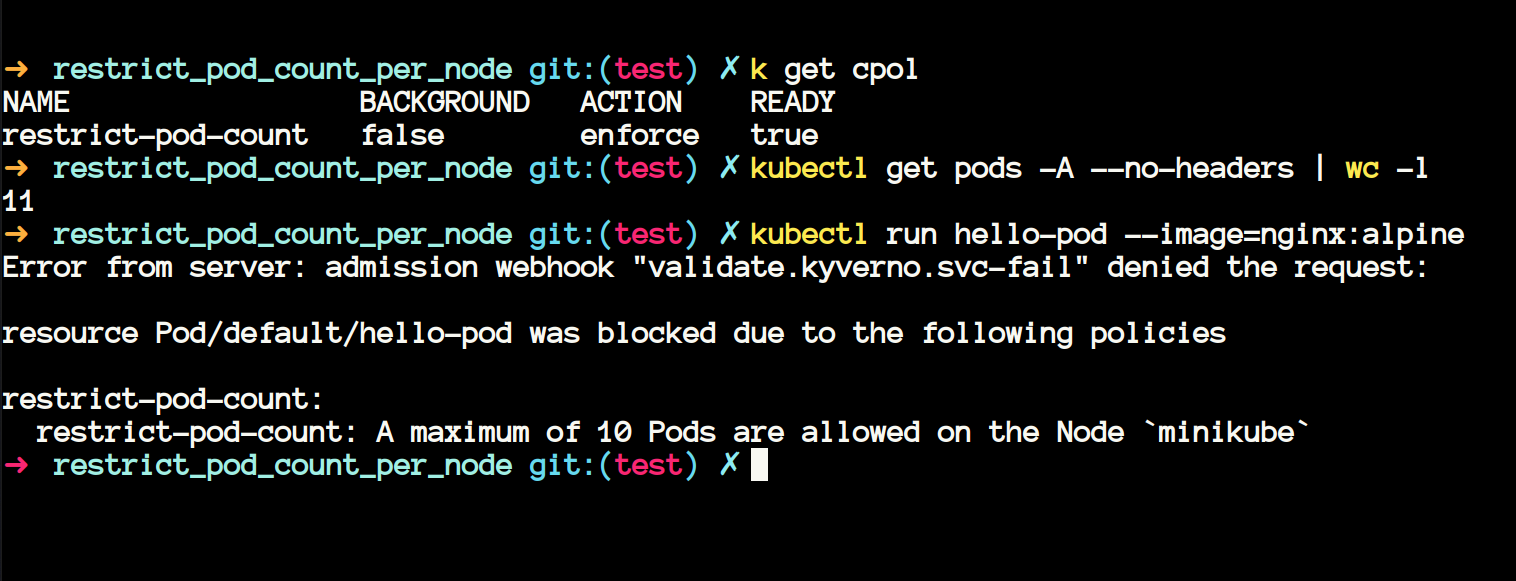
- The policy above uses JMESPath to restrict the number of pods on a node named minikube to 10. If you create more pods, then it will throw an error.
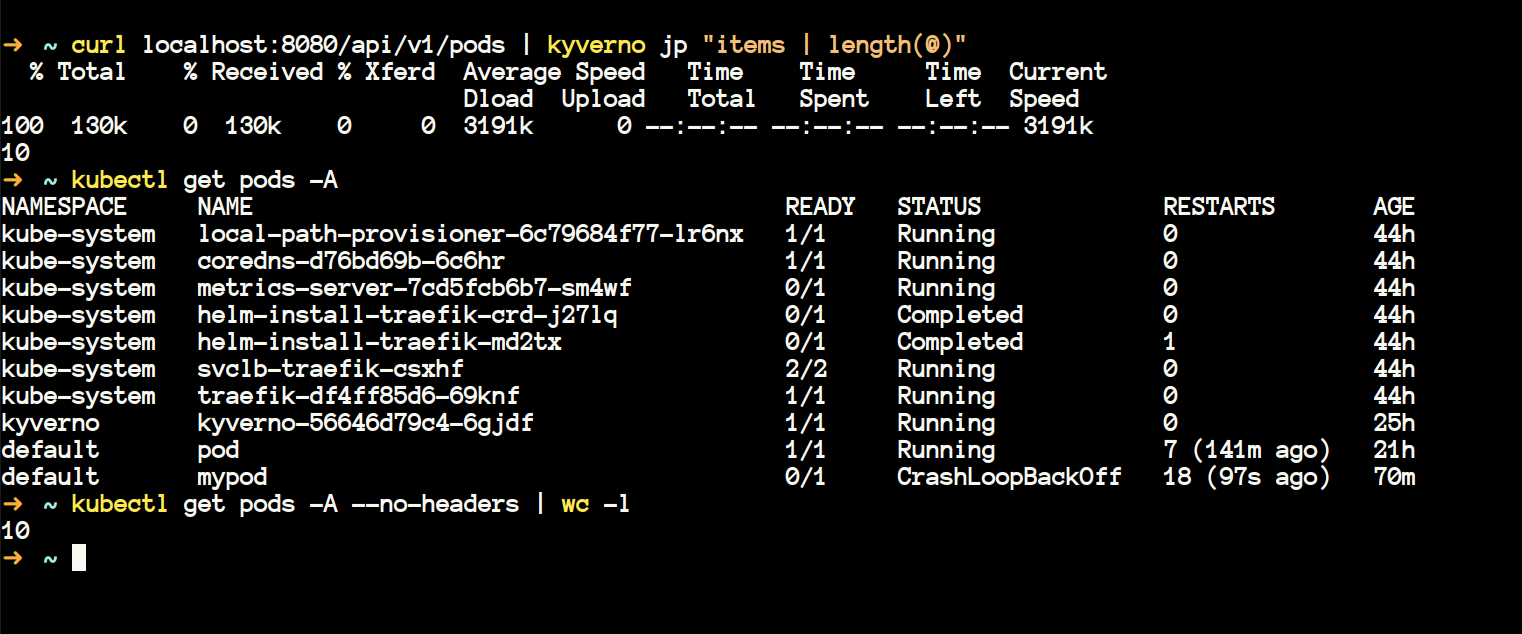
- We can also query the same using the
kyverno jpcommand. Make sure you runkubectl proxy --port 8080 &if you're following this.
Kyverno Test #
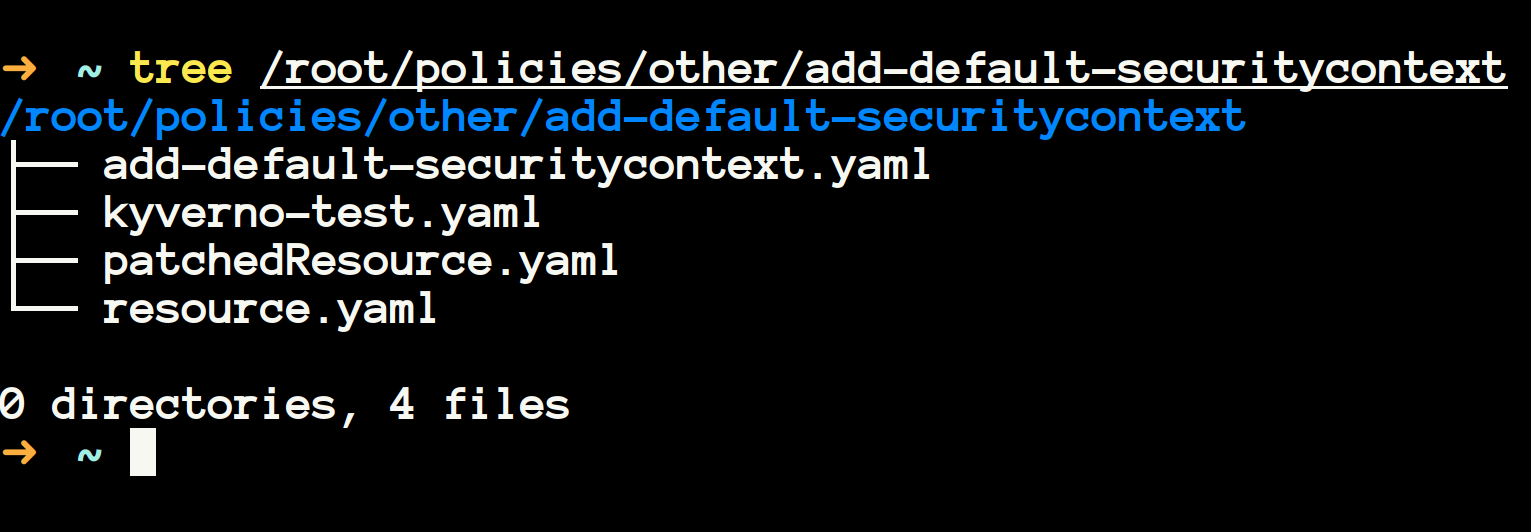
- Above when we have seen any directory then that used to contain one policy manifest, one resource manifest and one test manifest. Now it's time to explore that test manifest file. In kyverno you define your test in kyverno-test.yaml file. The test needs to follow a format/schema in order to work.
- go to
~/policies/best-practicesand we will try to test the policies inside therequire_pod_requests_limitsdirectory.
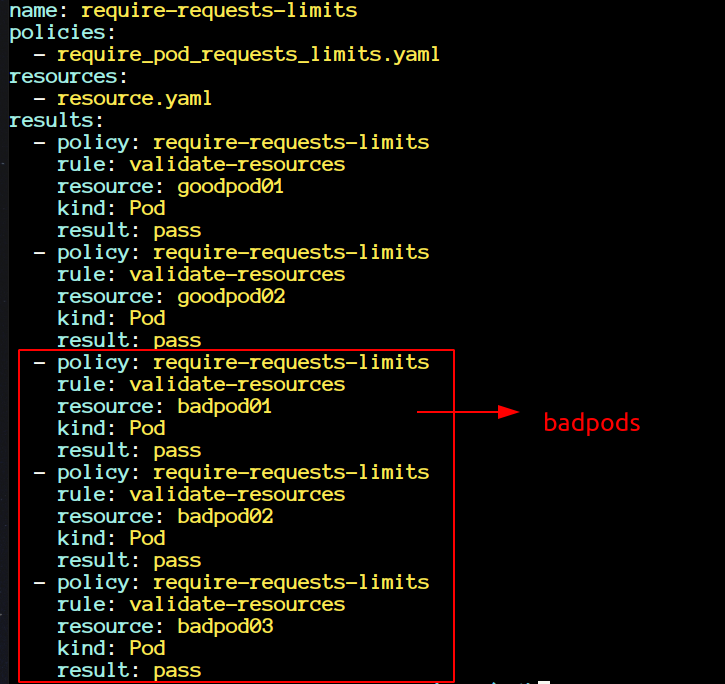
-
On the first look, you may ask why are
badpodspassing in the tests?- Upon inspecting, you will notice that they are passing because we wanted them to fail. We were already expecting them to fail, and they have failed, that's why it's a
passfor the test command.
- Upon inspecting, you will notice that they are passing because we wanted them to fail. We were already expecting them to fail, and they have failed, that's why it's a
-
Now let's change that, change all the results corresponding to badpods to pass. We are expecting all the badpods to pass.
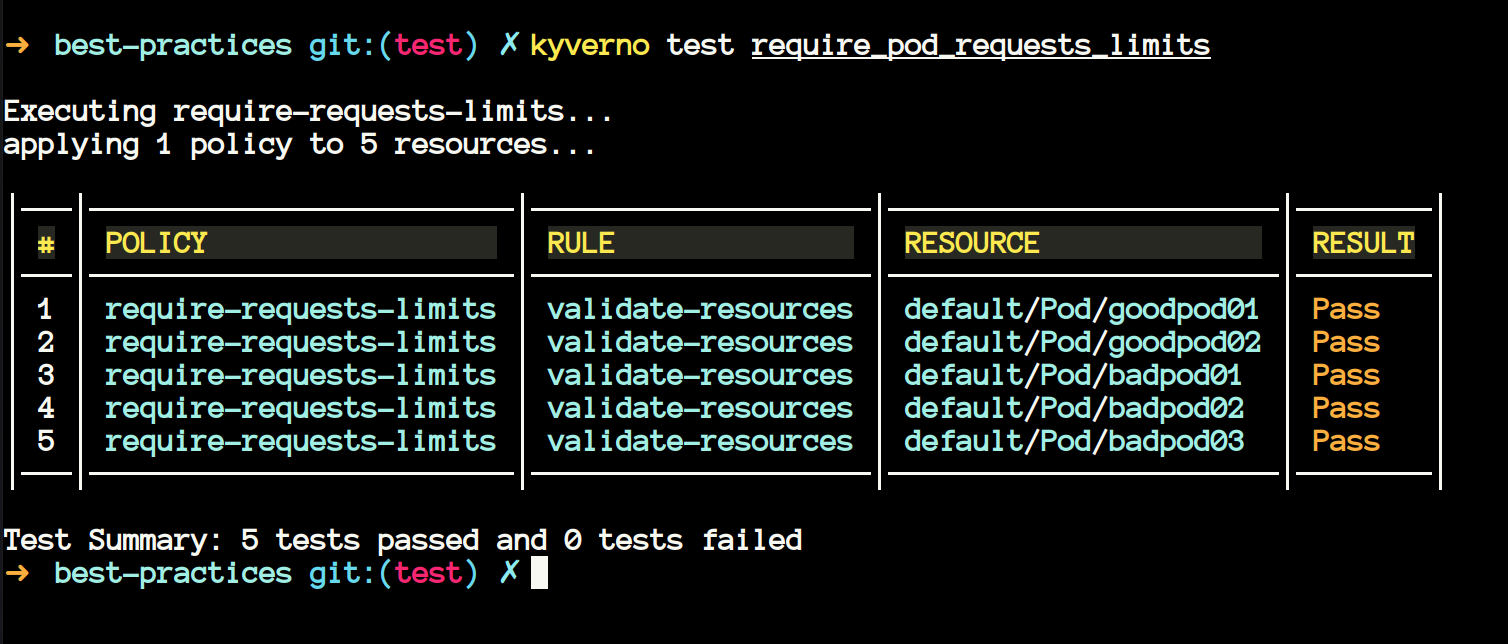
- Execute the command
kyverno test require_pod_requests_limits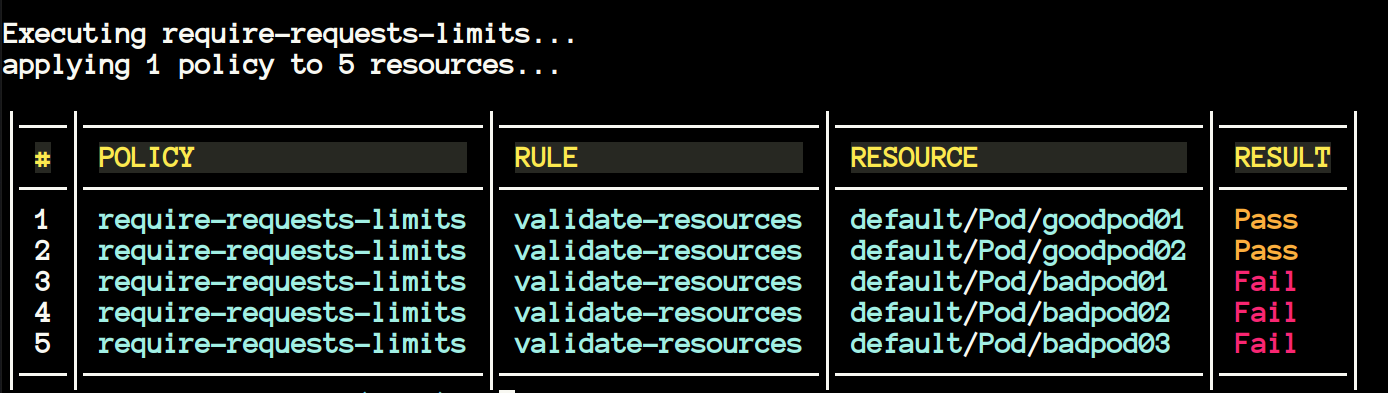
-
Now we can see the results as
Fail. It is happening because we have written all the badpods topasswhich they cannot, that's why the test command will result false. -
kyverno testalso supports the testing of the resources from the GitHub directory. You don't need to bring the policies in your local system if you don't want.
kyverno test https://github.com/<ORG>/<REPO>/<BRANCH>
kyverno test https://github.com/kyverno/policies/release-1.6
Kyverno Validate #
kyverno validatelet's you validate your policies. Say, if you have written a new policy or modified the existing one, you can validate that usingvalidatecommand.
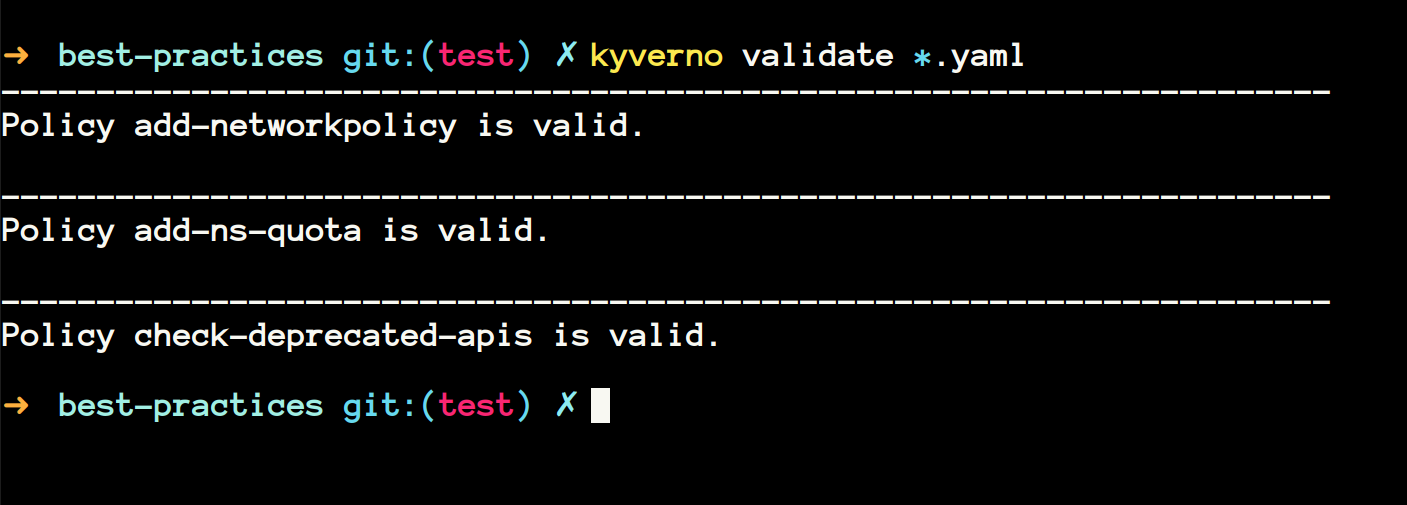
- You can also execute the command on a directory full of policies.
kyverno validate /path/to/directoryKyverno version #
- It is self-explanatory. This gives you the version of the kyverno CLI.

That's it for now. I hope you learnt something new. In the future I will write about mutating policies and generating policies aspect of kyverno. I will be thankful if you suggest any changes if there's anything wrong.
Get new posts in your inbox.
Spotted a typo or want to improve this post? Edit on GitHub →