Linux Boot Process Simplified 🐧
A beginner-friendly guide to help you explore the Linux boot process.
Introduction
Ever wondered what happens when you press the power button of your Linux machine? 🤔. This blog will give you a better understanding of how things work behind the scenes, in the following steps/stages:
1️⃣ BIOS + UEFI
2️⃣ Master Boot Loader (MBR)
3️⃣ Boot Loader
4️⃣ Kernel
5️⃣ Initial RAM disk-initramfs image
6️⃣ /sbin/init (also known as init) [Parent Process]
7️⃣ Command Shell using Getty
8️⃣ systemd
9️⃣ X Windows System
Let's have a better look at'em:
I. BIOS + UEFI

BIOS stands for Basic Input/Output System. It is located in a ROM chip on the PC motherboard.
This part of the Linux Boot process has more to do with the hardware than Linux itself.
As you turn on your computer, the BIOS instantly runs POST (Power On Self Test).
POST is a part of the BIOS which performs plenty of diagnostic tests on the hardware components such as SSD/HDD, RAM, Keyboard, Mouse, USB, etc.
Once POST has checked the basic operability of the hardware, the BIOS will now start looking for the Boot Loader, which is usually stored in one of the hard disks.
UEFI
UEFI can be considered as a successor of BIOS.
An abbreviation for Unified Extensible Firmware Interface, it performs the same function as a BIOS with one major difference: it keeps all data regarding initialization and startup in an.efi file instead of storing it on the firmware.
(Firmware is the programming that's embedded in the nonvolatile memory of a device.)
The.efi file, which is stored on a specific disc called EFI System Partition(ESP) which contains all information regarding initialization and starting in UEFI (ESP).
Most modern devies are equipped with UEFI, as it provides features like Secure Boot, Quick Boot, etc.
There are numerous reasons why UEFI is preferred over BIOS, which is a vast topic in itself, so fun researching!
II. Master Boot Loader (MBR).

MBR is the initial (main) sector of a hard disc that identifies the location of the operating system (OS) to complete the booting process.
MBR, depending on your hardware, is located in /dev/hda, or /dev/sda.
It is a 512-byte image containing code as well as a brief partition table that facilitates in the loading/execution of GRUB (Boot Loader).
III. Boot Loader

There are several bootloaders for Linux, the most common of which being GRUB and LILO, with GRUB2 being one of the most recent.
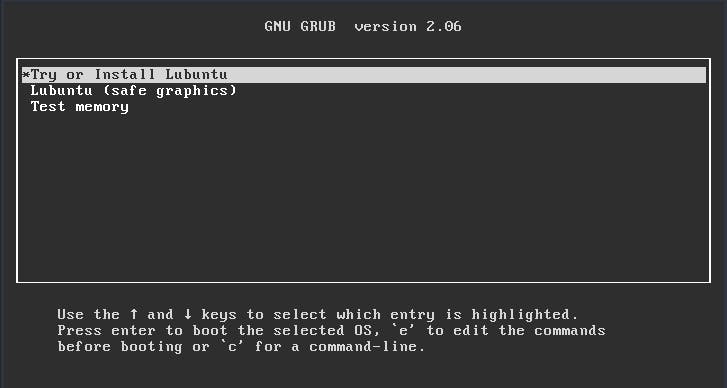
GRand Unified Boot loader (GRUB) is usually the first thing you'll see when you boot up your computer.
It consists of a simple menu displaying the options to choose the Kernel in which you want to boot (if you are having multiple kernel images installed) using your keyboard.
When dual booting your system, GRUB2 lets you select which operating system to boot into.

IV. Kernel

The Kernel has complete control over everything in your system, leading it to be known as the core of the OS.
Kernels are self-extracting and stored in compressed format to conserve space.
Once the chosen kernel is loaded into the memory and begins execution, it starts extracting itself before performing any useful task.
Once loaded by the bootloader, it mounts the root file system and initializes the /sbin/init program, which is commonly referred to as init.

V. Initial RAM disk-initramfs image

The initial RAM disk is an initial/temporary root file system that is mounted prior to when the real root file system is available.
This initramfs image is embedded in the Kernel and contains minimal binary files, modules & programs required for mounting the real root filesystem.
VI. /sbin/init(a.k.a init) [Parent Process]

init is amongst the first command to be executed by the Kernel, once it's loaded.
This program manages the rest of the booting process and sets up the environment for the user.
Essentially, this phase does everything that your system requires during system initialization: checking file systems, configuring the clock, initializing serial ports, and so on.
Along with booting up the system, the init command also assists in keeping the system running and shutting it down correctly.
VII. Command Shell using Getty

Getty is short form for "get tty"(tty - teletype), It's a UNIX program running on the host machine that manages the physical or virtual terminals
Getty opens TTY lines, sets their modes, prints the login prompt, obtains the user's name, and then starts the login process for the user.
Subsequently, users can utilize the system after authenticating themselves.
VIII. X Windows

X Windows System is an open source, client server system which implements a windowed Graphical User Interface(GUI).
Also known as X; it provides the basic structure for a GUI environment, including the ability to draw and move windows on the display device, as well as communicate with a mouse and keyboard.
IX. systemd

This aforementioned sequential startup method is quite conventional and belongs to the System V variant of UNIX, following which the controversial replacement of systemv with systemd took place.
On one hand, where SysVinit(Traditional init system - System V) followed the sequential process, on the other hand, systemd takes advantage of the parallel processing power of the modern multi processors/core computers.
NOTE: systemd is initialized by the Kernel once its loaded-up, after which systemd starts the required dependencies and takes care of the rest.
- systemd simplifies the startup process and reduces boot time by launching multiple processes simultaneously/ parallelly.
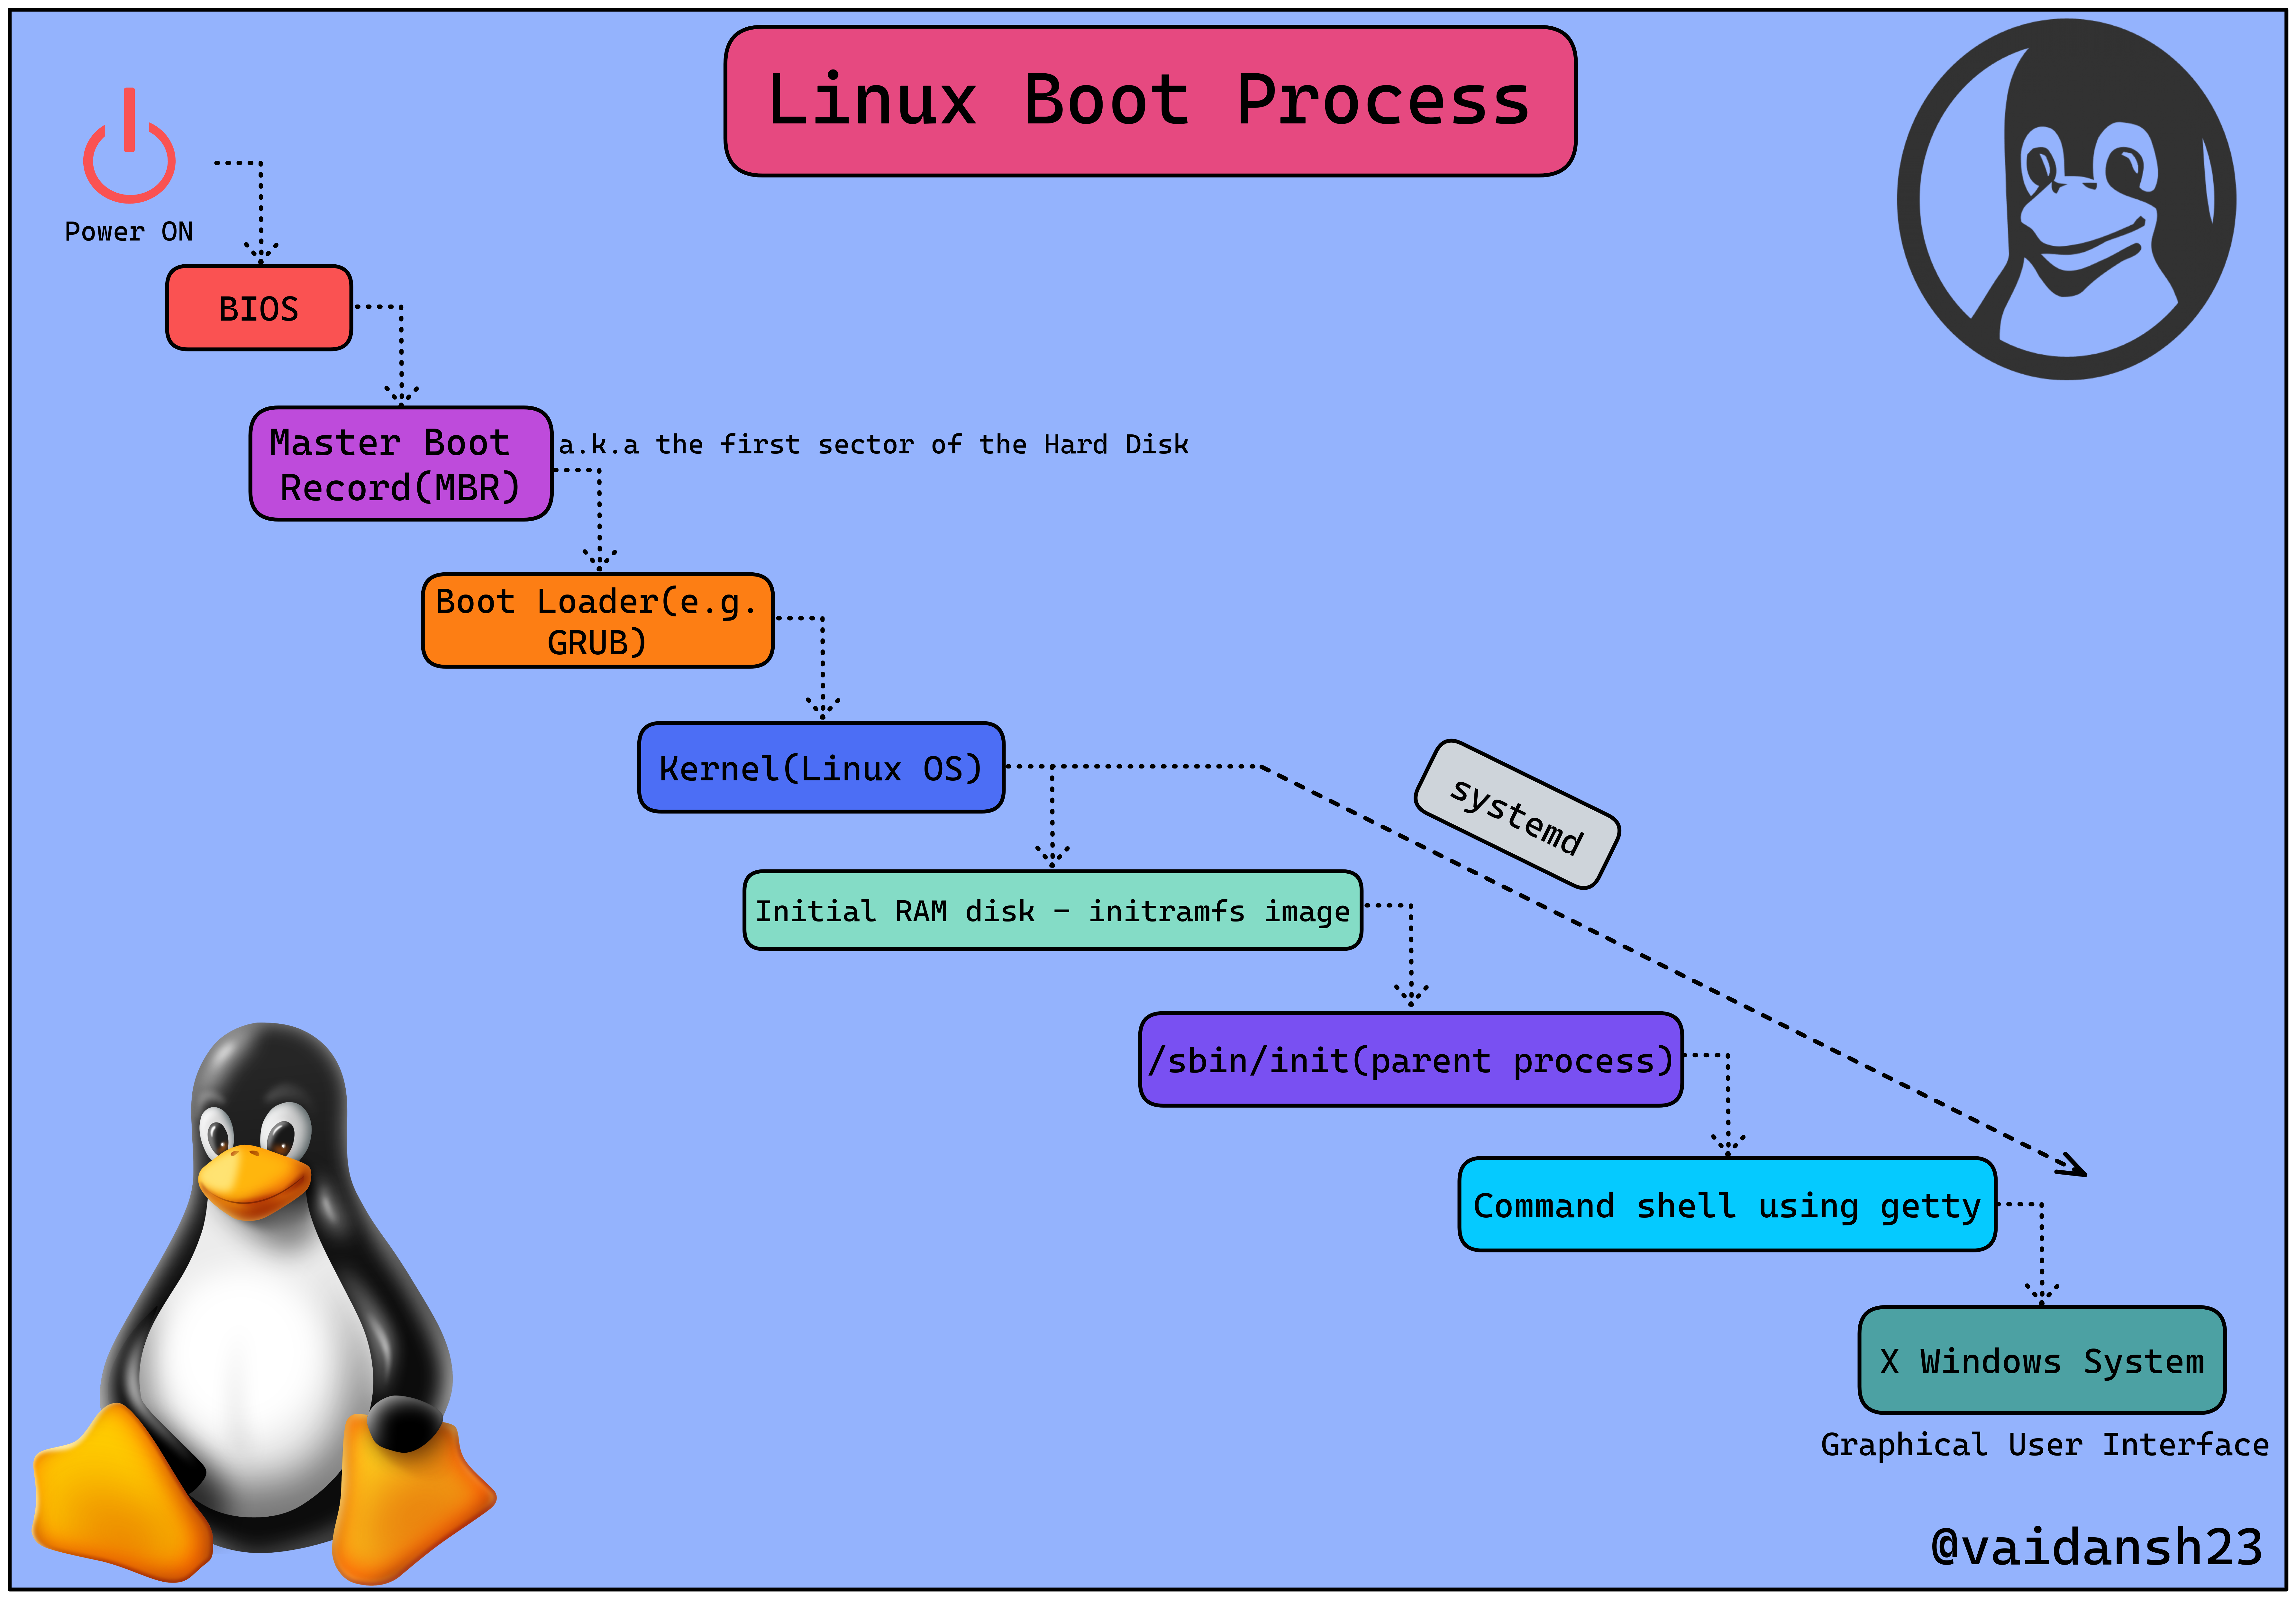
Diagram
Here's a chronological diagram(click on it to get a broader view)
Takeaway
The Linux boot process is very adaptable and constantly improving, supporting a wide range of processors and hardware platforms. It is not necessary that everything listed above properly depicts your machine's starting process; some phases can even be skipped with some tweaks. So, have a look at a few more interesting topics to explore within this area. ⬇️
➣ GPT and UEFI (Deep dive into UEFI)
➣ systemd
➣ Boot loaders(LILO, LOADLIN)
➣ Commands and Configuration files.
Resources
➣ Edx Introduction to Linux course.
➣ Plenty of other blogs.
➣ Ubuntu Wiki.
Thanks for stopping by!!
Follow Kubesimplify on Hashnode, Twitter and Linkedin. Join our Discord server to learn with us.

