Quick Bites of FluxCD: Health Assessment
%[https://github.com/dirien/quick-bites/tree/main/flux-health] During KubeCon EU, I talked with Stefan Prodan about a way to delay the deployment of…

On this page (7)
TL;DR: Code, please! #
https://github.com/dirien/quick-bites/tree/main/flux-health
During KubeCon EU, I talked with Stefan Prodan about a way to delay the deployment
of workload. I told him, that I use dependsOn but this did not check if the deployed resources are ready.
He suggested, that I have a look into Health checks. Health checks are available in the Kustomization resource.
How to implement health checks #
As stated before, a Kustomization can contain health checks, actually a whole series of them. This will be used to determine the rollout status of the deployed workloads. In addition, you can check the ready status of custom resources too.
To enabled health checking, just set spec.wait and spec.timeout. This will be valid for all the reconciled resources.
apiVersion: kustomize.toolkit.fluxcd.io/v1beta2
kind: Kustomization
metadata:
  name: quick-bites-services
  namespace: flux-system
spec:
  interval: 5m0s
  path: ./flux-health/deployment/services
  prune: true
  wait: true
  timeout: 2m
  sourceRef:
    kind: GitRepository
    name: quick-bites
If you want to check the only certain resources, you need to list them under spec.healthChecks.
Remember: when
spec.waitis set, thespec.healthChecksfield will be ignored.
The following types can be referenced by health check entries:
- Kubernetes builtin kinds: Deployment, DaemonSet, StatefulSet, PersistentVolumeClaim, Pod, PodDisruptionBudget, Job, CronJob, Service, Secret, ConfigMap, CustomResourceDefinition
- GitOps Toolkit kinds: HelmRelease, HelmRepository, GitRepository, etc
- Custom resources that are compatible with kstatus
apiVersion: kustomize.toolkit.fluxcd.io/v1beta2
kind: Kustomization
metadata:
  name: quick-bites-services
  namespace: flux-system
spec:
  interval: 1m0s
  path: ./flux-health/deployment/services
  prune: true
  healthChecks:
    - apiVersion: apps/v1
      kind: DaemonSet
      name: contour-envoy
      namespace: contour
  sourceRef:
    kind: GitRepository
    name: quick-bites
After applying the Kustomization resource, the controller tries to verify if the rollout completed successfully.
If the deployment went successfully through, the condition on Kustomization resource is marked as true. If the
deployment failed, or timeout, then the Kustomization ready condition will be false.
In case the deployment becomes healthy on the next execution cycle, then the Kustomization will be marked as ready.
If the Kustomization contains HelmRelease objects, you can define a health check that waits for the HelmReleases to
be reconciled.
apiVersion: kustomize.toolkit.fluxcd.io/v1beta2
kind: Kustomization
metadata:
  name: sock-shop
  namespace: flux-system
spec:
  interval: 1m0s
  path: ./flux-health/deployment/applications/sock-shop
  prune: true
  healthChecks:
  - apiVersion: helm.toolkit.fluxcd.io/v2beta1
    kind: HelmRelease
    name: contour
    namespace: contour
  sourceRef:
    kind: GitRepository
    name: quick-bites
Combine health checks with dependsOn #
We know that when applying a Kustomization, that we can define workloads that must be deployed before the Kustomization
will be applied. Best example is the cert-manager, as we may need to create a certificate in our actual deployment.
With the field spec.dependsOn we can bring these deployments into an order. The Kustomization with dependencies will be
applied only after the dependencies are ready.
apiVersion: kustomize.toolkit.fluxcd.io/v1beta2
kind: Kustomization
metadata:
  name: sock-shop
  namespace: flux-system
spec:
  interval: 1m0s
  path: ./flux-health/deployment/applications/sock-shop
  prune: true
  dependsOn:
  - name: quick-bites-services
  healthChecks:
  - apiVersion: helm.toolkit.fluxcd.io/v2beta1
    kind: HelmRelease
    name: contour
    namespace: contour
  sourceRef:
    kind: GitRepository
    name: quick-bites
Now combine this with health assessment, and we have a perfect way to ensure that the current Kustomization will be
applied when all the dependencies are healthy.
Demo #
Installation #
For this demo, we will create a kind cluster and install FluxCD via the Helm chart:
kind create cluster --name flux-healthTakes a couple of minutes, to be ready:
Creating cluster "flux-health" ...
 ✓ Ensuring node image (kindest/node:v1.24.0) 🖼
 ✓ Preparing nodes 📦
 ✓ Writing configuration 📜
 ✓ Starting control-plane 🕹️
 ✓ Installing CNI 🔌
 ✓ Installing StorageClass 💾
Set kubectl context to "kind-flux-health"
You can now use your cluster with:

kubectl cluster-info --context kind-flux-health

Not sure what to do next? 😅  Check out https://kind.sigs.k8s.io/docs/user/quick-start/
Now we apply the Helm chart:
helm repo add fluxcd-community https://fluxcd-community.github.io/helm-charts
helm repo update
helm upgrade -i flux2 fluxcd-community/flux2 --create-namespace --namespace flux-system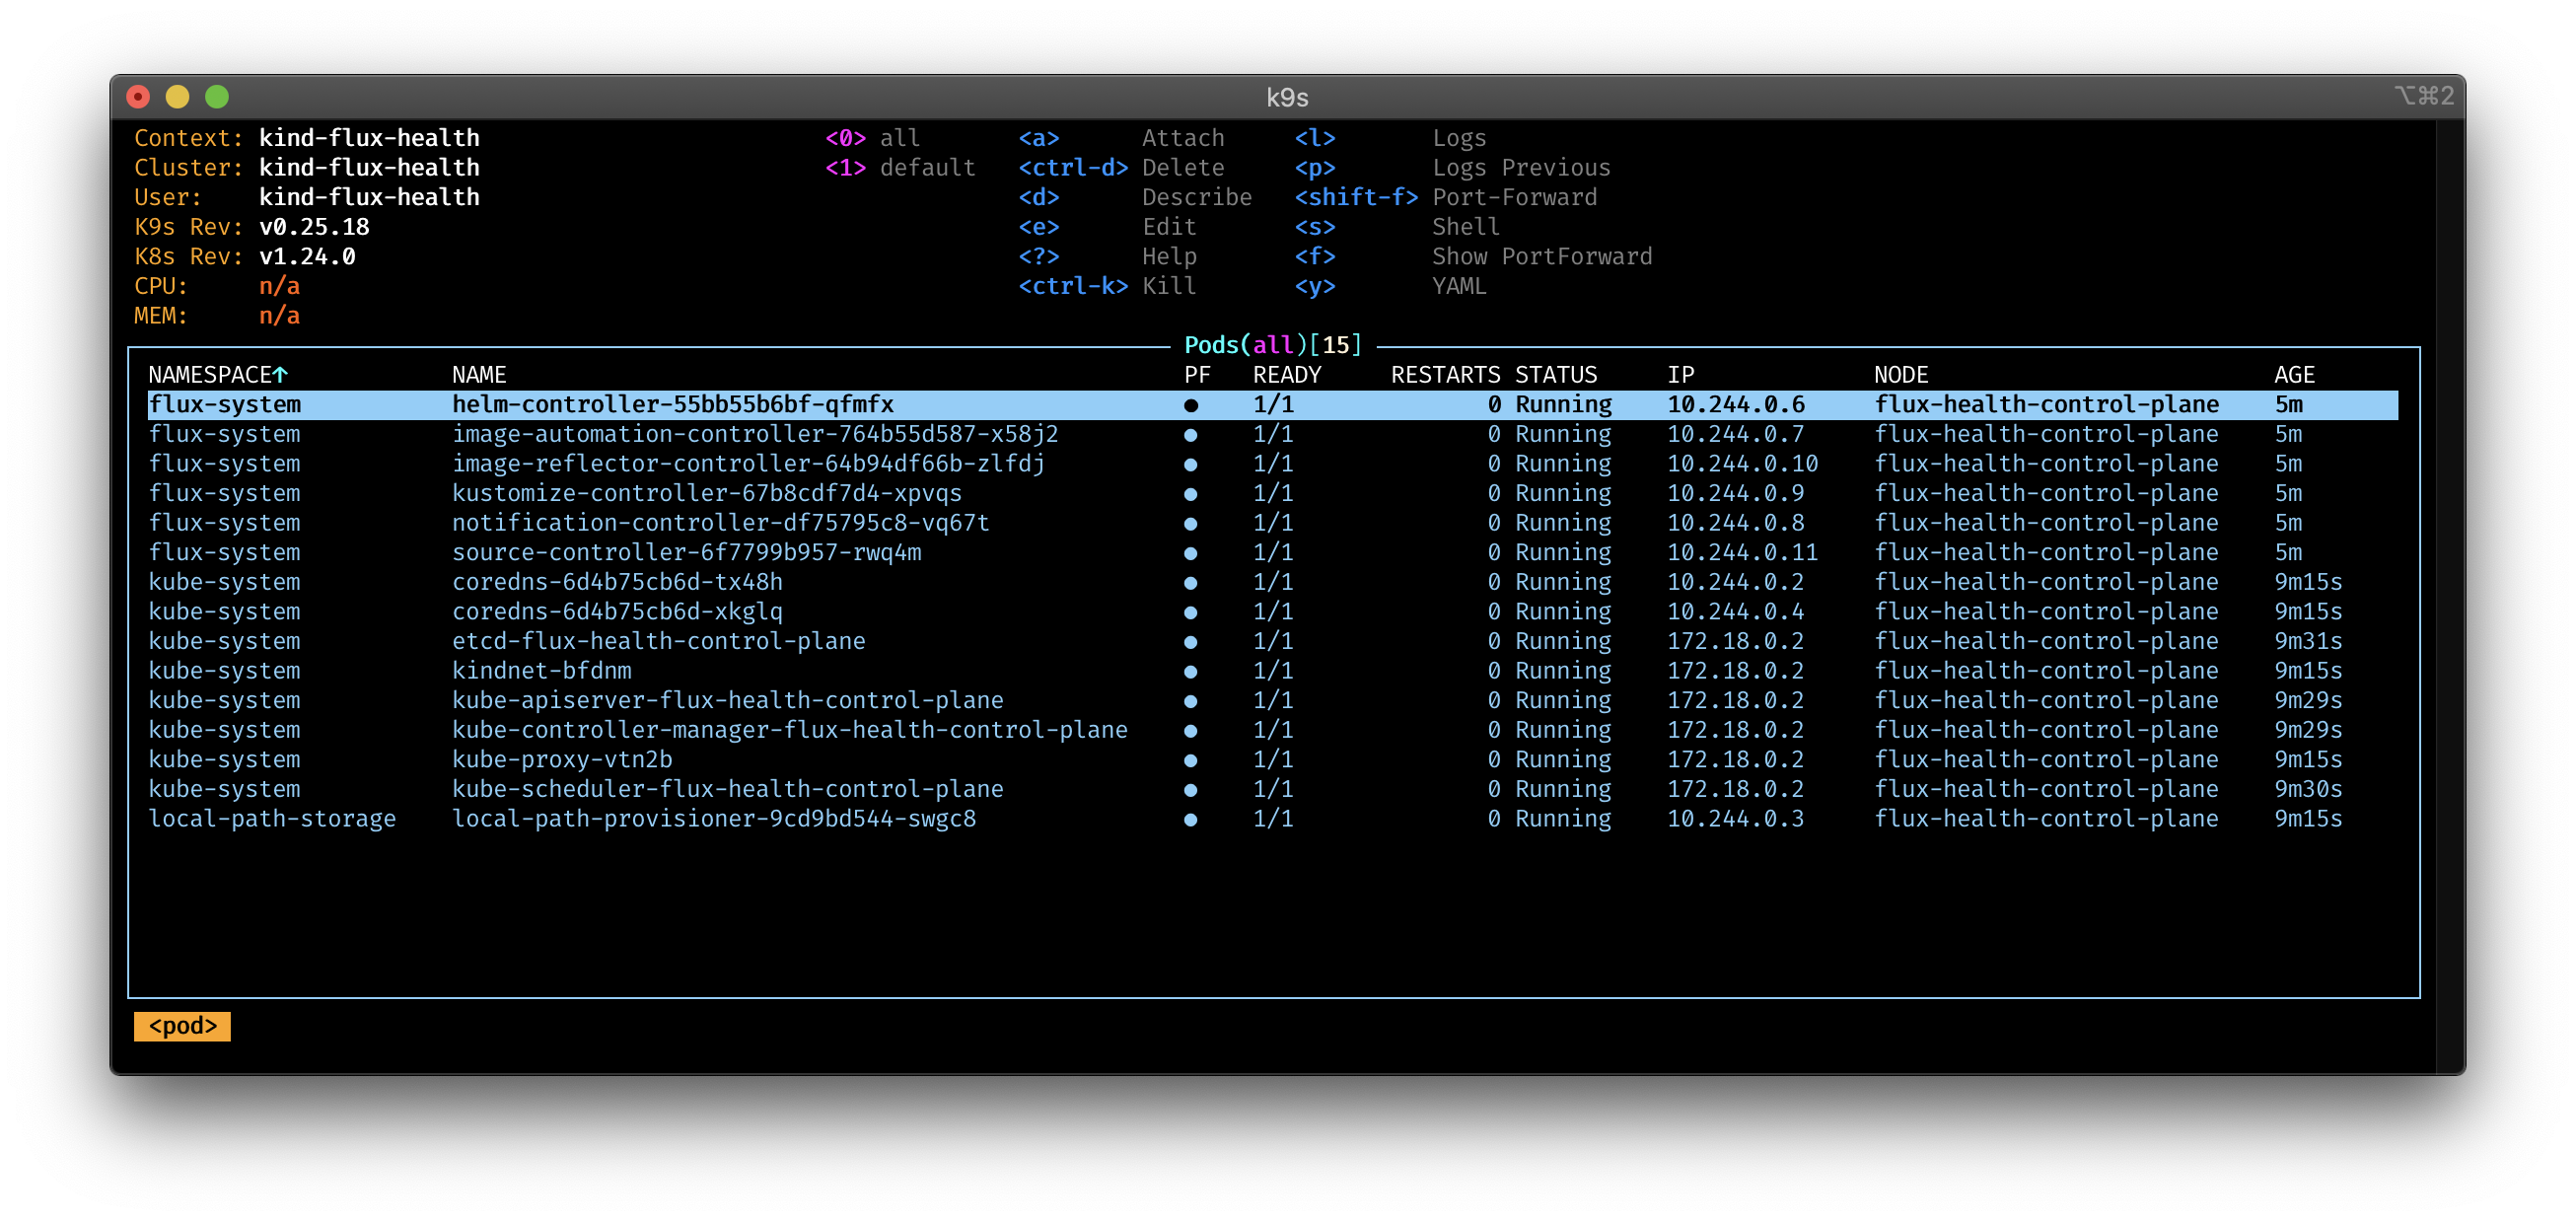
Install Metallb, so we have a load balancer:
kubectl apply -f https://raw.githubusercontent.com/metallb/metallb/v0.12.1/manifests/namespace.yaml
kubectl apply -f https://raw.githubusercontent.com/metallb/metallb/v0.12.1/manifests/metallb.yaml
kubectl apply -f https://kind.sigs.k8s.io/examples/loadbalancer/metallb-configmap.yaml
If you want to try this demo with a cloud provider, you may need this step.
Next we bootstrap our cluster with the actual deployment, for this I created a bootstrap folder, to apply
the GitRepository and Kustomization objects.
kubectl apply -f bootstrap/
kustomization.kustomize.toolkit.fluxcd.io/quick-bites-services unchanged
kustomization.kustomize.toolkit.fluxcd.io/sock-shop configured
gitrepository.source.toolkit.fluxcd.io/quick-bites unchanged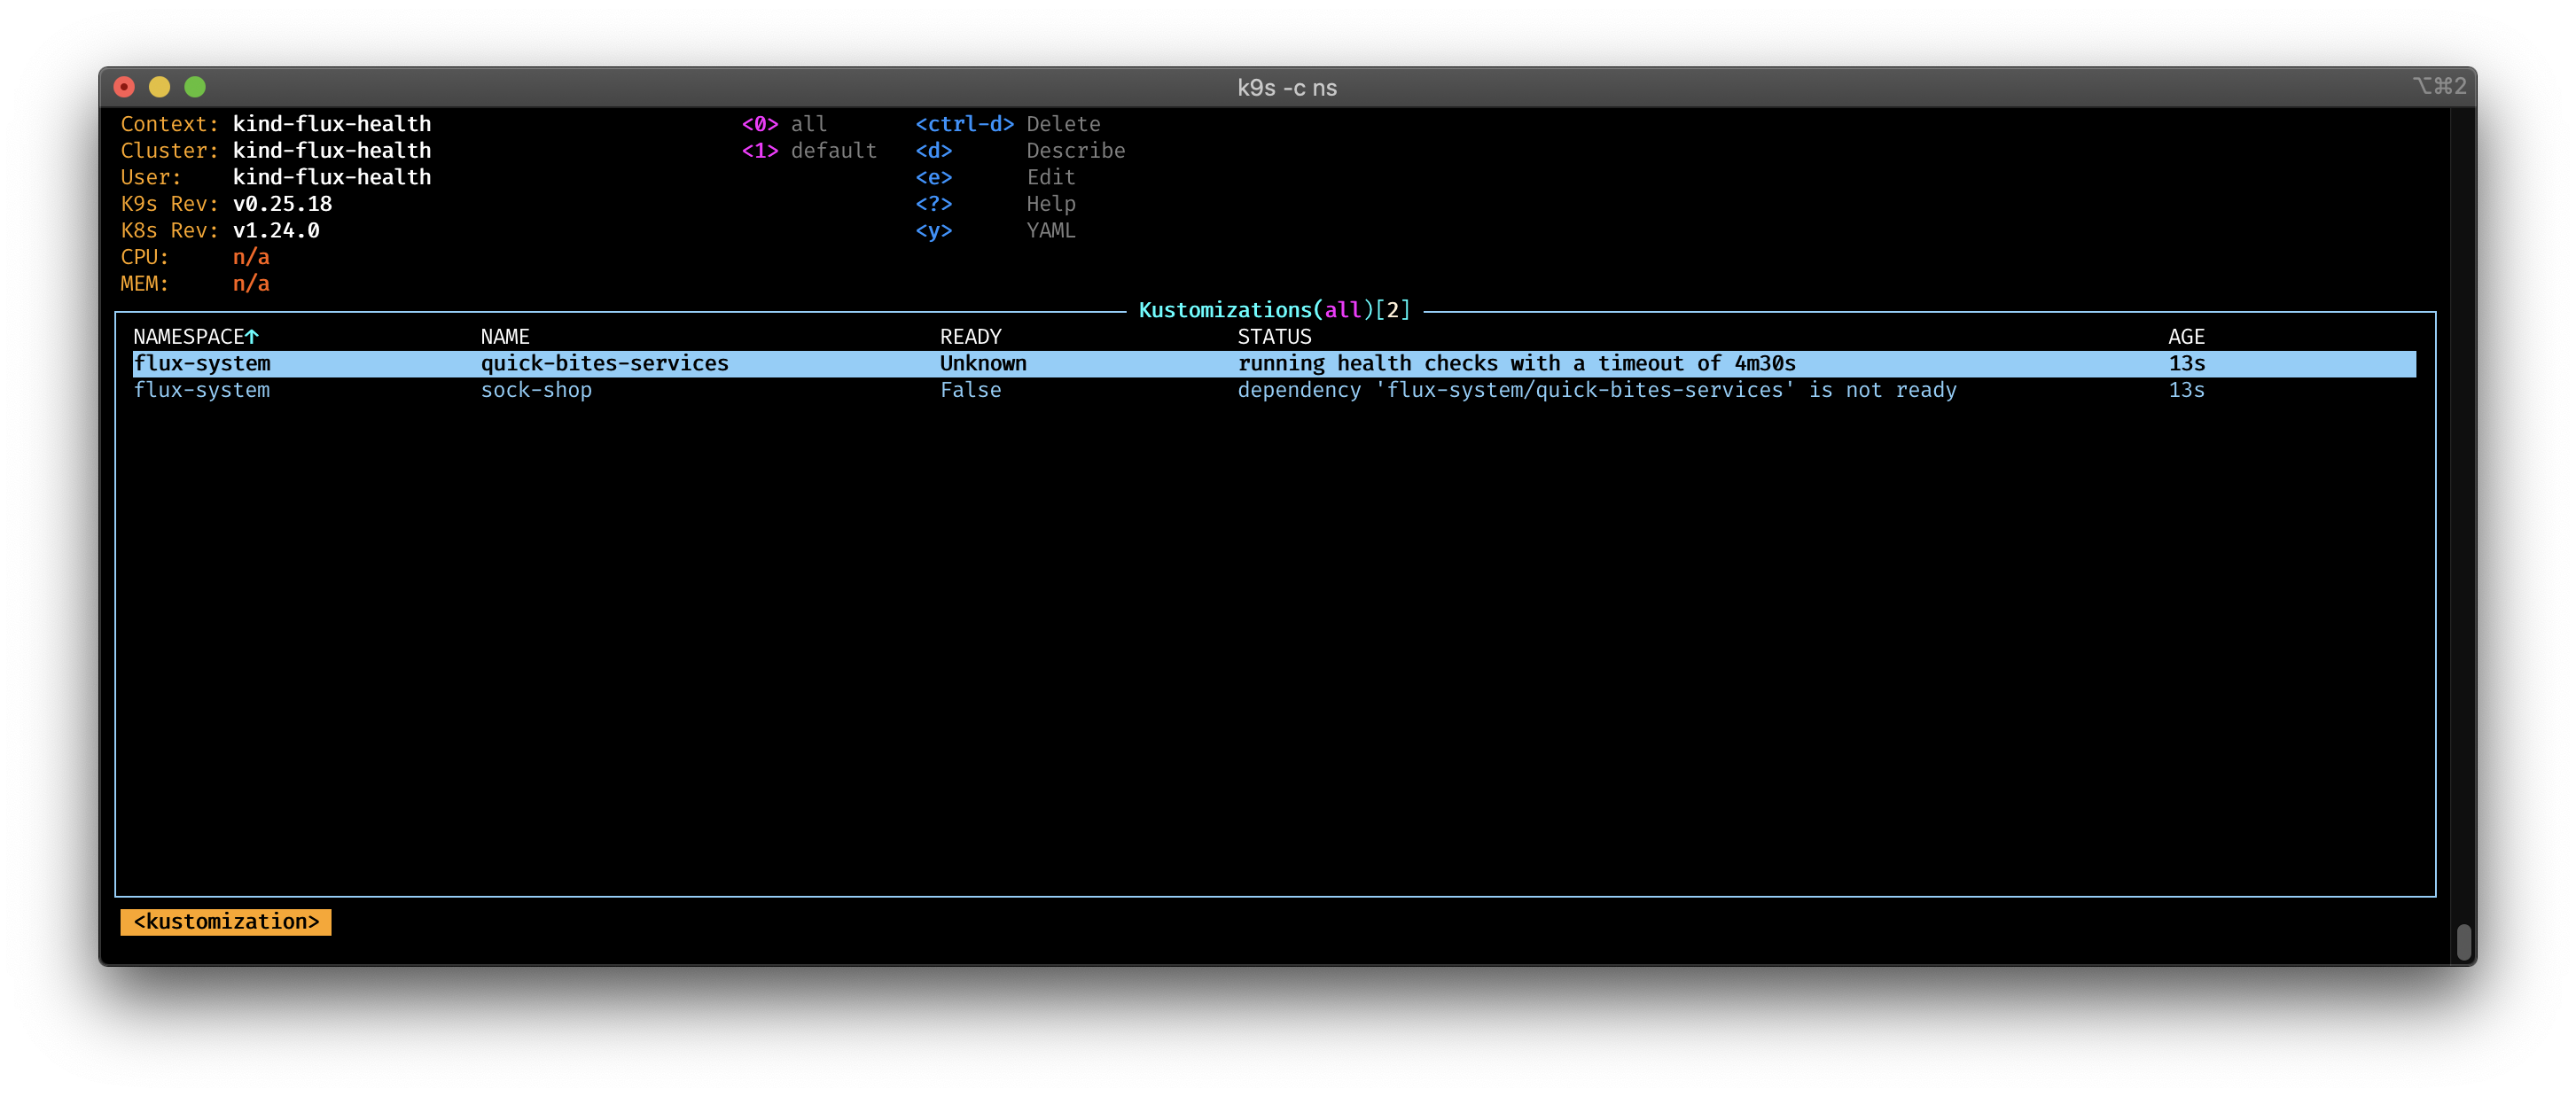
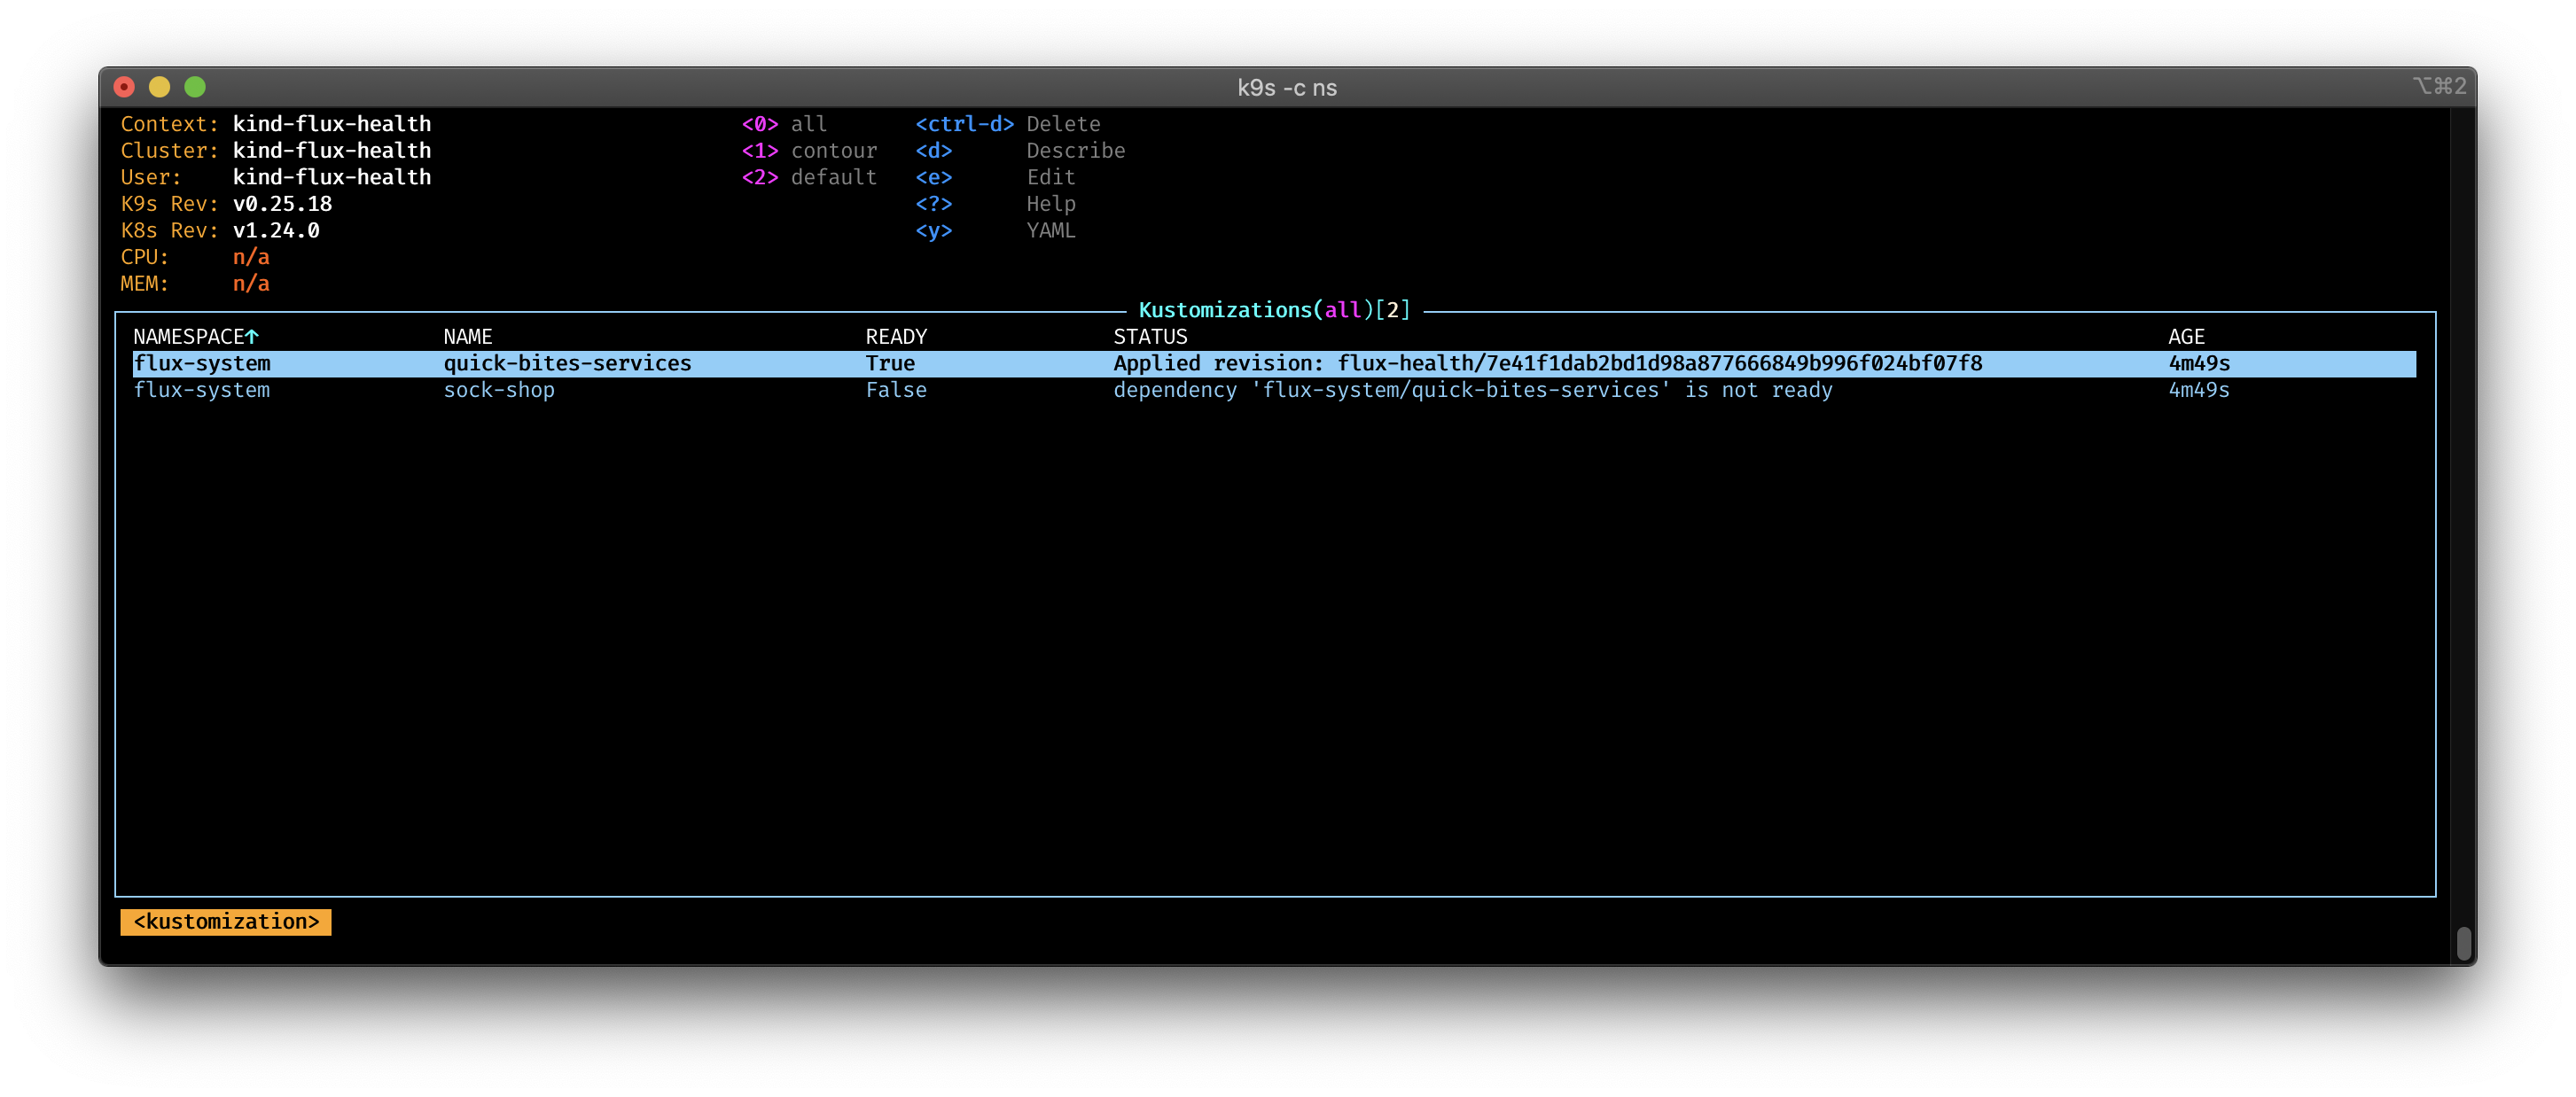

You can see in the pictures, how the Kustomization wait for the health check to be ready. As soon the health checks are successful, the sock-shop deployment start.
Housekeeping #
We can delete the cluster with:
kind delete cluster --name flux-healthConclusion #
Using health checks is a great way to ensure that the current Kustomization will be applied when the actual service is up and running,
and not only that, the Kubernetes objects are deployed.
Cloud Native Pilgrim | Kubernetes Enthusiast | Serverless Believer | Customer Experience Architect @ Pulumi | (he/him) | CK{A,AD} |
Get new posts in your inbox.
Spotted a typo or want to improve this post? Edit on GitHub →